Wednesday, December 29, 2004

Sydney Eats: Sel et Poivre

With the Christmas holiday and my move to Los Angeles, I somehow neglected to mention that I am currently in Sydney, Australia to celebrate the New Year. This means no baking for the time being, but I will attempt to make up for that by posting a couple of reviews of Sydney restaurants.
Yesterday was my first day here, though I have been to Sydney before, and my friends and wandered over to Sel et Poivre in Darlinghurst for breakfast. I wanted to go to bills, but we were hungry and didn't want to wait in line. Sel et Poivre is an adorable little french cafe on a quiet street with both indoor and outdoor seating.
The three of us arrived at about 10:30 and had no problem getting a seat and espressos (which were excellent) while we read the menu. I ordered a fresh fruit salad with fruit coulis, which was delicious and fresh, but would probably have been slightly more interesting with a coulis made of fruit that wasn't already included in the salad. My friends had poached eggs with salmon on toast and roasted tomatoes and scrambled eggs on toast. Both their dishes were excellent. My only realy complaint is that it took about 25 minutes to receive the bill once we requested it. On the positive side, this did give us a chance to read the lunch specials as they were posted on the chalkboards outside the restaurant. They sounded so good we almost had to order more food, particularly the creamy sweet corn soup with nutmeg and a baguette.
Monday, December 27, 2004

Cinnamon Babka


On Christmas, in addition to my marshmallows I wanted to make something to munch with coffee while my family and I opened our presents before breakfast. Often these pre-breakfast munchies take the form of coffee cake or cranberry-orange bread. This year I decided to try and make a babka in honor of my grandmother, whose family was originally from Eastern Europe.
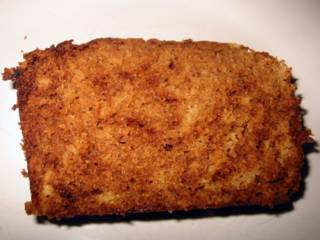
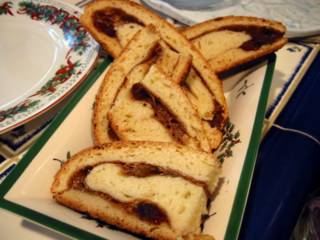
I used this recipe for Cinnamon Chcolate Babka (minus the chocolate filling) from Dianna's Desserts, but I won't reprint it here because I wouldn't make it again. While my grandmother liked the bread, I don't think that it could properly be described as a babka. I feel that the filling should have been crisper and that the bread should have been more moist. That said, it did taste good but it wasn't anything exceptional.
You may notice that the bread in my picture does not have a trational, upright babka shape. This is because I decided to bake it on a sheet pan instead of in a ring pan. Big mistake. The filling ran out all over the pan because I couldn't manage to properly seal the ring. My meringue seemed to make the whole dough wet as I was rolling it up, which might be why I couldn't get anything to stick together. Next time I will definately go for a ring or loaf pan.
*sigh*
Mediocrity is such a disappointment.

Saturday, December 25, 2004

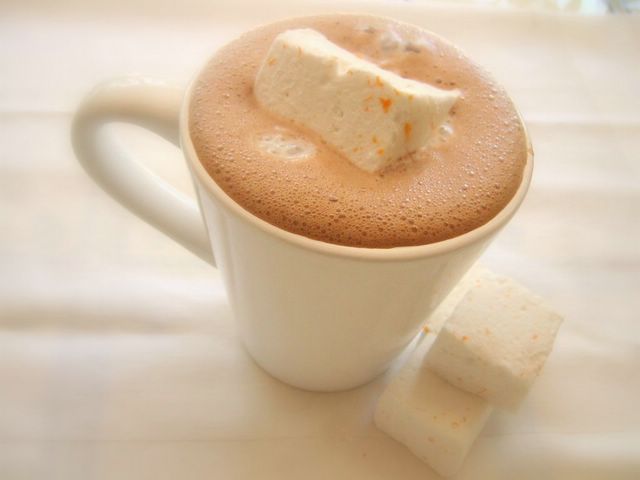
Christmas Morning Marshmallows


Really, what could be better then a nice big mug of hot cocoa on Christmas Morning? How about a nice big mug of cocoa topped with a homemade marshmallow. Or just a plateful of huge, wonderfully fluffy marshmallows?

As willing as I am (once a year) to purchase the dollar a piece marshmallows that they sell at some fine retailers, I thought that it might be a bit more practical to make my own. Not to menion more fun. After a bit of searching, I found this recipe from the French Laundry.


Homemade Marshmallows

3 envelopes of Knox gelatin
1/2 cup cold water
2 cups granulated sugar
2/3 cups corn syrup
1/4 cup water
1/4 teaspoon salt
1 tablespoon vanilla extract

In the bowl of an electric mixer, sprinkle gelatin over 1/2 cup cold water. Soak for 10 minutes. Combine sugar, corn syrup, and 1/4 cup water in a small saucepan. Bring to a boil and boil hard for 1 minute. Pour boiling syrup into gelatin and mix at high speed. Add the salt and beat for 12 minutes. Add vanilla and incorporate into mixture.
Scrape into a 9 x 9-inch pan lined with oiled plastic wrap and spread evenly. (Note: Lightly oil hands and spatula or bowl scraper). After pouring marshmallow mixture into the pan, take another piece of oiled plastic wrap and press mixture into the pan. Let mixture sit for a few hours.
In a shallow dish, combine equal parts cornstarch and confectioners' sugar. Remove marshmallow from pan and cut into equal pieces with scissors (the best tool for the job) or a chef's knife. Dredge each piece of marshmallow in confectioners' sugar mixture.

My batch made 36 big marshmallows. Enjoy!

Tuesday, December 21, 2004

The French Laundry


I didn't take my camera with me to the French Laundry, but I wouldn't need it to remember the dinner. It was easily the best dining experience I've ever had. I also saw Thomas Keller, who came out of the kitchen to sign a book for some people having the special, seasonal truffle-themed menu.
For my recap, I'll keep this short and sweet and just recount the menus to the best of my ability. I can't remember exactly what was in each course, but honestly it doesn't matter. It was that good. We ordered two vegetarian tasting menus, of which I had one, and two regular tasting menus. And yes, if something looked particularly good, we tasted it off each other's plates.
The French Laundry may only be a once or twice in a lifetime dining experience, but it is worth every cent and all the effort to get a reservation.


Amuse bouche: salmon and tomato cones

Vegetarian Tasting Menu
Celery soup with truffle cream
Carmalised Onion tart
--Breads, baguette
Artichoke salad with shaved truffles
Sunchoke and cauliflour salad
Braised Endive hearts with poached apples and red wine reduction
Corn and Cheese risotto with myer lemon infused olive oil
Cheese – local with cranberry/currant toast and cinnamon poached figs
--Coffee
Spiced pear sorbet with valhrona chocolate
Pistachio and almond torte


Regular Tasting Menu
Pearls and oysters, Sabyon of pearl tapioca and oysters with caviar
Pumpkin agnilotti
--Breads
Dover sole stuffed with raisins and topped with grapes
Scallop with chestnut sauce
Capon with poached apricots and onion
Steak – 2 kinds – with potatoes and asparagus
Cheese – crisp with fresh sheep’s milk cheese (runny) and walnut toast
-- Coffee
Cranberry sorbet with honey and vanilla crème
Rich chocolate tart with caramel and caramel cream

Mignardises: Panna cottas (for the guys) and crème brulees (for the gals, though I traded for a panna cotta)
Assortment of truffles, miniature citron tarts, shortbread, candied fruit, macaroons (caramel and allspice), financiers

Monday, December 20, 2004

Festive Cookies

Also know as baking with leftovers.

As I cleaned out my freezer, I found some leftover butter cookie dough, shortbred dough and gingersnap dough. I did what any normal person cleaning out their fridge would do: I baked them. Ok. Maybe not any normal person, but certainly a foodie or a food blogger.
The swirls are made with sugar, cinnamon and cloves in the centers. Mmm...

Sunday, December 19, 2004

New adventures...

Isn't this sunrise gorgeous? I took it at the SF Ferry Building Farmer's Market. *sniff* The last time I'll be there for a while, I imagine as I am moving to Los Angeles this week!

Negatives: No more bay area foodie eats.
Positives: Discovery of LA foodie eats.
Ultra Positive? Goodbye dinner at The French Laundry tomorrow night!

I cannot wait.
But I will because it's inappropriate to stake out a restaurant the night before your reservation.

Update: Read about my dinner at the French Laundry!

Saturday, December 18, 2004

Candied Orange Peel


The holidays seem to give license to candy just about anything you may have around: fruit, nuts, chocolate... not that I'm complaining, mind you.
Now I didn't make these - one of my roommates did. But I was there for the whole process which gives me enough authority to report on it here. Yummy and stunning. You have to start the night before, but they're not exactly difficult to make. They're a great holiday party snack.

Candied Orange Peel
6 medium oranges
1 tablespoon salt
2 cups sugar

Cut peel of each orange in sixths; loosen from pulp with spoon and remove most pith (white membrane) from peel. Add salt and peel to 4 cups of water and let stand overnight.

Drain and rinse thoroughly.
In a pot, cover peels with cold water. Heat to boiling and then drain. Repeat 3 times (this is to remove any bitter taste).

Cut peel into strips. In sauce pan, combine peel, sugar and 1/2 cup water. Heat and stir until sugar dissolves. Continue to cook until peel is translucent. Drain any liquid and roll peel in granulated sugar. Allow to dry.

If desired (and we did), melt dark or bittersweet chocolate over double boiler and dip each dried strip in. Refrigerate until chocolate is firm.

Friday, December 17, 2004

Gingersnap S'mores


So I have officially joined the ranks of the food bloggers who have made the Chez Panisse Gingersnaps from IMBB #10: Cookie Swap, submitted by Renee from feeding dexygus seconds. They are delicious.
Recently, I went to a bakery, which shall remain nameless as their other offerings are quite good, and purchased some "gingersnaps" that were not crispy and so hard I could barely bite into them (imagine an old, molasses flavored tire). I was so disappointed that I decided I had to make my own. And by my own I mean Renee's recipe. So far I have shared them with friends and given them as holiday gifts!
Today, though, I popped two slices into the oven and ten minutes later was ready to make some seasonal s'mores.

Gingersnap S'mores
2 Chez Panisse Gingersnaps
Marshmallows
Dark Chocolate
Place a gingersnap on baking sheet. Layer chocolate pieces on and top with a marshmallow (or two). Place under broiler for 1 minute, until marshmallows are lightly browned. Sandwich with second gingersnap and enjoy while warm.

Note: Use dark chocolate (I used 71%) because it goes much better with the spice of the ginersnaps than milk chocolate does. And yes, you can do these in 30 seconds in the microwave but it's worth the 1 minute wait to keep the gingersnap crispy.

Wednesday, December 15, 2004

Buttermilk Gingerbread

Holiday baking madness continues!

Actually, this hardly constitutes holiday baking as I made it for myself.
The holiday season has put me in a mood for spicy food - not chili pepper spicy, but ginger/cloves spicy. Hence, gingerbread.
I have never made gingerbread before as I am a little intimidated by molasses. Don't get me wrong, I enjoy the flavour that it lends to baked goods, but its bitter-sweet smell and tar like appearance always make me a little nervous. I worry that my breads will be overly spiced (if that is even possible). I learned my lesson here, though, and would put in maybe a touch more spice next time. And yes, there will be a next time.

I was hoping to make this in a nice 8x8 cake pan, but mine was MIA so I had to use a loaf pan. I know the picture isn't that great, but you can still see some of the lovely caramely swirls of molasses that formed while the bread was baking. Because I had some buttermilk left over from my chocolate cake, I substituted the water called for in the original gingerbread recipe with buttermilk. It was super light and just right in terms of moisture, with a fine crumb that wasn't cakey at all.
I also was extremely lazy and mixed everything by hand in one bowl. I know you're thinking "By hand? How is that lazy?" but think of all the cleanup that eliminates. I didn't sift anything, just dumped the dry ingredients into the wet and stirred.

Buttermilk Gingerbread
1 1/2 cups ap flour
2 teaspoons cinnamon
1 teaspoon ginger
1/2 teaspoon cloves
1 1/2 teaspoons baking soda
1/4 cup butter, softened
1/2 cup sugar
1 egg
1/3 cup molasses
1/2 cup buttermilk
Combine first 5 ingredients in a bowl.
Cream butter and sugar together. Stir in egg. Add molasses and buttermilk and mix until well combined.
Add dry ingredients to the molasses mixture and stir until just smooth.
Bake in a greased loaf pan for 45 minutes at 350F.
or
Bake in a greased 8x8 pan for 25 minutes at 325F.
Bread is done when tester comes out clean or with a little bit of crumb.


Notes:
Feel free to substitute water for the buttermilk, or sour cream if you want a richer bread. If using water, reduce baking soda by 1/2 teaspoon. Don't worry if the top of the bread gets a bit dark - that's the molasses caramelising.
I feel this would be a good canditate for replacing the butter with applesauce if you want a reduced fat version - I may try this next time myself.

Tuesday, December 14, 2004

Croatian chocolate


I was given a lovely gift box of these Kras Bajadera chocolates from Croatia. You can clearly see the almond and hazelnut on the package, but I had no idea what might be in these at first. On the back of the box they are described (in 11 languages, no less) as a "Hazelnut Almond Nougat product". How insightful, I thought to myself before popping one into my mouth.
I have never tasted a chocolate like this one before and I don't think that the word "nougat" would even have crossed my mind. It is a very firm candy, with top and bottom layers of very creamy milk chocolate. The interior portion is smooth but not soft and lightly flavored of almond and hazelnut.

On the Kras website, it describes them thusly:
Bajadera is a dessert of the highest quality, combining central European confectionery artistry and luxurious oriental flavor. Bajadera is a queen among desserts, with the distinctive flavor of fine nougat enriched with almonds. For generations of customers, Bajadera has been the symbol of the ultimate dessert. We are proud to say that Bajadera was the first sweet confection to receive the designation “Original Croatian” from the Croatian Chamber of Commerce. Its uniqueness is also recognized by numerous customers in many countries.
I also discovered that the Bajadera won the Monde Selection Gold Medal in 1998 as well as having recieved numerous quality awards before that.
Kras also produces many other candies, among them a brand called Dorina Chocolate, which may be more widely available.

So far, I have only found one business that carries Kras products. I plan on ordering the Dorina Chocolate Ice , which I hope is mint and not royal icing, the Runolist "Dorina" Milk Chocolate and the Dorina Super Milk . Rather amusingly, there is also a candy bar called "My first Chocolate" (or something similar) that appears to have a milk filling. They also carry Bosnian Filo dough, which I wanted to order in the interest of having something to post about despite my doubts as to how that will hold up during shipping, but are sold out at the moment. We'll see how everything is (hopefully) soon.

Monday, December 13, 2004

Triple Chocolate Layer Cake


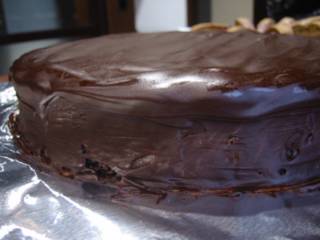
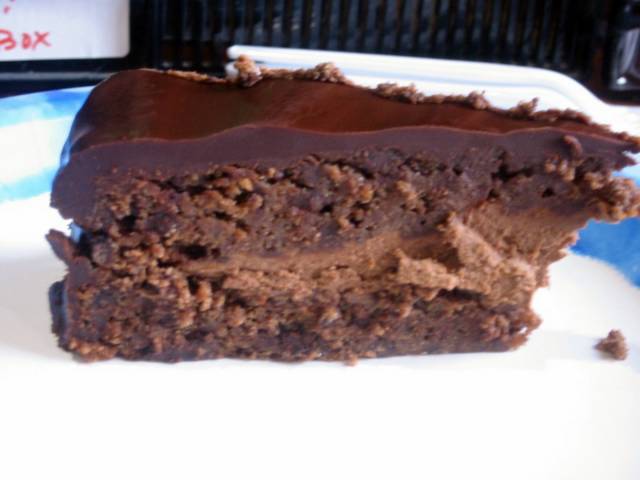
In my opinion, this is really more of a quadruple chocolate layer cake. This is a chocolate cake (1) with mini semisweet chocolate chips in it (2) filled with a milk chocolate mousse (3) and covered in a bittersweet chocolate glaze(4).
I made it yesterday to take to work this morning, as it was a coworker's birthday and I usually find the store bought cakes we end up with to be somewhat lacking. Don't get me wrong, I love a cake from a good bakery, but the last carrot cake we had appeared to be covered in a nearly inedible cheese-flavoured plastic substance. Tragic, really. I love carrot cake.... But back to my cake. Incredibly good and chocolatey.
Here's a photo of the interior, albeit a slightly blurry one:


It received rave reviews, as we all (rather unhealthily, I might add) had pieces well before lunchtime.
I used a recipe from epicurious.com, but left out the peppermint extract because though the original recipe appeals to me, I know several people who cannot stand the thought of chocolate and mint in the same dish. No ill effects came from the exclusion.
The recipe can be found here, though I will not repost it for brevity's sake:
Triple-Chocolate Cake with Chocolate Peppermint Filling.

My notes:
This cake was pretty easy to make, but time consuming. I made it a day ahead and stored it in the freezer over night without any problems. In fact, I would recommend storing it this way to keep everything firm. I used ScharffenBerger chocolate - a good use for it, because I don't really like it on it's own. I also slightly undercooked the cake (I would recommend one hour of baking at 375, rather then 350), but just scraped out the two or three tablespoonfuls of runny batter when I filled it, so no one was the wiser. Except all of you. Hmm.

Sunday, December 12, 2004

Easy Pita Snacks

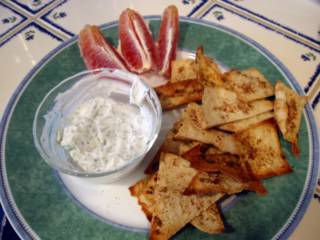
Homemade smokey pita chips, greek yogurt for dipping and blood oranges.
Mmm...
Blood oranges are in season right now and they make a tasty - not to mention attractive - accompaniment to any meal. With the oranges, I had this for lunch but it makes a great snack or appetizer. I guarantee your guests will be impressed and your tastebuds will thank you. The best thing is that it takes less then five minutes to prepare this whole thing and the ingredients are things that almost everyone always has on hand. If you don't usually have pita bread, I recommend keeping some in the freezer so you're always ready to make this (or sandwiches). Pita bread is great because it keeps longer and better then regular sliced bread. You're not condemned to making toast once it has been frozen, either; just defrost it in the microwave for 30 seconds.

For the chips:
Pita bread
Cumin
Pakrika
Salt
Olive oil
Mix cumin, paprika and salt together in a small bowl. Pull the pocket apart and slice the pita bread into trangles. Arrange in one layer on baking sheet. Spray or brush with olive oil then sprinkle with spice mixture. Put under your broiler for about 3 minutes, until browned and crispy.
For the dip:
Plain yogurt
Dill
Garlic powder
Salt
I recommend greek yogurt for the dip because it's thicker than regular yogurt and I prefer the consistency. You can also strain your yogurt with a cheesecloth, if you'd like. Useing regular yogurt will not affect the taste. I use about 2 teaspoons of dill per half cup of yogurt. Use garlic and salt to taste. If you want more of a bite, use a minced garlic clove instead of the powder. You'll probably want about 1/2 - 1 clove per cup of dip.
Mix yogurt, dill, garlic and salt. Serve with chips.
For the oranges:
Peel. Enjoy.

Friday, December 10, 2004

SHF #3: Spiced Angel Food Cake

As I have been getting into the holiday spirit quite a bit this year already - cookies, cakes, eggnog - I decided that for this round of SHF I would do something light that I wouldn't feel guilty about eating. Angel food cake was the obvious choice - you can't get a heck of a lot lighter and still be eating something that counts as food.

But spiced angel food cake? I had never heard of such a thing. I think I've seen chocolate ones, but I've certainly never eaten one. I had never actually made an angel food cake before, either. I figured that since I have made meringues and various other whipped egg white dishes that it couldn't be too difficult. And I was right.

I made an individual Spiced Angel Food cake. I baked it in a leftover aluminium tin, as I had seen on a cooking show once. What the tin held before, I have no idea. Maybe beans. Maybe tinned peaches. I'm sure it wasn't angel food cake, though. I had also originally thought to glaze the cake, but decided that layers were more attractive. I mixed cinnamon, cloves and powdered sugar into light Cool Whip - but by all means use real whipped cream if you're not watching those holiday calories!

Here's the recipe. It makes a little more than one tin worth, but I say just pile it in.

Individual Spiced Angel Food Cake

1 egg white
1/8 teaspoon vanilla extract
pinch of salt

1 tablespoon and 3/4 teaspoon cake flour
1/4 teaspoon cinnamon
1/8 teaspoon freshly grated nutmeg

1 tablespoon and 2-3/4 teaspoons white sugar

  • Preheat oven to 350F. Find a tin about 3 inches in diameter and three inches high. Any aluminum tin will work, even a cut-in-half soda can (which I have used before).
  • Sift together flour and spices
  • Whip egg white with electric mixer until frothy.
  • Add vanilla and pinch of salt and beat until soft peaks form. Add in sugar and beat to stiff peaks.
  • Fold in sifted cake flour and spice mixture gradually. When combined, pour into ungreased tin. Bake for 20-25 minutes, until cake springs back when touched.
  • Cool upside down on a wire rack.

If desired, before eating, slice and layer with Cool Whip or whipped cream. Add cinnamon and ground cloves to taste before layering.


And if you're cooking for more, use this recipe:

1 cup cake flour
1 1/2 cups white sugar
12 egg whites
1 1/2 teaspoons vanilla extract
2 teaspoons cinnamon and 1/2 teaspoon nutmeg
1/2 teaspoon salt

Follow directions as above, but bake for 40-45 minutes in ungreased tube pan.

You may want to increase the nutmeg content of the full size cake, depending on your tastes. I would also recommend replacing the vanilla with almond extract and adding a teaspoon or so of cardamom in place of the other spices as a variation.

Tuesday, December 07, 2004

Amazing Chocolate Cake Cookies

These were so amazing that you must bake them now! They're incredibly easy, too.
They're brownie flavored, light textured, very, very soft cookies.I found the recipe on allrecipes.com when I was looking for something to put my Nestle Toll House Swirled Morsels into. That's right: white and semisweet chocolate swirled chips. They're much like Hershey's Hugs, but tiny! They go perfectly in this cookie.

Chocolate Chocolate Cake Cookies
1 cup unsalted butter, softened
1 1/2 cups white sugar
2 eggs
1 teaspoon vanilla extract
2 cups all-purpose flour
1/2 teaspoon baking soda
1/2 teaspoon salt
2/3 cup unsweetened cocoa powder
2 cups semisweet (or swirled) chocolate chips
Directions
Preheat oven to 350F.
Cream together the butter and sugar until light and fluffy. Add the eggs one at a time and mix to incorporate. Add the vanilla and mix thoroughly
Mix together flour, baking soda, salt and cocoa powder in a separate bowl with a fork or whisk until even in color.
Add the dry ingredients to the butter mixture and stir until well combined.
Stir in chocolate chips.
Bake for 11 minutes at 350 F. The cookies will appear to be just barely firm with a sheen to their surfaces. Allow to cool on the sheet for a couple of minutes before removing to a cooling rack to cool completely. Store in airtight containers.

Notes: Follow the baking time EXACTLY! Trust me. You won't regret it.Since the batter called for 2 cups of chocolate chips and the bag only had 1 1/2 cups, I tossed in 1/2 cup of Mini Morsels, too.

Also, I changed the size of the pictures on my blog so the details of my pictures should be much clearer now!

Monday, December 06, 2004

Sour Cream Tea Bread

I have decided that loaves are very difficult to take photos of and still have the bread look attractive. This was the best that I could do, but I am not doing justice to the beauty of this quick bread.

I made this as a thank you/holiday gift for a professor friend of mine. Like I need a reason. It would probably take a force of nature to stop me once I have my mind set on baking something.
This bread is more of a cake, really. It has a nice, even crumb and a melt-in-your-mouth moistness without being heavy or greasy. Fabulous light flavor - just the right amount of sweetness! The best thing about it is that it is incredibly versatile, so you could add just about anything and have it turn out. I actually really like the fact that it is plain. As much as I like things like banana bread, it's nice not to feel to reliant on fruit occasionally. As it is meant as a gift (to be delivered tomorrow morning), I feel pretty lucky - not to mention full - that there was some overflow batter and I was able to make a couple of muffins in addition to the loaf.
The recipe is originally from Better Homes and Gardens, I believe. Easy ingredients, easy directions. I love it!

Sour Cream Tea Bread
2 1/2 cups all purpose flour
1 1/2 teaspoons baking powder
1/2 teaspoon baking soda
1/2 teaspoon salt
1/2 cup butter, softened
1 1/4 cups sugar
2 eggs
8 ounces sour cream
2 teaspoons vanilla
Grease a loaf pan and preheat the oven to 350F.
Sift together flour and other dry ingredients.
Beat butter in a bowl until smooth. Add sugar and beat again.
Add eggs one at a time, then add vanilla. Beat until fluffy.
Alternately add sour cream and flour, starting with sour cream, in two or three additions.
Pour into pan, smooth top and bake for 1 hour 5 minutes, or until tester comes out clean.
Notes: I added about 1 teaspoon of almond extract with the vanilla and added 1 cup of dried cranberries to the batter just before I put it into the pan. The original recipe suggests other variations, which basically involve adding a cup of fruit or nuts and a teaspoon or two of spices, if you wish. I would try it again with nonfat sour cream or yogurt, just to feel a tiny bit less guilty about loving it so much.

Saturday, December 04, 2004

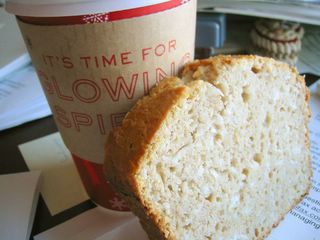
bills Coconut Bread


This is easily one of my favorite recipes: Coconut Bread from bills, in Sydney, Aus.
I made it to take in to work yesterday, or rather, I felt like making it so I took it to work to stop me from consuming the whole loaf by myself. Yes, it's just that good. The coconut keeps the bread super moist without getting too heavy. It adds sweetness and even people who think they don't like coconut will like this bread.
I remember finding the recipe a couple of years ago in some newspaper or magazine and clipping it out, knowing that I like coconut. It must have been around the holidays, because this is the time of year when I start craving it like mad. It wasn't until I was in Sydney, last year, that I experienced the true glory of the bread by going to bills (yes, it is spelled like that). I think I ate breakfast there everyday for a week. Scrambled eggs, toasted coconut bread, ricotta hotcakes... heaven! Not to mention that I left with cookbook in hand.
Bill Granger is like a hero to me.


Making the delicious bread from bills is easy! Here's the recipe with original and converted amounts.

bills Coconut Bread
2 eggs
300ml (1 1/4 cups) milk
1 tsp vanilla
350g (2 1/2 cups) flour
2 tsp baking powder
1/2 tsp salt
2 tsp cinnamon
225 g (1 cup and a bit) caster sugar
150 g (2 cups) shredded coconut
75 g (1/3 cup) butter, melted

Preheat oven to 180C /350F.

Whisk together eggs, milk and vanilla.

Sift together flour, baking powder, salt, cinnamon. Stir in sugar and coconut. Make a well in the center and pour in egg mixture. Stir until just combined.

Add butter and stir until just smooth, being careful not to overmix.

Pour into a greased and floured loaf pan and bake for 1 hour, or until tester comes out clean.

Cool in tin for 10 minutes, then transfer to a wire rack.

My notes: I have used lowfat milk to no ill effects in this recipe. I have also used sweetened coconut and reduced the amount of sugar slightly. Bill Granger suggests that this loaf will yield 8 slices, but I probably cut it into 12. Enjoy it plain, or toasted with butter!

Wednesday, December 01, 2004

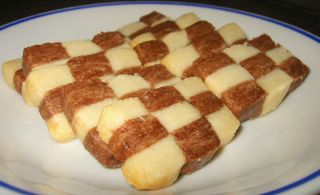
Checkerboard Cookies

Today I sat down... well, I stood up and made my first official batch of holiday cookies.


Checkerboard shortbread cooies are just beautiful. I was inspired by the mouthwatering picture from Il Forno, though I did not use the same recipe he did. Why? To prove a point. My aunt told me once that it was almost not worth attempting any of Marth Stewart's recipes because they are notoriously difficult. So, of course I used her recipe, which "she" assures the reader is not difficult.
I had no problems at all making this recipe, though I can see how someone could have serious problems if they are unable to cut in a straight line. The only substitution I made was almond extract in place of lemon. It also made about 6 dozen cookies for me. Here's Martha's recipe:


Checkerboard Cookies
Makes about 4 dozen
Though they look complicated, these tender cookies are easy to make if you use a ruler. To ensure an even design, measure the strips of dough carefully. The dough can be made a day or two in advance and refrigerated, or frozen for several weeks.

1 cup (2 sticks) unsalted butter, softened
1/2 cup sugar
1 teaspoon pure vanilla extract
1/4 teaspoon pure lemon extract (or almond)
1/4 teaspoon salt
2 1/2 cups sifted all-purpose flour
3 tablespoons cocoa powder
1 large egg

1. In the bowl of an electric mixer fitted with the paddle attachment, cream butter and sugar until well blended, 1 to 2 minutes. Add vanilla extract, lemon extract, and salt. With mixer on low speed, gradually add flour, scraping down sides of bowl.

2. Turn dough out onto a clean work surface; it will be loose and crumbly. Knead dough by pushing small amounts away from you with the heel of your hand for 1 to 2 minutes. Divide dough in half. Sprinkle cocoa powder over one of the halves. Knead until cocoa has been fully incorporated.

3. Place each half of the kneaded dough between two sheets of plastic. Using a rolling pin, shape dough into two 7-inch squares, about 3/8 inch thick. Using a sharp knife and a ruler, slice each square into nine 3/4-inch-wide strips.

4. Whisk together the egg and 1 tablespoon water. Cover work surface with plastic wrap. Place three strips of dough on plastic, alternating white and chocolate strips. Brush tops and in between the strips with egg wash. Gently press strips together. Repeat, forming second and third layers, alternating colors to create a checkerboard effect. Wrap assembled log in plastic. Repeat process for second log, reversing color pattern. Refrigerate 30 minutes, or freeze 15 minutes.

5. Preheat oven to 350°; line a baking sheet with a Silpat baking mat or parchment paper. Slice each log into 1/4-inch-thick slices; place on baking sheet. Bake until done, 10 to 12 minutes. Remove baking sheet from oven, and let cookies cool 2 minutes. Transfer cookies to a wire rack to cool completely. Store cookies in an airtight container up to 2 days.


I will definately make these again. They're very impressive (not to mention tasty)! And once the logs are assembled, they can be stored in the freezer and sliced at any time.
I boxed up most of my batch and mailed it today, so hopefully my aunt will enjoy them, too.