Wednesday, August 31, 2005

Blog Day 2005

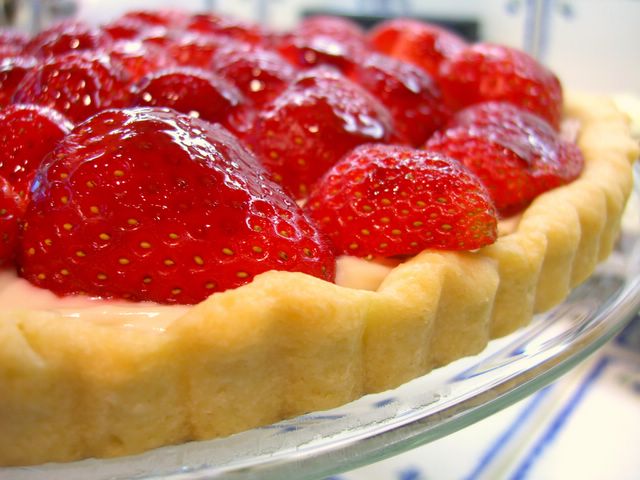
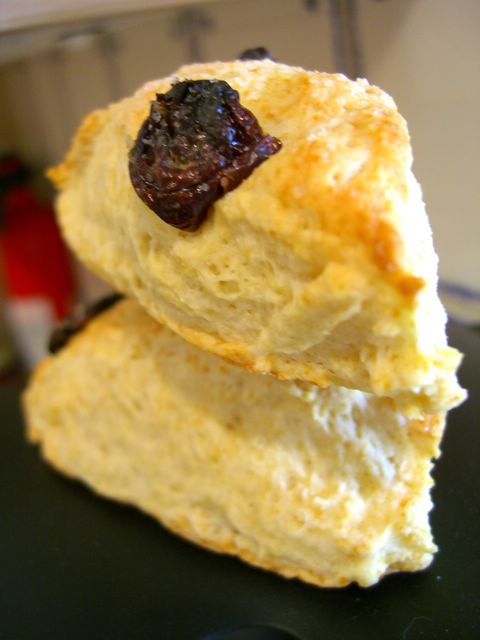
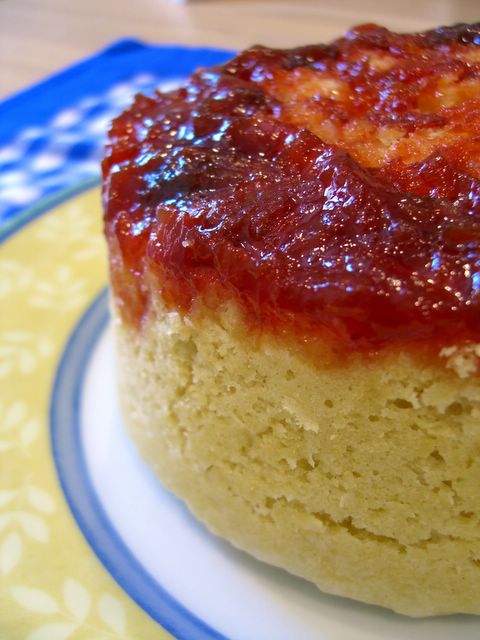
Like the tart? Check out this article about making fruit tarts. Mine isn't from the recipe given with the article, but it's close. I used a cream cheese filling, which went very well with the strawberries. I must say that the lime marmalade glaze mentioned in the article sounds like it would be divine with the raspberries in their tart.

Today, apparently, is World Blog Day. I love how there is a day for everything now.
For example, today is National Trail Mix day. Tomorrow is National Cherry Popover Day. I know that I have never seen a cherry popover, let alone eaten one. I want my own day! Wait. I guess that my birthday counts as my own day.
In honor of World Blog Day 2005, I am going to share with you 5 links to sites I like. I am also going to get around to updating the links section on my blog today, so you may get a few more than 5. These sites are probably not new to many of you, but I really enjoy them all.


The Food Whore makes food for money. Unfortunately for her, you can't always pick your clients. And if you have ever worked in any job that required you to interact with the public, you'll know that if you could pick your clients, there wouldn't be too many of them. Love her.

Waiter Rant is another food service blog. I think the Bistro is lucky to have him, though probably not so lucky to have some of their customers. He has great stories and great tips. I'd point you to a favorite post, but I like them all.

Who doesn't like candy? Cybelle of The Candy Blog does, and so do I. She tests and reviews a new type of candy every day: foreign, domestic, high quality or a mystery item on sale at the local discount store. Tasty.

Susan is living out her dreams of opening an artisan bakery at her farm in Missouri. At Farmgirl Fare, she posts a picture of ferm life every day. If we're lucky, she'll throw in the occasional recipe or useful tidbit about baking.

My last link of the day is not to a blog, but to the Red Cross, to support their efforts in helping the victims of Hurricaine Katrina and the City of New Orleans, which, at the time of writing this, is 80% underwater with water still coming in.

Tuesday, August 30, 2005

Addictive Chocolate Chip Cookies


How do you know when you've hit on a good chocolate chip cookie? When everyone who tastes one reaches for another.
Chocolate chip cookies are funny things because, though just about everyone (except for a few crazies) likes them, everyone has a slightly different opinion about what makes a good one. Jeffrey Steingarten said it much better than I could hope to in It Must've Been Something I Ate. He likes thinner, crispier, butterier chocolate chip cookies. I like not-too-thin, crisp-on-the-edges and chewy-in-the-center chocolate chips. I add enough oatmeal to ensure a bit of a chew, but not enough to qualify as a oatmeal cookie. There is a nice amount of chocolate chips, but if you must have nuts in your cookie, add 1/2 cup of walnuts. If you don't have quick cooking oats, you can substitute instant. If you only have regular rolled oats, whizz them in the food processor or blender to break them up.
They really are addictive.


Addictive Chocolate Chip Cookies

2 cups ap flour
½ cup quick cooking oats
1 tsp baking soda
1 tsp salt
1 cup unsalted butter, softened
¾ cup white sugar
¾ cup brown sugar
2 tsp vanilla extract
1 egg
1 cup chocolate chips

Preheat oven to 350F and line a few baking sheets with parchment paper.
In a medium bowl, whisk together flour, oats, baking soda and salt.
In a large bowl, cream together butter and sugars. Blend in vanilla extract and egg. Slowly add in the flour mixture until nearly combined. Add in chocolate chips and stir until dough is uniform in color and chip distribution.
Drop by rounded tablespoonfuls onto prepared baking sheets.
Bake at 350F for 11-13 minutes, until lightly browned. Remove to a wire rack to cool.
Makes 40 cookies.

Sunday, August 28, 2005

Sunday Brunch: Buttermilk Scones


I like a good scone. Unfortunately, a good scone outside of the kitchen seems to be rather difficult to come by these days. I know this is not true for many people for two reasons: you might have a particular bakery you frequent that makes nice ones or you have different scone standards than I do. Let me say that having one bakery that does scones well is a great thing, but it does not really increase the availibility of scones to the rest of us.
As to scone standards, I think that they are heavily influnenced by chains that do a heavy business in them. There isn't anything wrong with that. To be fair, some of their scones can have a good flavor (often from the glaze one the scone), but to my mind they are too dry and bready to be really good. My favorite scones are made by The Cheese Board in Berkeley, CA. If you live anywhere in the bay area and have never been, shame on you. Make sure to have their pizza, as well!
For now, I guess I'll stick to homemade.
Using buttermilk instead of cream in this recipe give the scones a richness without some of the fat. They are buttery and the cherries go well with the tang of buttermilk. You may need a little less liquid if it is very humid where you live.


Buttermilk Scones
1 cup flour
1 tsp baking powder
¼ tsp baking soda
1/8 tsp salt
2 tbsp sugar
3 tbsp butter, cold and cut into small pieces
5 tbsp buttermilk
1 tsp vanilla
¼ cup dried cherries, chopped if you like smaller pieces
For topping:
1 tbsp buttermilk
1 tbsp coarse sugar

Preheat oven to 400F. Line a baking sheet with parchment paper.
In a large bowl, combine flour, baking powder, baking soda, salt and sugar and whisk to combine. Rub butter into the flour mixture with your fingers or a pastry cutter until the mixture resembles very coarse meal. Stir in buttermilk and vanilla, adding the dried cherries as the dough starts to come together. The dough should be sticky but not runny.
Form dough into a disc 1 inch thick and place on your baking sheet. Cut the dough disk into 4-6 wedges using a knife or a pizza cutter. Brush with 1 tbsp buttermilk and sprinkle liberally with coarse sugar. You may separate the scones or bake them together and break them apart after they're baked (I like to separate them).
Bake at 400F for 15-18 minutes, until lightly browned.
Let cool for a few minutes before serving.

Makes 4-6 small scones

Saturday, August 27, 2005

IMBB #18: Not-So-Fried Green Tomatoes


Frying is the theme of this 18th edition of Is My Blog Burning, hosted by Linda of At our table. Now, I am not a big fryer. Don't get me wrong, fried food tastes good. Great even. But I want and like to eat healthy when I'm eating at home.
Last year, I had a great dinner at B. Smith's restaurant in New York. I ordered Fried Green Tomatoes as an appetiser. It isn't something that commonly pops up on menus out here in California. Fried green tomatoes are a classic Southern dish made from unripe tomatoes. Green tomatoes are pleasantly firm and more crunchy than their riper counterparts. They have a hint of tomato flavor, but taste rather lemony. Green tomatoes are best when nearing ripeness. They should be juicy around the seeds, but be far less juicy than any ripe tomato. This firmness makes them great candidates for both breading and frying.
I decided to oven fry my green tomatoes. I did take B. Smith's advice and was sure to use celery salt in my recipe. I added breadcrumbs for an extra crunch, but the texture of the cornmeal is imperative for a classic touch. The coating crisps up nicely in the oven and the tomato retains its shape but becomes soft in the center.


Oven Fried Green Tomatoes
3 large green tomatoes
1/2 cup flour
1/2 cup cornmeal
1/4 cup breadcrumbs (preferably Panko)
1 tsp celery salt
1/4 tsp paprika
1/4 tsp ground pepper
1 egg
1/2 cup buttermilk


Turn on your broiler and place oven rack about 4 inchs away. Grease a baking sheet with cooking spray.
Slice tomatoes into 1/4 inch thick slices.
Whisk together flour, cornmeal, breadcrumbs, and spices. Pour into a flat, shallow dish. Whisk together egg and buttermilk in a small bowl.
Dip tomato slices in egg mixture and then dredge in cornmeal mixture. Lay tomato slices onto baking sheet and spray lightly with vegetable oil.
Bake for 4 minutes, or until lightly browned. Flip and bake an additional 3-4 minutes, until browned.
Serve immediately with ranch dressing or salsa and sour cream.

For a more traditional version - actually fried green tomatoes - check out Caryn's IMBB entry! Great minds think alike. And either way, your tastebuds will thank you.

Friday, August 26, 2005

Honey Whole Wheat Bread


It seems like it's been a while since I made a loaf of bread. The last few I've made for personal consumption - not just to post about here - have been sourdough. I like sourdough and I feel like my loaves come out consistently well enough to be impressive. Not that I'm constantly fishing for compliments or anything, but it is decidedly fun to have people over for a bbq or something and serve a loaf that you baked yourself. At least 80% of people have no idea what makes sourdough sourdough.
Of course, you don't always want the same kind of bread. This was an easy one - great taste and easy to work with dough. Slightly sweet and a bit nutty, this bread tastes like nothing more than good bread. It is light, with a soft and even crumb. It goes great with soup, sandwiches or nothing more than a little butter. Addictive.


Honey Whole Wheat Bread
1 tbsp active dry yeast
1 cup warm water (110F)
1 tbsp butter, melted
3 tbsp honey
1 cup bread flour (ap is ok)
1 cup whole wheat flour
2 tsp salt

In a large bowl, stir together yeast and the warm water. Let stand for 5 minutes, until foamy. Stir in melted butter, honey and flours. Add a bit more flour if your dough is too sticky, otherwise stir until the dough comes away from the sides of the bowl. Turn dough out onto a floured surface and knead into a smooth ball, about 2 minutes.
Transfer dough to a lightly greased bowl, cover with plastic wrap and let rise until doubled, 1-1 1/2 hours.
Remove dough again to a lightly floured surface. Gently deflate dough. Shape into an oblong loaf and place or a baking sheet, or place dough into a greased loaf pan. Cover bread with a dishtowl and let dough rise until doubled, 1 hour. Meanwhile, preheat oven to 400F.
If you're doing a freeform loaf, go ahead and slash the top a few times, then place the loaf in to oven. Bake for 25 minutes at 400F, until the bottom sounds hollow when tapped.
Let loaf cool before slicing.
Makes one loaf

Thursday, August 25, 2005

Cooking School: Rice Pudding


I don't know about you, but when I make rice I often season it or cook it in chicken or vegetable stock instead of simply cooking it plain, in water alone. I also don't usually have too much rice left over at the end of a meal. This is a problem because I like rice pudding and it seems that most recipes call for starting with leftover rice.
There are two types of people in the world: those who like rice pudding and those who don't. Let me state for the record that if you don't like rice pudding at all, you have probably never had a decent rice pudding. Blandness is the most common complaint and that is easily resolved by actually flavoring your rice pudding.
Rice pudding is, in its simplest form, a dish of cooked rice, thickened with milk or cream and sweetened with sugar. In more complex forms, it is enriched with egg yolks and studded with fruits and nuts. I think of classic comfort food, something that you might eat when curled up by the fire on a wintery night or have as an indulgent breakfast treat, cold from the refrigerator, at your grandmother's house. In fact, I can't remember ever making rice pudding, just eating it. And my grandmother picked it up at the store.
The recipe I used was from Retro Desserts, by Wayne Harley Brachman. I had a few problems with his method. Essentially, you cook the rice in caramel, add milk and bake until thickened. Mr. Brachman says to cook the rice, in the caramel, with the saucepan lid on. Mine bubbled over. Twice. Needless to say, I left the lid off after that. I also decided that baking the pudding was not strictly necessary, not to mention that there would be less cleanup if I added the milk straight to the pan.
All in all, the pudding was delicious. The light brown color came from the brown sugar. If you soak the raisins in run, you'll get a nice, adult flavor, but it's not necessary and I think I actually prefer it without. Any type of milk will work in this recipe, but light cream will give you the creamiest, most decadent results.


Rice Pudding
1/2 cup short grain rice, uncooked
3/4 cup light brown sugar
2 1/2 cups water
1 vanilla bean, split
1 1/2 cups light cream (or milk)
1/2 cup raisins or sultanas (soaked in rum for 30 minutes (optional))
1/2 tsp cinnamon

Combine rice, brown sugar, water and vanilla bean in a medium sauce pan. Bring mixture to a boil, then reduce to a simmer until all the liquid has been absorbed, about 45 minutes. Carefully remove vanilla bean. Scrape out the seeds and stir them into the rice.
Stir in cream and, keeping rice over low heat, bring to a simmer. Remove pudding when it begins to bubble, after 20-30 minutes. Stir in raisins. Transfer pudding to a medium bowl or individual serving dishes, sprinke with cinnamon. Refrigerate until chilled and ready to serve.
Serves 6.

Tuesday, August 23, 2005

Red Passionfruit?


I do enjoy passionfruit. Purple fruit, yellow seeds. It makes gorgeous, not to mention tasty, sauces.
Of course, I have never seen red passionfruit before. These are growing on a vine outside my house. They seem to have more seeds and less juice than the passionfruit I have encountered before. The taste is sweet, but strongly flowery. The floweriness actually complimented the coconut yogurt panna cotta I tried to make the other day (not amazing, but pretty).
Has anyone seen these before?

Monday, August 22, 2005

She Wore Blue Velvet, But Ate Red


Borrowing Zarah's idea for making both miniature and regular sized cakes, I made a batch of red velvet cake. We all know that everyone likes cupcakes these days. Adults can relive a moment of their childhood and children can, well, experience a moment that they can relive in the future.
The origins of red velvet cake are shrouded in urban legend, just like Neiman Marcus cookies or any other recipe urban legends. Be suspicious of the origins of any recipe that someone "was charged $250!" This is not to say that the recipes aren't good ones. They are.
The name for red velvet cake comes from its red color. The most common story about the origin of the color cites a chemical reaction between the baking soda and the cocoa powder in the cake. If this were true, I think that most of my chocolate cakes would come out red. Leite's Culinaria has some more information on the science behind the cake.
My personal belief is that some chef dumped red food coloring into his cake to suprise people or to be festive for a holiday. The outside of the cake browns enough to disguise the real color. Whatever the origin, I quite like this cake. I like the flavor of buttermilk, the hint of chocolate and the raspberry red interior of the cake. Even more than the cake, I like this icing. Mascarpone cheese makes it creamier and more interesting than an ordinary cream cheese icing. I love it with this cupcake because it lends an adult touch and makes the icing the star.


Red Velvet Cupcakes
1 1/8 cups sifted cake flour (10 tbsp)
1 tbsp cocoa powder
1/2 tsp baking powder
1/2 tsp baking soda
1/4 tsp salt
3/4 cups sugar
1/4 cup butter, softened
1 egg
1/2 cup buttermilk
1 1/2 tsp red food coloring
1/2 tsp apple cider vinegar
1 tsp vanilla extract


Preheat oven to 350F. Grease cupcake tins or line with paper liners.
In a medium bowl, sift together cake flour, cocoa, baking powder, baking soda and salt. In a small bowl, whisk together buttermilk, food coloring, vinegar and vanilla extract.
In a large bowl, cream together butter and sugar. Add in egg and beat until smooth. Add dry ingredients in 4 additions, alternating with 3 additions of the buttermilk mixture, scraping the sides of the bowl as necessary. Stir until just combined.
Spoon batter into prepared cupcake tins. Fill them 2/3 to 3/4 full, which will create nice, rounded tops.
Bake mini cupcakes for 15 minutes and regular cupcake for 20-22 minutes, until a toothpick comes out clean.

Yield: 7 large and 12 mini cupcakes, with more than enough frosting to top each one thickly.


Mascarpone frosting
8 oz mascarpone cheese, room temperature
2 tbsp butter, room temperature
2 tsp vanilla paste (extract is fine)
1 tbsp milk
1 1/4 cups confectioners sugar

Beat together mascarpone and butter until well combined. Beat in vanilla and milk. Add in confectioners sugar, scraping down the bowl as you go. When it has all been incorporated, beat on high speed for 1-2 minutes, until icing is smooth.

Saturday, August 20, 2005

Oatmeal Cookie Biscotti


The isn't much I can say about these. The spicy taste of an oatmeal cookie with the crunchiness and longevity of a biscotti. How can you go wrong?
The oatmeal gives the cookie an even lighter texture than usual, so I found that dipping these was unnecessary (though still delightful). This is definately a new variation on my usual recipes that I will use again and again.

Oatmeal Cookie Biscotti
2 cups flour
1/2 cup quick cooking oats
1/2 tsp baking soda
1/2 tsp baking powder
1/2 tsp salt
1 tsp cinnamon
1/4 tsp cardamom
3 eggs, room temperature
1 cup sugar
1 tsp vanilla
1/2 cup raisins or dried cranberries


Preheat oven to 350F. Line a baking sheet with parchment paper.
Whisk together flour, oats, baking soda, baking powder, salt and spices in a medium bowl. In a large bowl, beat eggs, adding sugar gragually, at medium speed until smooth and light, 1-2 minutes. Stir in flour mixture and raisins.
Drop spoonfuls of batter onto baking sheet and, with well floured hands, form into rectangular logs about 1/2 inch high. Sprinkle a few oats on top for decoration. Length and width are your perogative. Bake at 350F for 20 minutes.
Slice logs into 1/3-1/2 inch thick slices (1-1.5 cm) and lay flat on baking sheet.
Lower oven temperature to 300F. Bake sliced cookies for 15 minutes, flip them and bake for an additional 15 minutes. If cookies are not firm, depending on how thickly they were sliced, turn again and bake for 10 more minutes. Remove to a wire rack to cool. Store in an airtight container.
Makes 4 dozen.

Thursday, August 18, 2005

Cooking School: Steamed Puddings


I have never steamed a pudding. And by pudding, I mean cake. Steaming cakes, or puddings, is a traditionally British way of cooking these, instead of baking them.
I picked a recipe from Jamie Oliver's The Naked Chef for a basic steamed pudding. The recipe seemed simple enough and I liked the fact that he suggested simple sounding flavor variations in addition to offering a basic pudding. Unfortunately, there were several things that I didn't like about the recipe. I didn't know if there was any way to test when the pudding was done and the cooking time of "about 2 hours" seemed rather vague. Jamie also did not offer any serving suggestions, so I wasn't sure whether the pudding should be served immediately or if it could.should be held at room temperature.
Mixing and cooking the puddings was simple. I didn't have pudding molds, so I used pyrex baking dishes covered tightly with aluminum foil, per Jamie's suggestion. Jamie did not mention that the puddings would make such a racket as they steamed. It could be the fact that I did not have actual molds, but my dishes rattled around like crazy and resisted all attempts to weight them down.
I made two puddings: a jam pudding and a chocolate pudding. The jam pudding tasted excellent. I used Sarabeth's Plum Cherry Preserves and spiked the batter with a bit of vanilla and almond extracts. It was underbaked in the center, after about an hour or so of cooking time. I had to take it off the stove because I couldn't stand the noise. The chocolate pudding was much quieter and seemed to be done after 1h 45min. It was much drier than the jam pudding and sauce that I poursed over it did not seem to help its case. The fact that there were no additional flavorings beyond the cocoa made it rather bland.
All in all, I will give steamed puddings a try again in the future. I think that they can add a lot of moisture to a cake without letting it get gummy. I'm sure that it is an excellent method for puddings with dried fruit, as they will plump nicely in the heat. I really did enjoy the jam pudding (the cooked parts, at least), so below is my adaptation of Jamie's recipe. I tried to fill in Mr. Oliver's instructional gaps, too.


Steamed Jam Pudding
1 1/2 cups flour
1 tsp baking powder
1/4 tsp salt
1/3 cup sugar
1/3 cup butter, soft
1 egg
1/2 cup milk
1/2 tsp vanilla extract
1/4 tsp almond extract
1/4 cup jam/preserves
water, for steaming

Set a large pot on the stove and grease a 1 quart (4 cup) baking dish or bowl, making sure it will fit in your pot when the lid is on. Spoon jam into the bottom of the dish.
In a medium bowl, whisk together flour, baking powder, salt and sugar. Stir in softened butter so it is evenly distributed. Stir in egg, milk and extracts to make a smooth batter. Pour batter into baking dish and cover it tightly with aluminum foil.
Place dish into pot and fill with water until it reaches half way up the side of the dish. Place lid on the pot - you may need to check the water level occasionally if the lid does not fit tightly. Bring water to a boil, then turn it down to a simmer and cook for approx 1 h 45 min. Poke the top of the cake by pressing lightly on the foil to check for doneness; the cake will spring back when it is ready.
Carefully remove dish from pan and turn the pudding out onto a serving dish.
Eat warm, with tea.
Serves 8.

Tuesday, August 16, 2005

Grilled Corn on the Cob

As much as I have always loved fresh, locally grown sweet corn, I never loved it as much as I do now. What changed? I started grilling it. The sugars of the corn intensify the flavor and it takes less time than boiling!
I think I first saw this on Good Eats, but I'm not entirely sure. It has been a smash hit, not only with me, but with everyone I've served it to. Simply shuck the corn until it is down to 2 or 3 layers of husk. Pull off some of the silk, but the rest will come off easily after cooking. Place corn on a hot grill and cook, rotating every few minutes, until the husk is dark or mostly blackened. Over high heat, this should take about 10-12 minutes.
Strip off the blackened husk and serve. The corn also makes great leftovers, so cook extra.

Monday, August 15, 2005

Look to the Cookie!


"The thing about eating the Black and White cookie, Elaine, is you want to get some black and some white in each bite. Nothing mixes better than vanilla and chocolate And yet somehow racial harmony eludes us. If people would only look to the cookie all our problems would be solved." - Jerry Seinfeld, Seinfeld (The Dinner Party)


Black and white cookies are one of the representative foods of New York City. They are huge, soft, frosted and tasty. In fact, while they have been at bakeries in the Big Apple for decades, it is only recently that they have spread widely beyond the city limits. The black and white cookie is actually more like a cupcake than a cookie, as it has a very soft and cakelike texture and is frosted. Some people frost butter or sugar cookies and disguise them as black and whites, but, to be honest, this is wrong. I'm sure they taste fine, but they are not black and whites.
A black and white should consist of a cookie/circle of cake (like the top of a cupcake) that has a hint of lemon flavor. The icing, while always half black and half white, can be a variety of things. You can use a regular frosting (boiled or buttercream), thinly spread, or a smoother ganache type frosting, but probably the most common frosting is a simple sugar one. Conveniently, it is also the easiest. Only lightly flavored with chocolate or vanilla, the sugary icing dries firm on the cookies and adds a nice layer of sweetness.
I believe that, traditionally, the flat part of the cookie is frosted, to provide an even surface, and the cookie is set on the rounded side. I like to frost the rounded part because not only do you get more frosting, but I prefer the way the cookies lie on the plate.
This recipe is adapted from Cooking Light, as black and whites are not usually very waistline friendly, due in large part to their huge size. These cookies are more managable and come out to be 3 in/8cm in diameter. Even when cooled completely, the tops of the cookies felt sticky and I was worried about their low fat content. Once they were frosted, though, they were fine. The cookies tasted great and stayed nice and moist!

Black and White Cookies
adapted from cooking light


Cookies:
1 1/2 cups ap flour
1 1/2 tsp baking powder
1/2 tsp salt
2/3 cup unsweetened applesauce
1 cup sugar
1/4 cup butter, softened
1 tsp vanilla extract
1 tsp lemon juice or a few drops of lemon oil
2 large egg whites


Preheat oven to 375F. Line a baking sheet with parchment paper.
Set applesauce in a fine sieve to drain while you prepare the other ingredients.
In a medium bowl, whisk together flour, baking powder and salt. In a large bowl, cream together butter and sugar until smooth, 1-2 minutes. Beat in applesauce, vanilla and lemon juice. Add in egg whites and beat until well combined. Stir in flour mixture until batter is smooth.
Drop batter two tablespoonfuls at a time onto the prepared baking sheet. Smooth slightly to form nice, round circles.
Bake for 10 minutes, until set but not browned.
Allow to cool for a few minutes on the baking sheet, then remove to a wire rack to cool completely.


Icing:
1 1/2 cups confectioners sugar, divided
3 tbsp milk or light cream, divided
1/4 teaspoon almond extract
1/2 tsp vanilla extract
2 tablespoons unsweetened cocoa


When cookies are cool, prepare the icing. Sift 3/4 cup confectioners sugar into two small bowls. Add 1 tbsp milk and the almond and vanilla extracts to one bowl and stir until smooth. Add cocoa and 2 tbsp milk to the other bowl and stir until smooth. Using a small knife and working over the bowls to catch drips, spread each icing over half of each cookie. Set on a rack until icing is set, then store cookies in an airtight container.


Makes 2 dozen cookies.

Sunday, August 14, 2005

Summer Mochaccino

A lovely independent coffee shop a few neighborhoods away is one of my favorite places to visit. It is near Warner Bro.'s studios and attracts a lot of "industry types". If you're not familiar with that term, it basically means that there are lots of actors, executives and, above all, screenwriters at this place. I should say that many are actually aspiring screenwriters, as they are not paid for their work (yet). The coffee shopt has a great location, good food and excellent drinks, but I love being able to casually evesdrop on random plot developments or scripts-in-progress while I sip my coffee.
I don't get over there as much as I'd like, so I thought I would try to recreate one of my favorite summer drinks at home. Yes, it's actually called a Mochaccino and it comes hot, over ice or blended with ice. The menu board lists its components as: coffee, espresso, cocoa and cinnamon. This was my starting point.
It seemed likely that the greatest amount of coffee was present in the drink and the least amount of cinnamon. It tastes mostly of coffee, with a hint of spice, so I tried not to make the cocoa or cinnamon too agressive. Though the drink is not too sweet, it tastes creamy; it uses sugar to create the texture and not milk.
While I cannot say that this is exactly the same, it's pretty darn good. It is more refreshing than many blended coffee drinks because it doesn't have the heaviness of dairy to weigh it down into dessert territory. And, it's a great thing to do with leftover coffee.


Ice Blended Mochaccino

Fill up one large cup (16 oz.) with ice and pour strong, cool coffee (add a shot of espresso if you have it) over ice to the top of the cup. Pour this into a blender. Add 1/2 tsp vanilla extract, 1 tsp cocoa powder, 1/4 tsp cinnamon and 2 tbsp sugar. Blend until smooth.
Makes 2 servings.

While you're enjoying your drink, check out the entries for this month's DMBLGiT over at spittoon. It's going to be a tough call for the wine blogging judges!

Saturday, August 13, 2005

The Hazards of Plating... and WCB


As so many food bloggers know, it can be difficult to take photos of food. You have to arrange your subject on the plate. You have to have decent lighting. You have to have a plesantly contrastive backdrop. You have to keep your pets away.
Head over to eat stuff to see other people's cats. Thanks, Clare, for giving me an excuse to post this photo. One other site of interest is Stuff on My Cat, hosting a collection of cats with stuff on them.
And, no, I didn't let him eat the pie.

Friday, August 12, 2005

SHF #11: One Shot Per Slice


Many thanks to Ronald of Love Sicily for picking such a delightful theme for this month's Sugar High Friday. The theme this month is Coffee.
I drink a lot of coffee. I spend a lot of time thinking about coffee. I have toured coffee plantations and roasted my own coffee. I do not, however, often cook with coffee. Thus, this month's SHF gave me the perfect opportunity to bake a heavily coffee laden cake. There is one shot of espresso for each slice of this cake, and slightly more if you like large slices.
This cake is a Black Chocolate Espresso Cake with Bittersweet Glaze from In the Sweet Kitchen. The batter is weird and very liquid, but the recipe is reassuring, so I was not too apprehensive. It uses 2 cups of espresso. Technically the recipe calls for dissolving instant espresso in hot water, but I used the real stuff. 16 shots (one ounce each) of the real stuff from my friendly, local baristas in exchange for a few pieces of cake. You can see the logo of the coffee shop on the plate in the photo if you look in the lower right land corner, since I had a little photo shoot in the cafe. You can also see my cappuccino.
The cake is very dense, but incredibly tender. It seems as though it will melt right into your mouth as you eat it. The coffee flavor is apparent and, despite the large amount of sugar, the cake is extremely chocolately without being very sweet. Serve a cake like this to chocolate lovers and there is a good chance that they will just about die after their first bite. It's that good.
Make it. You won't regret it.

Thursday, August 11, 2005

Cooking School: Better-Than-Hagrid's Rock Cakes


I had always assumed that when JK Rowling refered to "rock cakes" in her Harry Potter books, she was using an alternate term for scones. I found this to be rather unusual, but not entirely unlikely, so I was satisfied with my explanation. For a while.
I stumbled across a recipe for rock cakes at the Floo-Network and I knew I had to try them. I couldn't let myself go on believeing that they were scones! Baking and eating were done purely for scientific reasons, you know.
Rock cakes are actually not scones. In fact, they are a bit cookie-like because, though you do cut the butter into the flour, they use minimal additional liquid. Rock cakes are small, round cakes that have a crunchy, sugar coated exterior and the most wonderful, buttery, melt-in-your-mouth texture you could ever hope to enjoy. If you over cook them, they will turn out rather burnt and rock like since there is little moisture in the dough.
It was easy to cut the butter into the flour and stir in the rest of the ingredients. I don't really have access to mixed peel, so I omitted that. I decided to use currants rather than raisins, though you could certainly add any type of dried fruit you wish. This is not a recipe where you should worry too much about over mixing; it takes a while for the dough to come together because there is so little liquid. The presence of such a high fat-to-flour ratio will keep the dough from getting tough as you bring it together. They'll dry out if they bake for too long - probably why Hagrid's are inedible - so keep an eye on them and take them out when the tops are a light golden brown.
Even if you're not a Harry Potter fan, you should definately try these cakes.

Better-Than-Hagrid's Rock Cakes
adapted from Mrs Weasley's Rock Cakes at the Floo-Network
2 cups ap flour
1 tsp baking soda
1/2 tsp salt
1/2 cup butter, chilled
1/3 cup sugar
1 tsp vanilla extract
1/3 cup currants/raisins/sultanas
1 egg
2 tbsp milk
coarse sugar

Preheat oven to 400F. Line a large baking sheet with parchment paper.
Whisk the flour, baking soda and salt together in a large bowl and rub in the butter lightly with the fingers until the mix looks like breadcrumbs. Stir in the sugar and currants.
Beat the egg together lightly with the milk and vanilla. Pour it into the flour mixture and stir until the dough comes together into a ball.
Shape dough into 2 inch balls, dip the tops in coarse sugar and place on baking sheet. They won't spread very much, so they can be fairly close together.
Bake for about 13-16 minutes, until tops of cakes are light gold.
Remove to a wire rack to cool, or eat them straight away.

Makes 14-16 cakes

Tuesday, August 09, 2005

A Semi Successful Mousse

In the neverending search for healthier desserts, I tried making a mousse with yogurt instead of whipping cream. I was inspired by my frozen yogurt recipe, which tastes wonderful even before it's frozen. I found a CIA recipe for Chocolate Yogurt Mousse, so it seemed like the idea wasn't entirely farfetched, but I wanted to make use of the fresh strawberries I had.
The upshot of all this is that I got a great tasting mousse - on the top of the dish. A bit of egg white separated into the bottom of each dish, which was less of a problem for smaller servings and more of a problem for larger ones. I refrigerated the mousse for several hours before serving it - is this what caused the problem? Should I have frozen it? The other thing that occurs to me is that I should simply have used fewer egg whites. Any suggestions?

Monday, August 08, 2005

Bananaanadamarama


Ah, a slice of Americana, er, Anadama.
Anadama (pronounced an-uh-DAM-uh) bread traces its roots back to colonial New England, the northeastern part of the US. It is characterised by its inclusion of cornmeal and molasses, which are two very American ingredients.
The origin of the name is lost to history, but there are several stories that attempt to explain it. The upshot of every story is that a woman named Anna baked the bread and someone, possibly her husband, said "Anna, damn her!" either because the bread was awful or the bread was wonderful.
I tend to agree with the latter. I like this bread quite a bit. I threw in a cup of mashed banana (2 medium) both because I like the flavor combination and because of the added hilarity of the new name: Banana-anadama
When I tasted the dough, it had a very strong molasses taste and was quite salty. I was honestly a bit worried that the resultant bread wouldn't be as appetising as I had hoped. I need not have worried, though. The flavors both mellowed and melded as the dough rose and the finished loaf had a faintly sweet, wheaty taste with a light banana flavor. It had a fairly coarse but even crumb and was neither too dry not overly moist. With it's hearty taste and light feel, it was perfect for accompanying dinner as part of a bread basket. It also made tasty sandwich bread and french toast.


Banana Anandama Bread
1 tbsp active dry yeast
1 cup warm water
1/4 cup cornmeal
1/4 cup molasses
1/2 tsp cinnamon
2 tsp salt
1 cup mashed banana
1 egg
4-5 cups ap flour


Combine yeast and warm water and leave to proof for 5 minutes, until bubbly. Stir in cornmeal, molasses, cinamon, salt, banana, egg and 1 cup of flour until smooth. Add in the rest of the flour gradually, until the dough comes away from the sides of the mixing bowl in a ball.
Remove dough to a floured surface and knead, adding additional flour if necessary, until smooth. Place dough into a large, oiled bowl and leave to rise until doubled in size, 1 - 1 1/2 hours.
Grease two 8x4 inch loaf pans. Divide risen dough into two pieces. Flatten each piece into a 10x8 rectangle and roll up (beginning with the longer side) as you would a jelly roll. Tuck in the ends and place into one of the prepared loaf pans. Repeat with second piece of dough.
Let the loaves rise until nearly doubled, about 1 hour.
Meanwhile, preheat the oven to 375F.
Bake loaves for 30-35 minutes, until nicely browned on top and they sound holly when the bottom is tapped.
Allow to cool on a wire rack before slicing.

Makes 2 loaves.

Sunday, August 07, 2005

Sunday Brunch: Classic French Toast


French toast was definately my most looked forward to breakfast growing up. I liked to sleep late, though, so my slices were always cold by the time I got down to breakfast. Not that it mattered to me, though. I would just pop them in the microwave. I always sprinked them with lots of sugar instead of using syrup. I suppose it makes them a little creme brulee like, in that it adds a nice crunch to a somewhat custardy dish.
There are two pitfalls in making french toast. The first is slicing your bread too thick and not letting the bread soak in the custard long enough. Having tough, dry bread in the middle of french toast if awful. The second pitfall is having overly muchy french toast. This problem usually arises from having too much milk or cream in proportion to the eggs in your recipe. When the bread soaks up so much milk, it just falls apart, rather than becoming custardy.
You can easily use milk, cream or any combination of the two as the liquid in this recipe. Light cream or half & half gives it a bit of richness without going overboard. Cinnamon is always a great addition, but spices like nutmeg and cloves also go very well. If my bread were strongly flavored, I might pass on the cinnamon all together, but if it is a rather plain bread, I might use a few spices instead of just one. You can also use oil to grease your pan, but the combination of cream, butter and eggs is just too good to pass up sometimes.


Classic French Toast
3/4 cup light cream (half & half or milk is fine, too)
3 eggs
1 tsp vanilla
1/2 tsp cinamon
1/4 tsp salt
8 slices of bread
butter, for greasing the pan

Whisk all ingredients together in a large bowl and pour into a shallow pan or baking dish. Lay slices of bread in the mixture and soak them, remembering to flip them over, for a few minutes until saturated.
Heat a frying pan over medium-high heat. Coat with butter and place slices of french toast into the pan. Cook until the bottom is browned and the egg mixture around the edge of the toast is firm, about 2 minutes. Flip over and repeat.
Serve warm.

Makes 8 slices, serves 4.

Saturday, August 06, 2005

Whole Wheat Pie Crust


I recently signed up to test some recipes for the Good Home Cookbook, which is conducting the first national, public recipe testing campaign. There are over 1,000 participants! I received three recipes to test: Herbed Bread Sticks, Sugar Cookies and Sweet Potato Pie. The breadsticks were outstanding and I had fun making the cookies. I'm not giving out any recipes yet, though. If you want to take a sneak peak, why don't you sign up to be a tester and send an e-mail to recipetester@collectorspress.com?
This brings me to the sweet potato pie. I had never made one before, but cooking the potatos and assembing everything was easy. My only problem was that I didn't exactly realised that I needed a crust. I hadn't planned far in advance to try the pie, and so I found that I needed to whip up a crust quickly to stick the filling in And because sweet potatoes remind me of fall and hearty meals, I decided that the perfect compliment would be a nutty whole-wheat crust. So while the potatoes were boiling away on the stove, I put this together, tossed it into the freezer and was ready to go!
This crunchy, nutty, slightly sweet crust comes together easily and would compliment many fillings. I refrigerated the leftover pie and the crust still stayed crisp and flakey. Can't complain about that!


Whole Wheat Pie Crust
½ cup ap flour
½ cup whole wheat flour
¼ tsp salt
1 tbsp sugar
5 tbsp butter, cold and cut into a few pieces
3-4 tbsp cold water


Whisk together flours, salt and sugar in a large bowl. Rub in butter with your fingertips until the mixture resembles a very coarse meal. There should some pea sized pieces as well as some sand sized pieces. Pour in water and press dough together with your hands until it comes together into a ball. Add a bit more water if necessary.
Wrap dough disc in plastic wrap and freeze for 1 hour if you want to use it right away. Alternatively, you could refrigerate it for 4 hours, or until ready to use. Roll out on a floured surface.
Makes 1 crust.

Thursday, August 04, 2005

Cooking School: Chocolate Pudding Cake


One of the more popular restaurant desserts is a molten chocolate cake. This can mean several things. Some stories speak of a chocolate souffle that refused to cook all the way through as the origin of this dish. This souffle managed to worm it's way out of a ramekin and into the hearts (and onto the plates) of diners everywhere. A chocolate cake with a custardy chocolate sauce or some sort, served hot. How could you go wrong?
I was taught that the proper way to make a molten chocolate cake/chocolate lava cake/self saucing chocolate cake was to put a ball of ganache in the center of an individual chocolate cake or souffle and bake according to the original recipe. The ganache would melt and create a molten center. Delicious and decadent. Unfortunately, it seems that the vast majority of these types of cake now involve simply under-baking a cake. If you like the taste of cake batter, this could be good, but I am not such a person. I am definately wary of ordering this dessert in restaurants. Eggy, undercooked batter? Thanks, but no thanks.
When I want a chocolate cake with a rich, delicious chocolate sauce, I turn to a classic chocolate pudding cake. I love this recipe because it is baked in the same pan that it is mixed in, so there is little to no cleanup. I also love, of course, the taste! The cake is super moist and chocolatey- in fact, this is one of my favorite chocolate desserts. The chocolate pudding is extremely rich tasting, but is actually quite light, and makes a perfect compliment to the cake. To make the dish even more decadent, top it with whipped cream or vanilla ice cream.


Chocolate Pudding Cake
3/4 cup ap flour
2/3 cup sugar
1/2 cup cocoa powder, divided
1 1/2 tsp baking powder
1/2 tsp salt
1/2 cup milk
3 tbsp vegetable oil
2/3 cup brown sugar
1/4 cup chocolate chips (miniature, if you have them)
1 tsp vanilla extract
1 1/4 cups hot water


Preheat oven to 350F.
Combine flour, sugar, 1/4 cup cocoa, baking powder and salt in an 8 inch square baking pan and stir with a fork to combine. Mix in milk and oil until batter is uniform.
Sprinkle brown sugar, 1/4 cup cocoa and chocolate chips evenly over batter. Add vanilla to the hot water and pour over everything. Do not mix.
Place pan in oven and bake for 30-35 minutes, until surface of the cake looks dry. The pudding will be bubbling around the edges. Allow to cool for a few minutes before serving.
Leftovers, if you have them, may be stored for one day at room temperature. Reheat before serving.


Serves 8-9

Wednesday, August 03, 2005

Blogging By Mail 2

The second round of Blogging By Mail is up and running, hosted by the generous and talented Samantha of the Samantha Files. What are you waiting for? Go sign up!

Tuesday, August 02, 2005

Heart Healthy Oatmeal Chocolate Chip Cookies


I just love it when a dessert or snack has a nutritional benefit that doesn't make me feel guilty about taking seconds. This pie is a good example, but I will always have a soft spot for cookies. These cookies in particular have a rather heart heathy flair to them: most of the fat in from tahini instead of butter. The recipe is from EatingWell magazine.
Out of the oven, they were crisp on the edges and soft in the center. The flavor was very nice. I found the cookies to have a nutty undertone, both from the whole wheat flour and the tahini. I'm sure that if you didn't know there was tahini in the cookies, it would be difficult to determine the source of the nuttiness. I sent these out with success to some people as part of Blogging By Mail, so they do ship well. The added benefit was that I was able to get additional feedback, because Jessica noted that these weren't particularly buttery in flavor. Not suprising, considering that there is not much butter in them!
I left out the walnuts in case of allergies, but there is no doubt that they would be tasty with them. This omission would also lower the fat slightly from the nutritional information given by the article. Of course, there are still the chocolate chips to contend with, but that is one sacrifice I'm not willing to make in the search for healthy treats.

Tahini Oatmeal Chocolate Chip Cookies
from EatingWell March 2005

2 cups rolled oats
1/2 cup ap flour
1/2 cup whole wheat flour
1 tsp ground cinnamon
1/2 tsp baking soda
1/2 tsp salt
1/2 cup tahini
4 tbsp butter, softened
2/3 cup granulated sugar
2/3 cup packed light brown sugar
1 large egg
1 large egg white
2 tsp vanilla extract
1 cup chocolate chips
1/2 cup chopped walnuts (optional)

Preheat oven to 350F and line baking sheets with parchment paper.
Whisk together oats, flours, baking soda, salt and cinnamon in a medium bowl.
Beat tahini and butter together until blended. Add sugars and beat until well combined. Add in egg, egg white and vanilla until thoroughly combined. Stir in oat mixture until nearly incorporated, then add in chocolate chips. Do not over mix.
Drop dough by tablespoonfuls onto prepared baking sheet.
Bake for 10-12 minutes (or 15 minutes for a crispy cookie), until golden brown at the edges.
Remore to a wire rack to cool completely.
Makes 4 dozen.

Monday, August 01, 2005

Blogging By Mail: Opening the Packages (A roundup)


I definately want to thank everyone who participated in the first ever Blogging By Mail.
The event went smoothly, by all accounts. I collected names and addresses, matched people up more-or-less at random (no playing favorites!) and the rest was up to the participants. People made, bought or stole goodies from their kitchens and localities and mailed them out across the globe. We had 22 participants from the US, Canada, France, Singapore and Australia. I didn't put myself into the round because I wanted to be free to coordinate everything. I also decided to send something small to everyone who participated, both to inagurate the event and to ensure that even if something went horribly awry, everyone would get something.
I think that Melissa's son's coments, upon seeing a package arrive, were my favorites:

Do you know this person?
Is she a crazy blogger?


Maybe we're all a little crazy (about food!), but I think that blogging is all that amounts to. And I can definately say that I know people a lot better as a result of this event. I know that some of the swappers are keeping in contact, too! We all love the treats, but I think the new friends we're all making are even better.

Here's a little list of the posts about the event:

McAuliflower posted her first package as soon as it arrived, adding a gorgeous photo! She also found a little clarity, with a little help from her blogging by mail buddy, of course.
Samantha's gives up some hints about the next round.
The Baker shows the great looking goodies she sent off!
Mariko proves you don't have to exclusively blog about food to make some tasty treats.
Clare's blogged about not one but two packages, with great photo collages.
Templar also covered more than one package.
Sam's post proves that cookies make much better mail than bills.
Stephanie was worried about distances when she sent out her package, but it sounds like she did a great job.
Linda may have ended up on a sugar high after getting through her goodies.
Jessica packages included some rather unusual finds from Oregon.
Farmgirl's taste of home nearly filled up the tiny post office in her town.
Melissa guides our attention to her booty while she waits for the next round.
Jennifer's package introduced her to some tasty treats from Singapore.
Cathy received a box of traditional Aussie goodies from AugustusGloop, whose post about the package I sent out is oh-so-sweet!

The Baker's package was packed with homemade candy - as well as a few items not available in Singapore.


Lauren doesn't (yet) have a blog, but sent in this report : I sent Cheddar-Jalapeno Bread and some honey sticksfrom my farmer's market in Bloomington, Indiana toSuzie in Brooklyn. We've actually kept in touch a bitand plan to do so in the future. I'm really happy tohave someone to talk to about food with! I received avery nice package from Cheryl in Singapore. She sen tme a ton of stuff, including candy we can't buy here, a mix to make a classic Singapore dish (so fun!) andsome wonderful chocolate chip cookies that I promptly sat down on the floor to eat when I received.

We're working on setting up the next round - so stay tuned!