Friday, December 30, 2005

Winter Spiced Coffee and Café Brulé


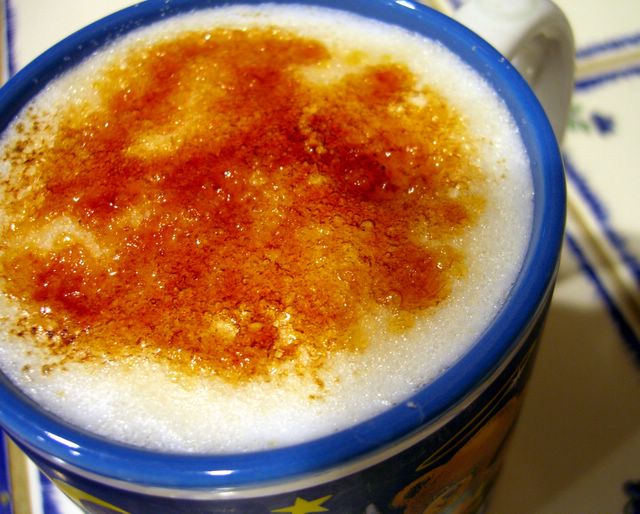
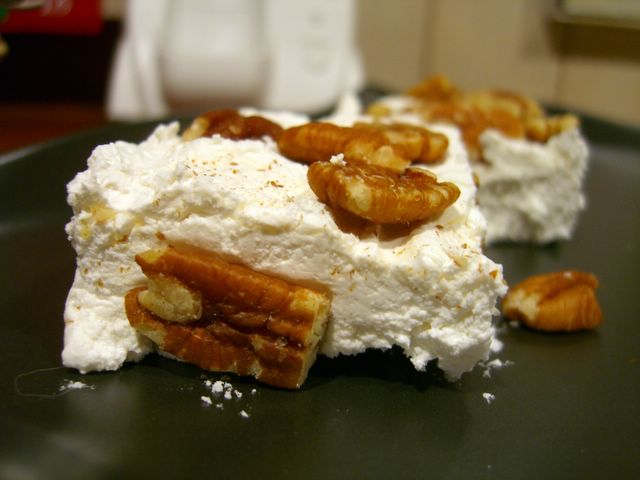
After seeing both Anne and Jennifer mention the idea of café brulé, I just couldn't resist giving it a try myself. The drink can be any of your ordinary, foamy, steamed milk-topped favorites and is sprinkled with a fair bit of sugar before applying a kitchen torch to caramelise it into a crème brulée look-alike. I love the idea and I loved using my kitchen torch on my coffee even more, though I would recommend scattering the sugar further over the foam than I did, let is caramelise into one sheet of sugar.
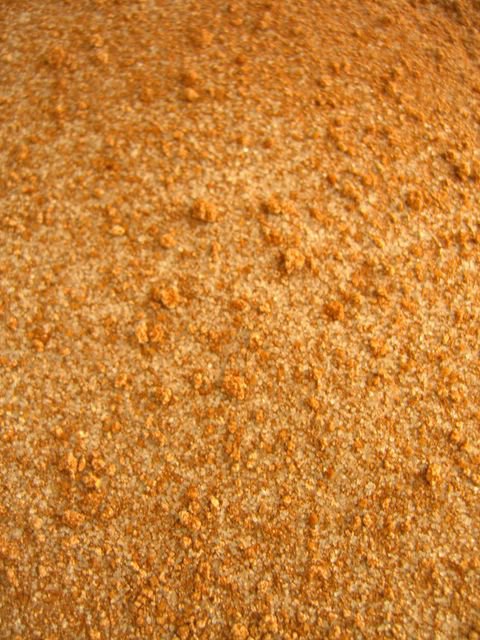
The coffee is really what is special about this drink, though. It is my recreation of Trader Joe's seasonal coffee offering, their "Wintry Blend". The whole bean coffee has whole cloves, red and green peppercorns and small pieces of cinnamon that get ground up with the beans in your coffee grinder. The resulting coffee is deliciously spicy.
Now, to make this yourself, you might have to play around with proportions. I suggest starting light on the spices and working up, since no one wants to actually taste pepper in their coffee. Once you get it down, though, the coffee is warming with a perfectly wintry smell and a hint of spicy flavor. It is nice black, with sugar and/or milk, so don't feel that it isn't worth a try if you don't have a way of steaming milk at home. If you don't grind your own beans (a practice I highly recommend), just add a dash of cloves, cinnamon and a grind or two of pepper to your coffee grounds before you brew a batch and you'll get a similar result.


Winter Spiced Coffee
whole bean coffee
whole cloves
cinnamon (ground)
red and/or white peppercorns


The exact amount of spice you'll need depends not only on your personal tastes, but on how much coffee you brew at a time. I suggest starting with about 3 cloves, 3 or 4 peppercorns and a good sized pinch of cinnamon for 1/2 cup of beans, grinding it all in your coffee grinder and adjusting as necessary.

Thursday, December 29, 2005

Cooking School: Popcorn Balls


Popcorn has been around for about 5000 years. At a site known as the "Bat Cave" in New Mexico, an anthropologist and a botanist, along with several graduate students, discovered layers of prehistoric "trash" stretching back thousands of years, which contained all manner of corn cobs and even popped corn. There were many unpopped kernels so well preserved that they popped when placed in hot oil by the scientists.
Popcorn balls are a food around which legends have sprung up, though the truth is probably that it was easier for shop owners to sell popcorn in pre-measured amounts than it was to sell it loose. In fact, they were one of the most popular candies around the turn of the last century, when popcorn was enjoying huge popularity. Since the most popular time of year for popcorn is late fall, it is no surprise that popcorn balls quickly became favorite holiday treats. Though not as popular as they once were, popcorn balls are still a tasty treat and have a sort of retro cache about them that keeps bringing people back for more.
I think that popcorn balls are an easy way to eat popcorn. They're not as fussy as many caramel corn recipes are, but they have a similar flavor. They also look very beautiful and will keep in an airtight container for at least a week or two. All you have to do is cook the syrup with a candy thermometer and stir it into the popped corn.
From start to finish, these take about 15 minutes. The maple syrup gives these a wonderful flavor, though you should be able to use molasses or treacle if it isn't available to you. By cooking the syrup only to 250F (121C), which is hard ball stage, the sugar is still pliable enough to work with easily and the balls will not be too hard, which would make them very difficult to eat. I personally think that the dried fruit and nuts are a nice touch, but feel free to be a purist and leave them out.

Maple Popcorn Balls
6 cups popped corn (lightly salted)
¾ cup maple syrup
¼ cup sugar
½ cup dried cranberries or othe fruit
½ cup chopped, toasted pecans or walnuts (optional)


Place popcorn in a large bowl.
Combine maple syrup and sugar in a small sauce pan over high heat. Bring to a boil and cook until the mixture reaches 250F (121C). Remove from heat and, while stirring, slowly pour it onto popcorn. Add dried fruit and nuts and stir until well coated.
Oil your hands lightly and, when mixture is cool enough to handle, but still warm, form into 3-inch (about ½ cup) balls. Place on a sheet of waxed paper and allow to cool.
Store in an airtight container.
Makes 12.

Wednesday, December 28, 2005

Dried Fruit Focaccia


After seeing an article in my local newspaper for Martha Stewart's Dried Fruit Focaccia, I wanted to make it. I love focaccia and one that is lightly sweetened and packed with dried fruit sounded delicious in general, as well as seeming like a good winter bread.
Unfortunately, I couldn't find the recipe in my rather large pile o' newspaper clippings and, eventually, opted to abandon my search and just wing it. To my dough I added dried tart cherries and golden raisins, both of which I remembered seeing in Martha's version (which I finally found here, if you're curious), and some cinnamon. I didn't use sugar, used far less oil and ended up with a smaller bread than Martha's. But, particularly considering I looked at the original recipe for about 30 secondes, it came out really well and was a very tasty bread. Since it is thinner than your average focaccia, it is also crisper. In fact, I discovered that this makes excellent toast, tasting just like cinnamon raisin bread - hardly suprising given both the cinnamon and the raisins in the recipe. The cherries were particularly delicious.
To get a softer version of this bread, I would shape this into a round, 9-inch focaccia, pressing it into an oiled cake pan. This would be thicker than my rectangular version, but at least equally tasty. Cooking time for a round will be the almost the same, but closer to the higher end of the range.


Dried Fruit Focaccia
1 tbsp yeast
1 cup warm water (110 F)
1 cup dried tart cherries
1/2 cup golden raisins
1 tsp salt
1/2 tsp cinnamon
2 tbsp olive oil, more for working dough
2 - 2 1/2 cups flour


In a large bowl, combine yeast and warm water. Let stand for 5 minutes, until slightly foamy. Add in dried cherries, raisins, salt, cinnamon, 2 tablespoons olive oil and 1 1/2 cups flour. Stir to combine. Add remaining flour 1 or 2 tablespoons at a time until dough pulls away from the side of the bowl.
Turn out onto a lightly floured surface and knead for 3-4 minutes, until fairly smooth and elastic. The fruit may make it difficult to tell when the dough is smooth, so be sure to knead for 3 minutes if you are unsure. Place dough in a lightly oiled bowl to rise until doubled and cover with plastic wrap for about 1 1/2 hours.

Oil a 10 by 15 inch jelly roll pan (baking sheet with sides).
Place risen dough into prepared pan, stretching it into a rectangle as you place it. Oil your hands well, splay your fingers and gently press dough into a thin rectangle, covering most of the sheet. Cover with a clean dish towel and let rise for 30 minutes.
Preheat over to 425F.
Brush focaccia gently with a bit more oil and sprinkle with sugar. Bake for 20-25 minutes, until golden brown.
Cool on a wire rack.
Makes 1 focaccia

Monday, December 26, 2005

Mini Brownie Bites


I think that the Hershey's website is a little misleading.
I decided to make brownie bites like the ones Santos made last week. The recipe she used was a little too rich for me, calling for four sticks of butter. Admittedly, it made more than a few brownie bites, but still.... I went with Hershey's recipe instead. Their photo shows brownies with a nice, crackly crust and these do not get crackly. I rather think that you need to use butter to produce a crust like that, not oil. I will give them the benefit of the doubt and assume that they accidentally posted the wrong photo.
The recipe was easy. I wanted them to be chocolatey, so I substituted bittersweet chocolate chips for the peanut butter chips suggested. I was suprised to see that the mini muffin wrappers held their shape when I just set them on the baking sheet, unsupported by a muffin tin. If your wrappers are thin, however, double up on them.
These were still quite tasty, even if they didn't turn out they way the Hershey photo promised. They were rich little chocolate cake bites studded with chocolate chips. Each one was a bit more dense than your usual cake and the top crust was a little crisp, so I feel they were brownie-like in taste, if not entirely in appearance. I enjoyed them, particularly when they were warm and the chocolate was melty. The effect is easily produced with a few seconds in a microwave. I topped them with bits of my homemade marshmallows, but a mini marshmallow or a sliced up store-bought marshmallow will work just as well.

Mini Brownie Bites
6 tbsp unsweetened cocoa
1/3 cup vegetable oil
1/2 cup sugar
1/2 cup brown sugar
2 eggs
1 tsp vanilla extract
2/3 cup ap flour
1/2 tsp baking powder
1/4 tsp salt
1/2 cup chocolate chips, plus more for topping
marshmallows, for topping

Preheat oven to 350F.
In a medium bowl, whisk together cocoa, vegetable oil, sugar and brown sugar. Whisk in eggs one by one, followed by vanilla extract.
In a small bowl, whisk together flour, baking powder and salt.
Add flour mixture to cocoa mixture and stir until just combined. Stir in chocolate chips.
Place 24 mini muffin cups on a baking sheet and fill evenly (about 3/4 full) with brownie batter.
Bake for 14-16 minutes, until just set and slightly firm to the touch. A tester should have a few crumbs.
Cool on a wire rack. Top each brownie with a few chocolate chips. As they melt, press a marshmallow into the chocolate. Let stand until set.
Makes 24.

Sunday, December 25, 2005

Merry Christmas 2005

We all know that nothing says Christmas like a cat, curled up by the fire with a pointsetta in the background. Except for trees, mistletoe, eggnog, piles of food and (my favorite) marshmallows and cocoa. But having your cat around, especially when he's has just returned after beeing missing for days, makes the day all the more special. I'm glad Kiri is home, Clare! Phoebe is more than happy to share her Christmas toys, consisting of bits of wrapping paper and ribbon, with him.

Merry Christmas, everyone.

Friday, December 23, 2005

Pear Muffins


Pears are funny fruits. Much like bananas, when you have a group of them, they seem to ripen all at the same time. Unlike bananas, they also have a very short window in which they are perfectly ripe, firm but yielding to the touch. I frequently get pears as gifts, particularly this time of year and as I can't seem to resist buying them in fairly large quantities when the price is right, I will occasionally be forced to eat many pears in a day or two. Poor me.
Once in a great while I will tire of eating pears plain and begin to hunt around for something to do with them. Pears and cheese, pears in soup, pears in my oatmeal, pear sauce. I don't usually add pears to my baking because they don't hold up as well as firmer fruits, like apples, but a recipe from Everyday Food caught my eye. Unfortunately, I didn't have any granola for the topping and and wasn't going out to get any. I ended up reducing the baking time and temperature, but making similar muffins.
Before I bit into one, I worried that I hadn't put enough spice into these muffins. As I tasted and chewed, I completely forgot about the spices. These muffins managed to taste just like my pear clafoutis, less custardy by default, but strikingly similar. The pears were soft and gave a lot of moistness to the muffin. The relatively delicate flavor of pear was strong, which I loved. There simply aren't enough pear-flavored things.


Pear Muffins
1 cup ap flour
3/4 cup whole wheat flour
2 tsp baking powder
1/2 tsp salt
1/2 tsp ground cinnamon
1/2 tsp ground ginger
2 tbsp butter, very soft
3/4 cup brown sugar
2 eggs
1/2 cup yogurt
2 cups pears, peeled and diced (2 med/lg Bartletts)


Preheat oven to 375F. Line a 12-cup muffin tin with baking cups.
In a large bowl, whisk together flours, baking powder, salt, cinnamon and ginger.
In a medium bowl, cream butter with brown sugar. Beat in eggs one by one, followed by yogurt. Pour egg mixture into flour mixture, stirring until just combined. Mixture will be thick. Add pears and stir just until well distributed.
Fill muffin cups evenly with the mixture. Each cup should be quite full.
Bake at 375F for 17-20 minutes, until a tester comes out clean.
Cool on a wire rack. Serve warm or cold.
Makes 12 muffins

Thursday, December 22, 2005

Cooking School: Large Scale Cakes


While most people will have to scale a recipe from time to time, doubling a batch of rice pilaf for a crowd or halving a batch of pancakes to feed only one or two, not everyone will be require to scale recipes for baked goods. You have to be exact with a cake recipe. The first thing to do is determine what size pan you're going to use. For this cake, I used a 14-inch by 2-inch round pan to make a 2-layer cake. I only had one pan this large, so I used it twice: once for each layer.

Depending on the increase you're going to make, you will need to dust off your multiplication skills. I learned the hard way that trying to multiply more than a few ingredients at a time in my head was simply not practical, so it's important to write down all your ingredients on a separate piece of paper. Before you can calculate the new ingredient amounts, you need to know how much batter you'll need.

My usual chocolate cake recipe makes two 8-inch layers. A reference sheet like this one is useful for conversions between pan sizes, but my 14-inch pan is too large to be on a list of common sizes, so I used an easy volume calculation to find out that I needed triple my usual amount of batter, or 1 1/2 batches for each layer. I multiplied my ingredients and wrote them out. It's easier if the ingredients are in grams or ounces and you can weigh them all, but using fractions is fine when you're not opening a bakery. The baking time should not really change when you're going from one pan size to another if the pan is the same depth. If you switch to a different style of pan - a bundt, for example - the time will definitely be affected. My baking time was identical to the time for 8-inch layers.

Once the layers were baked and cooled, they were put together like any other cake. It was, however, rather difficult to maneuver such large pieces of cake without breaking them because this cake is so moist. I actually ended up placing the larger piece on the cake stand (specially sized), frosting it and cutting the upper layer into quarters before laying them on. Frosting covered my cuts and it was dramatically easier to position the top layer this way.


Decorating is always the most fun part of baking a cake. I used the idea for the Snowflake Cake on Leite's Culinaria and made an uncounted number of white chocolate snowflakes to cover the mascarpone frosting. They were delicious and beautiful and it turned out to be a very simple way to dress up the cake.
When it came time to serve, I cut the cake in concentric circles, not slices, like a wedding cake. It served about 36.


Large Scale Mascarpone Frosting
This recipe can be cut in half for a smaller cake and will frost, thinly, a 14-inch layer cake.
1 cup butter, room temerature
24 oz mascarpone, room temperature
8 cups powdered sugar, sifted
1 tbsp vanilla extract

Beat together butter and mascarpone in a mixer. Add vanilla extract and gradually add all of the sugar until the frosting is thick, fluffy and smooth, about 5-10 minutes.
Makes about 7 1/2 cups

Wednesday, December 21, 2005

Easy Homemade Eggnog

I must confess that I never particularly cared for eggnog. Until very recently, I had only ever had store-bought eggnog and, while the consistency reminded me plesantly of a thick milkshake, I couldn't get past the semi-eggy, custard-gone-awry sort of flavor. I ordinarily like custard, too, but I basically gave up on the drink. I'd have a sip every now and again, in case my tastes changed and I found I enjoyed it, but I was far more likely to refuse 'nog than not.
This year I finally decided to give homemade eggnog a try. I searched through countless recipes and tried quite a few to limited success. I ruled out anything that involved cooking the eggs, since I already knew that wasn't what I wanted. I did not like the recipes that needed multiple bowls for beating multiple components. Since I never exactly wanted to indulge in eggnog in the first place, I didn't want an overly indulgent recipe, either. Finally, I came across this recipe, which I liked because I wouldn't have to separate and independently beat the eggs and because there is no cream to make it too rich. After a few tries, a few eggs and a few modifications, I had eggnog. And it wasn't bad!
This eggnog is very easy to make and is relatively low in fat. You can use any kind of milk, though I recommend low fat. The resulting nog is creamy and slightly eggy, without having a trace of store-bought taste. It reminds me of a thin, but enriched, milkshake. The vanilla and nutmeg really compliment eachother. The alcohol is entirely optional and you can substitute bourbon or rum to suit your tastes.


Homemade Eggnog
2 eggs, room temperature
4 tbsp sugar
1 tsp vanilla extract
1/4 tsp nutmeg, plus more for serving
2 cups low fat milk
2 oz. brandy (optional)

In a large bowl, whisk together eggs and sugar until light in color and sugar is dissolved. Whisk in vanilla, nutmeg, milk and brandy, if using. Strain into a small pitcher and chill.
Pour into glasses and sprinkle with additional nutmeg.
Makes 2 large or 4 small servings.

Tuesday, December 20, 2005

Soft Cutout Christmas Cookies


I don't particularly like crisp, buttery cookies with frosting on them. I feel like the sugary coating takes something away from the simplicity of that type of cookie. In other words, if it's a good butter cookie, I don't want to disguise it with icing. But Christmas cookies deserve to be decorated as much as the tree and there is only so much that one can do with sprinkles alone (which are, incidentally, a fine addition to butter cookies). Frosting can allow you to be a lot more creative. Christmas cookies just want to be frosted.
I like to use simple sugar icing for frosting cookies, since it's not as rich or gooey as a buttercream, but still adds a nice, sugary taste. It is also easy to control the consistency of, so I can make it thin, for flooding large areas, or stiff, to draw the details. The frosted cookies themselves should be soft but firm, neither too sweet nor too buttery and they have to stay fresh for a few days. Gingerbread cookies are a good choice and easy to decorate, but whiter cookies give you a bit more color versatility, as well as less pressure to make ony gingerbread men.
Made with buttermilk, these cookies are soft and stay moist and fresh tasting for several days without getting too cakey or stale. They have a light vanilla flavor with a subtle tang from the buttermilk. The dough can be rerolled once or twice and holds it's shape well in the oven, though it does puff up a bit. The dough is sticky when it isn't cole, so be sure to have the dough well-chilled and your work surface floured. And the most crucial point? They hold up well to decorating and actually taste much better with the icing and sprinkles.
I'm already making another batch. After all, it's still a few days until Christmas and, while these will stay fresh until then, I don't expect them to last that long.


Soft Cutout Cookies
2 3/4 cups ap flour
1/2 tsp baking powder
1/2 tsp baking soda
1/2 tsp salt
1 cup sugar
1/2 cup butter, very soft
1/2 cup buttermilk
1 egg
1 tsp vanilla extract
1/4 tsp almond extract

In a medium bowl, sift together flour, baking powder, baking soda and salt.
In a large bowl, cream together sugar and butter. Beat in buttermilk, egg and extracts. With the mixer on low speed or by hand, add in the flour mixture, mixing until no flour remains.
Divide dough into two pieces. Wrap in plastic wrap and freeze for at least 2 hours.
Preheat oven to 375F.
Working with 1 piece of dough at a time, roll out to 1/4-inch thick on a lightly floured surface and use a floured cookie cutter to make desired shapes. Transfer cookies to a parchment lined baking sheet. Reroll remaing dough, chilling for a few minutes if it becomes too warm to handle easily. Repeat with second piece of dough.
Bake for 6-7 minutes at 375F, until the edges are slightly firm to the touch but cookies are not browned (The bottom of the cookies will be light brown).
Cool completely on a wire rack before icing.
Makes 4-5 dozen, depending on cookie cutter size.


Simple Colored Icing
4 cups confectioners sugar, divided
2 tbsp milk or light cream per bowl
1/2 tsp vanilla extract per bowl
white, red, green and blue food coloring


Place 1 cup of sugar in each of 4 small bowls. Add 2 tbsp milk or light cream, 1/2 tsp vanilla and a few drops of your desired food color to each bowl. Mix thoroughly with a fork, until smooth and a good consistency: thin for filling in large spaces and thick for making clear lines. Add extra milk if necessary.
Scrape each color into a small zip-lock plastic bag.
Snip the corner of the bag to ice cookies.

Monday, December 19, 2005

Broccoli with Caramelized Onions


Sometimes the simplest dishes are the best. That said, I would not say that making caramelised onions is the simplest thing. They're not difficult to make, but they are relatively time consuming, taking well over an hour to reduce the onions to melt-in-your-mouth sweetness. Rachael says that they freeze well, but I've never been able to resist them for more than a few hours. The house smells so amazing as they cook that it really gets me in the mood to eat them. Caramelised onions make a great addition to just about any meat, vegetable or rice dish. They can enrich simple dishes like mashed potatoes and add a surprising twist to pasta dishes.
I followed Rachael's method, taking about 2 hours instead of three to cook the onions, steamed the broccoli and tossed them together with some pine nuts, balsamic vinegar, salt and pepper, just like EatingWell recommended in their recipe for this dish.
While I was rather indifferent to the balsamic vinegar's presence - perhaps I should have used a better one - I loved the broccoli with the onions. The crunch of the greens with the added flavor of the onions almost makes this elegant, which is pretty unusual for a dish of broccoli. The pinenuts were a nice touch, too. Mine were toasted, but next time I'll look for salted ones to add a bit more interest to them.


Broccoli with Caramelised Onions
2 onions, peeled and sliced very thinnly
1 tsp oil
1 tsp butter
4 cups broccoli florets
1/4 cup toasted pinenuts
2 tbsp balsamic vinegar
salt and pepper, to taste


In a medium sized sauce pan, heat oil and butter over medium high heat and add the onions and a bit of salt. Once onions are coated with butter and oil and are beginning to soften, reduce heat to medium-low. Stirring occasionally, cook until onions are very soft and golden brown, about 2 hours.
While the onions cook, heat a big pot of water, salted, to boiling. Add broccoli and cook until just tender, about 5 minutes. Drain and rinse with cold water.
Toss onions and broccoli with the toasted pinenuts, balsamic vinegar, salt and pepper.
Serve warm or at room temperature.
Serves 4-6, as a side.

Saturday, December 17, 2005

Gingersnaps with Crystallized Ginger


This is another recipe from Real Simple, actually from the same article that I found the PB&J Crunch Cookies I made recently. One look at the ingredient list had me sold on these, though the picture certainly didn't hurt. These cookies are jammed with a whole variety of spices, making them one of the more interesting ginger cookies I've had.
Most thick cookies than claim to be snappy actually turn out to be harder than rocks. So I was very plesantly suprised to find that they actually turned out to be quite crisp, without being hard. The day they were made, they were positively crunchy! After the first day, they did lose a little bit of the crunch, as so many cookies do, but the spices came forward just a bit more. The spicing is truely an excellent combination; the balance and blend of the spices is just right. Don't be tempted so substitute some of the plain sugar for brown sugar in this recipe, as it will cause the cookies to loose some of their crunch.
The recipe originally called for forming the dough into logs, then chilling and slicing them. After trying both sliced and dropped cookies, I decided to simply form the dough into balls. The non-sliced cookies had a prettier final appearance and, though the sliced ones remained a bit crunchier even days later, I prefered the texture of the hand-formed cookies. Refrigerating the dough in its bowl for about 30 minutes gives it a chance to rest and evenly distribute the moisture, making it easier to form into balls.


Gingersnaps with Crystallized Ginger
4 1/4 cups ap flour
1 tbsp baking soda
1/2 tsp salt
2 tsp ground ginger
1 tsp cinnamon
1/2 tsp ground cloves
1/2 tsp cardamom
1/2 tsp ground black pepper
1/2 cup butter, at room temperature
1 3/4 cups granulated sugar, plus more for coating
2 large eggs
1/2 cup molasses
1 tbsp balsamic vinegar
1 tsp pure vanilla extract
1/3 cup crystallized ginger, finely chopped


In a large bowl, sift together flour, baking soda, salt, ginger, cinnamon, cloves, cardamom and black pepper.
In another large bowl, cream together butter and sugar. Add eggs in one by one, followed by molasses, balsamic vinegar and vanilla. Either by hand or with the mixer on low speed, gradually stir in all the flour, adding the minced ginger with the last addition. Stir until all flour is combined.
Form dough into 1- 1 1/2 inch balls, roll in extra sugar and place on baking sheet. Press cookies to flatten slightly and bake for 10-12 minutes at 375, until browned around the edges.
Makes 5 dozen.

Friday, December 16, 2005

Blood Orange Banana Cake


Most of the time, when I have overripe bananas, I make banana bread. Simple, tasty and versatile, it is one of my favorite baked goods. Somehow, this week, I decided to turn my overripe bananas into a cake. I know that it was the overabundance of oranges on the trees outside and my desire to use at least a few of them before the squirrels had the chance that made me add oranges to the cake.
Blood oranges are slightly less acidic than other oranges, much in the same way that a meyer lemon is less acidic than a regular lemon. They usually have a bright red interior - hence the name - though the amound of "blood" can vary significantly between varities. If you notice the pinkness of the glaze topping the cake, it is because instead of mixing milk with confectioners sugar to a pourable consistency, I substituted a few tablespoons of blood orange juice.
This cake mixes up quickly and bakes quickly. The flavor is very balanced between the sweet, zesty taste of the blood oranges - though any oranges will work - and the bananas. The cake is very moist and very soft. The crumb is not as tight or light as a non-banana cake, however it is not nearly as dense as a banana bread. It is really excellent for breakfast or a snack, but if you topped it with a citrus-spiked mascarpone frosting, this would make a really standout dessert.
I can only imagine the cupcakes!


Blood Orange Banana Cake
1 cup blood orange sections (2 large, peeled)
2 medium bananas
1 cup sugar
1/4 cup butter, very soft
1 egg
1 tsp vanilla
1 2/4 cup ap flour
1/2 tsp baking soda
1/2 tsp baking powder
1/4 tsp salt

Preheat the oven to 350F and butter and flour a 9-inch cake pan.
In a food processor, combine blood orange sections, bananas, sugar and butter and whizz until fairly smooth. Add in egg and vanilla and pulse to combine.
In a large bowl, sift together flour, baking soda, baking powder and salt. Pour in orange mixture and stir just until no lumps remain. Pour into prepared pan.
Bake for 30-35 minutes, until a tester comes out dry and the cake springs back when lightly pressed.
Allow cake to cool in the pan for 10-15 minutes. Run a knife around the edge and invert the cake onto a platter. Reinvert the cake onto a wire cooling rack and allow to cool completely before frosting.
Serves 8-10

Thursday, December 15, 2005

Cooking School: Pecan Divinity


I don't know when it happened that "sweet" became synonymous with both unsophisticated and undesirable in desserts. As though there is some level of sophistication past which your palate is too evolved to eat sugar. For the record, I don't feel this way. I love sugar and candy is the perfect way to showcase it. In fact, this week I did a complete 180-degree turn from the anti-sugar sophistication and made a classic, Southern holiday treat: divinity.
Divinity is an ultra sugary treat that is balanced by the inclusion of nuts. It is sometimes called divinity fudge, as it is a textural cross between fudge and marshmallow, dense, light and smooth all at the same time. It is quite close to nougat, actually.
Though the ingredients are simple, I have always found divinity to be very difficult to make. This is because almost every recipe I ever looked at was identical. Identical and, frankly, not very good. Up until this time, I failed in every attempt I ever made to make divinity. Most recipes seem to not cook the sugar long enough and not direct you to beat the mixture for enough time; their divinities never set up. I went straight to the source for my new recipe, Karo Corn Syrup, on the theory that their product is such an essential ingredient in divinity, they must have a workable recipe. And they do have one.
For divinity, the sugar and corn syrup mixture is cooked to 260-266 degrees Fahrenheit, the upper end of hard ball stage. A candy thermometer is the best way to do this (If you want to try it without one, however, just drip a bit of the syrup into water. When it sets up in a stable ball that is pliable with your fingers, it is ready). The syrup is drizzled into beaten egg whites and beaten until it has cooled enough to set up firmly, which takes anywhere from 10-15 minutes. The beating is the point where most recipes fail, as they underestimate the beating time. The point of beating is not only to generate the divinity consistency, but to cool the mixture down to the point where it will set up quickly and maintain that consistency. Pecans or walnuts - roasted and salted are always my preference - are folded in at the end and the mixture is pressed into a baking pan, like fudge, too cool before it is sliced.
Cut it into small pieces. It's addictive, but too sweet for large chunks.


Divinity
(courtesy of Karo)
2 1/2 cups sugar
1/2 cup corn syrup
1/4 tsp salt
1/2 cup water
2 egg whites, room temperature
1 tsp vanilla extract
1 cup coarsely chopped pecans (roasted and salted, if desired)

Line an 8x8 inch baking pan with parchment or wax paper.
In a medium sauce pan, combine sugar, corn syrup, salt and water. Bring to a boil, stirring only until the sugar is mostly dissolved. Cook over high heat until a candy thermometer reaches 260F, 20-25 minutes.
When the syrup reaches 260F, beat the egg whites to fairly stiff peaks in a large bowl. When they are ready, the syrup should be at about 265F. With the mixer running continuously on low speed, carefully drizzle the syrup in a steady stream into the egg whites. When all the syrup has been added, turn the mixer up to medium speed and beat for 4-5 minutes. The mixture should have thickened somewhat by this point. Add the vanilla and turn the speed down to medium-low and continue to beat until the mixture is no longer glossy and begins to stick to the sides of the bowl, pulling away from the beaters.
Quickly fold in 3/4 cup pecans. Spread divinity into the prepared pan, pressing the remaining 1/4 cup pecans into the top.
Allow it to set up for at least 2 hours, until completely cool, before slicing into small pieces.
Makes 1 pound of candy, or 36 small pieces.

Tuesday, December 13, 2005

Artichoke and White Bean Soup


Now that the weather is really cooling off, I can indulge my desire for soup a bit more often. Though I do make soup during the summer, somehow a bowl of steaming deliciousness is slightly less delicious when the air temperature is the same as that of the soup. Soup is also a good excuse to bake more bread to serve with it.
This particular soup can from a rather unlikely source: Sunset Magazine. It's not that they don't offer recipes, it's just that I suppose I wouldn't ordinarily expect to be so inspired from them. Perhaps I will keep a closer eye on the Sunset recipe section from now on, because this soup is just delicious. It is also really easy, since it uses mostly canned ingredients. It's the perfect thing for a weeknight dinner.
I adore artichokes, so their flavor in this soup really won me over. I used artichoke hearts packed in water, which I strongly recommend over those packed in oil. Not only does this avoid the unavoidable greasiness and extra fat, the flavor and texture of the artichokes is much better. I also opted to use white beans in place of the garbanzos that the original recipe called for and thinned the soup with some extra liquid. The end result is light tasting, but filling, as well as being remarkably satisfying. If you have leftover chicken sitting around in your fridge, you can shred some up and stir it into the soup, too, but it is excellent as is.


Artichoke and White Bean Soup
(adapted from a Sunset recipe)
1 tbsp olive oil
1 medium onion (white or red), diced
1/2 cup carrots, chopped
1/2 cup celery, chopped
4 cloves garlic, minced
1/2 tsp red pepper flakes
1 cup fresh tomatoes, seeded and chopped
2 - 15 oz. cans artichoke hearts, packed in water, drained and cut in quarters
1 - 15 oz. can white beans, drained
2 - 15 oz. cans chicken or vegetable broth
1 cup water
salt and pepper, to taste
parmesan cheese, for serving

In a 5 or 6 qt. dutch oven or pot, heat olive oil over medium heat. Add onion, carrots and celery and cook until onion is softened, about 8-10 minutes. Add garlic and red pepper flakes, along with some salt and pepper, and cook for an additional minute. Add all remaining ingredients. Cover and bring to a boil. Redure heat and simmer for 15-20 minutes, until carrots are tender. Add salt and pepper to taste and serve with parmesan cheese, if desired.
Serves 6, with bread, as a meal.

Monday, December 12, 2005

Cranberry Cherry Crumble


I really like crumbles because they can be mixed up on a whim. Fruit in the bottom of a baking dish topped with a mixture of flour, sugar, butter and oats is just about as simple as a dessert can get. The crumble mixture can even be made ahead and stored in the refrigerator for a few days, which keeps the butter nice and firm until you are ready to use it.
You can basically use any fruit combination that you like. I always have lots of frozen fruit on hand, because, while seasonality is nice, sometimes you just feel like something different. Frozen sweet cherries are one of my favorite frozen fruits because they are amazing for snacking on, believe it or not, as well as being nice in muffins or desserts. Cranberries are often hard to find fresh, though around this time of year they are more prevalent in stores. I decided to add the apple and the dried cranberries simply because their flavors work well with both the sweetness of the cherries and the tart cranberries.
The topping is very crisp and has a nice oaty flavor, rather granola-like. You could use any spice combination, but this is a nice all purpose one. It isn't too spicy, but there is enough spice to give a little extra flavor boost to the fruit. Next time, I think I'll add some diced candied ginger to the topping to spice it up even a bit more. This is great with ice cream or yogurt because the hot fruit melts the ice cream so nicely, while the crumble topping makes a very crunchy contrast.


Cranberry Cherry Crumble
½ cup flour
½ cup oats
6 tbsp sugar (brown or plain)
¼ tsp salt
½ tsp cinnamon
½ tsp ginger
¼ tsp allspice
1 tsp vanilla
1 tbsp water
3 tbsp butter, cold
3 cups frozen sweet cherries
1 ½ cups cranberries, fresh or frozen
1 apple, peeled and chopped in medium pieces
¼ cup dried cranberries
2 tsp cornstarch

Preheat oven to 375F.
In a food processor, combine flour, oats, sugar, salt, cinnamon, ginger, allspice, vanilla, water and butter. Pulse until mixture resembles coarse crumbs.
In a large bowl, toss cherries, cranberries and apple with 2 tsp cornstarch. Pour into an 8x8 inch baking dish. Top with dried cranberries. Distribute crumb mixture evenly over the fruit.
Bake at 375F for 45-50 minutes, until topping is crisp and lightly browned.
Serve warm.

Sunday, December 11, 2005

Whole Wheat Quinoa Bagettes


Not only was this a healthy and delicious bread incorporating one of my favorite grains, quinoa, it gave me a chance to use an ingredient I haven't used before: vital wheat gluten. Vital wheat gluten is the protein found in wheat that has been (mostly) isolated from the wheat itself. It is useful, because it can be added to breads that contain low-gluten flours, like rye or whole wheat as opposed to all purpose or bread flours, to improve their rise and lighten the texture of the final loaf. These baguettes all rose beautifully, so I think it's safe to say that it worked.
The recipe is from another of Beth Hensperger's books, The Pleasures of Whole Grain Breads, which I've had for some time now without using. It has recipes using more unusual grains, like quinoa, millet and teff, and specialty flours, like chestnut, potato and chickpea. Every bread and muffin recipe sounds delicious, even though I will probably have to hunt down ingredients to try a few of them.
I did modify the recipe, of course. I didn't use an overnight rise and let the dough double for about 2 hours at room temperature. I also didn't process the quinoa until fine, as the recipe indicated. Not because I didn't try, mind you, but it simply wouldn't process in my Cuisinart. After about 2 mintues I gave up and just added them whole. I also added a bit of honey because I think that whole wheat breads are just perfect with a bit of honey.
The quinoa on the exterior turned crunchy, while the interior stayed moist. The effect was similar to adding oatmeal, except perhaps slightly more obvious, since quinoa is more resiliant than oats. The resulting bread was less heavy than an oatmeal bread and nicely light in tuxture, proably due to the wheat gluten. Next time, I think I will try baking this as a loaf instead of individual baguettes, because it would make fantastic sandwiches, particularly with peanut butter or egg salad.


Whole Wheat Quinoa Baguettes
(based on a Beth Hensperger recipe)
1 cup whole, uncooked quinoa
2 cups warm water (about 105F)
2 tsp active dry yeast (1 package, minus 1/4 tsp)
2 cups whole wheat flour
1- 1 1/2 cups bread flour
2 tbsp vital wheat gluten
2 tsp salt
2 tbsp honey
1 tbsp olive oil


Rinse quinoa in a sieve with warm water.
In a large bowl, mix yeast and water. Let stand for 5 minutes, then stir in whole wheat flour and quinoa. Mix well. Add 1/2 cup bread flour, 2 tbsp vital wheat gluten, salt, honey and olive oil and mix until well combined. Add remaining bread flour 1/4 cup at a time, stirring until the dough comes together and pulls away from the sides of the bowl.
Knead dough until elastic on a lightly floured surface, about 3 minutes. Place in a lightly oiled bowl and cover with plastic wrap. Let rise until doubled in size, 2-2 1/2 hours.
Sprinkle a baking sheet with flour. Turn dough out onto a lighlty floured surface and divide in three pieces. Working with each piece in turn, flatten gently and shape into a baguette, pinching the seams together well. Place baguette onto prepared baking sheet. Repeat with remaing pieces of dough. Cover with a clean dishtowel and let rise for 1 - 1 1/2 hours.
Meanwhile, preheat the oven to 425F.
Slash baguettes with a sharp knife and bake for 25-30 minutes, until baguettes are brown and sound hollow when tapped. Cool completely on a wire rack before slicing.
Makes 3 baguettes.

Friday, December 09, 2005

Chocolate Chip and Almond Cookies


The closer Christmas gets, the more cookies I want to make. It's almost a compulsion, but I don't fight it since I love cookies.
I wanted to make some cookies that had chocolate chips, but still had a little something extra special about them. I didn't want plain chocolate chip cookies or oatmeal chocolate chip. After searching through my cupboard, I found a bag of toasted, whole almonds. A quick search through my bookmarked recipes revealed maki's chocolate chip and almond cookies, but I didn't want thin, crisp (though delicious-looking) cookies on this occasion. I wanted something a bit more substantial.
Starting with maki's recipe, my recipe uses a bit less butter and starts with whole almonds. I coarsely chopped them in the food processor, which resulted in fine and chunky bits. This really dispersed the almond flavor through the cookies. I hesistated slightly before adding the full teaspoon of salt, but I think that in this case it brings out the flavor of the nuts really well. If you use salted butter or start with salted almonds, you will want to reduce the amount to 1/2 teaspoon salt.
This turned into a fabulous, buttery combination of chocolate and almond without the overwhelming chocolatiness of most chocolate and almond combinations (think flourless chocolate cake). They are definately a nice change from cookies with the more ordinary pecans or walnuts, too. Make sure you let them cool on the sheet for at least 5 minutes, or they will be too soft to handle. Once they have cooled, the cookies are very light and crisp the first day. The chocoalate is melty and the whole combination is simply lovely. But the flavor improves with time. After storage, the cookies soften slightly, though staying nicely moist, and the almond flavor gets a bit stronger. The flavors meld to create a suprisingly sophisticated cookie.


Chocolate Chip and Almond Cookies
2 cups flour
1 tsp baking soda
1 tsp salt
3/4 cup butter, room temperature
1/2 cup white sugar
3/4 cup brown sugar
1 tsp vanilla
1/4 tsp almond extract (optional)
2 eggs
1/2 cup toasted almonds
1 cup chocolate chips


Preheat oven to 350F. Line a baking sheet with parchment paper.
In a food processor, pulse almonds until coarsely chopped. It is fine if some pieces are very small, but you want to avoid having very large chunks.
In a medium bowl, whisk together flour, baking soda and salt.
In a large bowl, cream butter and sugars together. Blend in vanilla and almond extracts. Beat in eggs one at a time. By hand, or with the mixer on low speed, stir in flour mixture, adding almonds and chocolate chips at the very end.
Drop dough by rounded tablespoonfuls onto prepared baking sheet.
Bake for 10-11 minutes at 350F, until cookies are lightly browned.
Let cookies rest on sheet for at least 5 minutes before removing to a cooling rack.
Makes 3-4 dozen

Thursday, December 08, 2005

Cooking School: Sourdough English Muffins


Bette's Oceanview Diner is one of my favorite places in Berkeley, California. They have a cute, bustling diner feel - rare to find on this coast - and fantastic food. Their basic pancakes and scones are really excellent and their specials are equally delicious. It's hard to pick a favorite, but the enormous Dutch Bunny - a 12 inch puffed apple pancake - is definitely a consistent favorite. Even if you need 4 people to eat one. It also opens quite early, which would have swayed my opinion of it even it I didn't love the food because I'm a morning person and it sometimes seemed like things in Berkeley didn't open for breakfast until after 10am. Getting up early also prevented me from having to wait in a long line just to get in the door. When I was flipping through the Bette's Diner Pancake Handbook , I decided that based on their excellent recipe track record, their recipe for sourdough english muffins would be a good place to start to make an attempt at a non-pancake breakfast favorite I've wanted to try for some time.I was surprised at how easy these were. Once my starter was fed, I mixed up the dough and let it sit, covered, overnight. You don’t have to worry about overdeveloping the sourdough flavor because the baking soda will neutralize some of it, leaving just the right amount of sourness in your muffins.
The major change that I made in this recipe, aside from using some whole wheat flour, was to replace the milk the original called for with water. I wanted to ensure that I got the rather coarse, open texture I like in english muffins. I could only find a small biscuit cutter, so I had to use 2-inch rather than a 3-inch round. If you use a larger one, you may need to cook yours for an extra minute or two per side and you will probably get fewer than the 20 or so that I got.They tasted fantastic. They were a bit doughy when hot off the grill, but like most yeast breads, their texture stabilized once they were allowed to cool for a few minutes (they cooled quickly). Honestly, they were some of the most flavorful english muffins I've ever had - chewy, slightly sour and full of holes to catch jam and butter.


Sourdough English Muffins
(adapted from The Pancake Handbook)
½ cup sourdough starter, fed
3 cups flour
1 cup water
½ tsp baking soda
½ tsp salt
2 tbsp sugar
cornmeal

Combine starter with 2 cups of flour and 1 cup of water. Stir thoroughly, cover with plastic wrap and let sit out overnight (about 7-10 hours).
In the morning, add the baking soda, salt, sugar to the dough and gradually add the remaining 1 cup of flour, 2 tablespoons at a time, until the dough looses its stickyness. Turn dough out onto a lightly floured surface and roll until about ½ inch thick. Use a lightly floured biscuit cutter and cut the dough into as many rounds as possible. Place rounds on an ungreased baking sheet, covered with cornmeal. Sprinkle the tops of the muffins with cornmeal and leave them to rise, covered with a clean dishtowel, for about 45 minutes.
Heat a lightly oiled or nonstick skillet over high heat until very hot, then reduce the temperature to medium/medium high.
Cook the muffins for about 5 minutes on each side, turning only once. The muffins will reach a light or medium brown (turn town the temperature slightly if they cook too quickly) on both the top and the bottom when they are cooked through. Before the first flip, the sides of the muffin will start to look dry, like the edges of a pancake, when it it ready to be turned. You can peek at the underside, too.
Cool completely before storing.

Wednesday, December 07, 2005

Blogging About Food


One of the reasons that I enjoy reading food blogs is that I like food. Not in just a casual sort of way, either. I am genuinely interested in it. I enjoy reading about and seeing other people's creations and insights. I keep my blog for the same, simple reason, because I like to share with others. On my best days, I hope that I can provide interesting and useful information and on the worst... well, clearly no one aspires to the worst, but those days are testaments to the fact that recipes, technique and cooks, not to mention spell check, are not infallible. Things don't taste great all the time, nor do they look pretty, but food is good, no matter whether it is a sliced up piece of fruit or a loaf of bread that you hand-ground the wheat to make.

One of the downsides to any community is that sometimes people feel excluded or pressured to conform or compete. I am not necessarily saying that this is true of food blogging, but I have little doubt that it may happen unintentionally on occasion to some. It may seem like everyone is eating sustainably grown, local, organic produce all the time, or that suddenly everyone else is cooking with ramps. And it is true that, as a whole, we cook new ingredients and explore new cuisines, but we also enjoy simple dishes and old favorites. Some people are cutting-edge chefs and some cook only for themselves. People bake, sauté, fry and grill all manner of meats, vegetables and sweets, for voracious appetites, both carnivorous and vegan. There is no one gold standard that we are striving to equal. And there shouldn't be. I don't think any less of myself when I read a recipe for some gorgeous dish I would never imagine I could attempt to make and neither should anyone else.

In my mind, the community is a spectacular one, with new and interesting people joining all the time. Even if you don't actively blog, but are a reader, your input - whether you comment actively or read quietly from home - is valued and appreciated. The point is that the community is great because of the diversity of its members. We are not - certainly not I - all constantly hunting down the rarest cheeses or most singularly unusually vegetables within a 200 mile radius, nor do we dine at the French Laundry or Alinea every week. We are interested in these things because we are interested in food. But we are also interested in the coffee shop down the street (yes, even if it is a Starbucks), enjoying a candy bar and a dinner of leftovers.

You don't have to be some sort of culinary revolutionary to enjoy food and you don't have to be one to blog. If you are one, don't fight it and share with us. If you aren't, then share whatever you do. Whether you bake or cook, write or simply read, thank you.

------------------------------


To acknowledge the work of food bloggers and the food blogging community, Kate, the Accidental Hedonist, is hosting the 2006 Food Blog Awards, with categories on everything from best individual post to best recipes to favorite overall. What Are you waiting for? Head over and nominate your favorites!

------------------------------

Tuesday, December 06, 2005

Vegan Molasses Apple Tart


I hesitated to post this tart because I wasn't completely pleased with the way it turned out. Not because there was anything wrong with it, but simply because it wasn't what I expected. I made a crumbly, molasses cookie bottom, pressed it into the pan, baked it off and let it cool. I topped it with some very thin apple slices and baked it again. I wanted a nice, light apple tart that had a cookie-like bottom and layer of apples. What I failed to take into consideration is that the nature of many, if not most, molasses cookies is to be softer and chewier than other cookies. I did decide to post it because (a) it looked pretty and (b) it tasted simply delicious.
The first day, the tart had a crisp outer edge and a softer bottom crust, though it was still firm enough to pick up a slice and eat it out of hand. I didn't mind the soft bottom because it tasted like an extraordinarily good cookie. It probably would have been better with whipped cream or warmed, with vanilla ice cream, but that wouldn't have been in keeping with the vegan-ness of the tart. The softness of the bottom crust somehow marries the texture of the apples and the crisp tart edges.
The second day, after the leftover tart had been wrapped and stored overnight, the bottom crust virtually melted into the apple layer. This is what I was really disappointed with, though the taste was still excellent. I hoped that it would maintain its texture from the first day, but it was not to be. Consequently, I recommend sharing the tart, freshly made, on the first day and covertly eating any leftovers (should there be any) alone with a glass of tea and a spoon on the next.
I'll continue to work on the crust I have in mind, but I'll make this one again in the meatime.

Vegan Molasses Apple Tart
For the Crust :
2 tbsp vegetable oil
4 tbsp molasses
1 tbsp water
1/2 cup sugar
1 cup ap flour
1/4 tsp baking soda
1/4 tsp salt
1/2 tsp ginger
1/2 tsp cinnamon
1/4 tsp allspice
1/8 tsp nutmeg

Preheat oven to 350F. Lightly grease rectangular tart pan (like this one).
Whisk together vegetable oil, molasses and water. Whisk together flour, baking soda, salt and spices. Stir the two together with a fork until mixture is thorougly moistened. It will be crumbly. Press mixture into rectangular tart pan, pressing it into the corners and up the sides. Make sure there are no gaps.
Bake for 10-12 minutes at 350F, until slightly firm to touch.
Cool completely in the pan.
For the tart:
2 apples
1 tsp vanilla extract
1 tbsp brown sugar

Peel and slice apples very thinly. Toss gently with vanilla extract and brown sugar. Arrange apple slices in an even layer, lightly overlapping.

Bake at 400F for 20-24 minutes, until apple slices begin to brown and are tender when pressed with the tip of a knife.
Cool at least 30 minutes before removing from tart pan.
Serve the day it is made, with whipped cream, if desired.
Serves 6-8.

Monday, December 05, 2005

Maple Pecan Oatmeal Cookies

These cookies come from a good combination of fall flavors, though it is nearly the start of winter. They combine maple, cinnamon and pecans with my favorite cookie ingredient: oatmeal. The maple comes from maple syrup. I generally keep grade B on hand, since I prefer its darker flavor and slightly more syrupy consistency to higher grades.
The highlights of these cookies are the pecans I used. I bought a bag of cinnamon spiced pecans at Trader Joes, which seem to be roasted pecans with a thick coating of cinnamon. They are spicier and much less sweet than candied pecans, but are possibly even more addictive. Normally I wouldn't use chunks of pecans as my only cookie "add-in", but these are so flavorful that I couldn't resist.
I definately thought of autumn when I tasted these. The maple flavor was subtle, but present, and the pecans were a standout. Resist the temptation to add vanilla to these because it could overwhelm the other flavors. Candied pecans will work as well, but keep your eyes out when you are in the store for other sweet spices. You can always make your own, as well. These were a nice change from regular oatmeal cookies, flavorwise, but they still had a nice softness and a crisp edge.


Maple Pecan Oatmeal Cookies
1 cup ap flour
½ tsp cinnamon
½ tsp baking soda
1/s tsp baking powder
¼ tsp salt
1/2 cup butter, softened
1/3 cup brown sugar
1/3 cup maple syrup
1 egg
1 cup rolled oats (regular or quick cooking)
½ cup coarsely chopped cinnamon glazed pecans


Preheat oven to 375F. Line a baking sheet with parchment paper.
In a small bowl, whisk together flour, cinnamon, baking soda, baking powder and salt. Set aside.
Cream butter and brown sugar together in a large bowl. Beat in maple syrup and egg. Stir in flour mixture and oats, adding pecans at the last minute. Stir only until just combined.
Drop by rounded tablespoonfuls onto parchment lined baking sheet.
Bake at 375 for 9-12 minutes, until set and golden brown around the edges.
Makes about 2 dozen.

And before I forget, I just want to say thank you to everyone who voted for my Rooibos Raisin Rolls in last month's TeaChef contest. They were the winning recipe!

Saturday, December 03, 2005

Hot Cocoa Mix


You're probably wondering what the heck that is in the photo. Unless you read the title for this post, in which case you may have guessed that it is a hot cocoa mix.
Is there anything better than a big, steaming mug of cocoa on a cold day? Well, I'm sure there are some things (world peace, etc.), but it is pretty high up on the list. It is chocolatey, sweet and not nearly as heavy as hot or drinking chocolate, which is typically made with melted chocolate instead of, or in addition to, cocoa powder.
The proportions I used here have enough sugar to make a really creamy ice blended coffee drink when you add it to a cup full of ice, half milk and half strong coffee. I know that some of us won't be thinking about iced coffee drinks for a while, but if you're south of here - oh, say in Australia or something - this is probably a usedful tip. The powdered milk makes any drinks extra creamy when they're made with milk, but it also allows you to make the cocoa with water instead without loosing too much flavor. Vanilla powder is made from ground vanilla beans. It can be a bit difficult to get ahold of because your neighborhood market isn't likely to carry it. It adds a hint of vanilla flavor and boosts the cocoa if you use it, but the mix tastes great without it, too.
This mix makes a great gift because it will keep for quite a long time. Just pack it into a tin with some marshmallows and cookies and you can check someone off you holiday shopping list.


Hot Cocoa Mix
3 tpbs unsweetened cocoa powder
7 tbsp sugar
4 tbsp dry nonfat milk powder
1 tsp vanilla powder (optional)

Combine all ingredients in a lidded container and shake well. Store covered
Makes about 1 cup.

For gift giving, make sure to include this information on the label:
For hot cocoa, mix 2 spoonfuls into a mug of hot water or milk.
For ice blended cocoa, fill a cup with ice to the top, then halfway with mik and halfway with strong, cold coffee. Add two heaping spoonfuls of cocoa mix and blend in a blender until smooth.

Friday, December 02, 2005

PB&J Crunch Cookies


I already know a recipe for good some fine peanut butter cookies, but a little variety is never a bad thing so I didn't hesitate when I spotted this recipe for Peanut Butter Crunch Cookies in Real Simple. While they used chopped peanuts, they also had the interesting inclusion of puffed rice cereal (aka Rice Krispies). The little girls in the photo that accompanied the recipe in the magazine certainly seemed to be enjoying them, so I was sold.
Peanut butter cookies can be either chewy or crumbly. The crumbliness is rather unique to peanut butter cookies, as it is the result of an incredibly tender yet dry crumb that melts in your mouth and makes you wonder if you should have a glass of milk as you reach for your next cookie.
These cookies are certainly crumbly in the way that only peanut butter cookies can be crumbly and are filled with crisp bits. The crisps don't seem like puffed rice, since they compress with the moisture and heat of baking. Instead, they seem like tiny pieces of peanut in the final cookie. It's a very neat texture and no one will guess if you don't tell them.
I didn't have any whole or chopped peanuts on hand, so I used 1/4 cup natural, chunky peanut butter in place of them in my recipe. I used ordinary, supermarket smooth peanut butter for the 3/4 cup called for; the recipe did not specify and I figured a child-friendly recipe might be calling for a national brand.
I would say that these are good with and without jam. Actually, I loved them with jam, but it softened the cookies a bit on the second day. If I were making another batch, I would do just what I did this time: half with jam and half without. The half without jam will keep (in my opinion) much better, retaining their crispy crumbliness. Eat the PB&J ones on the first day. It won't be hard to do.


Peanut Butter Crunch Cookies
(adapted from Real Simple)
1 cup ap flour
1/2 tsp baking soda
1/2 tsp salt
1/2 cup butter, room temperature
1/4 cup sugar
1/2 cup brown sugar
1 egg
3/4 cup smooth peanut butter
1/4 cup natural, chunky peanut butter
2 cups puffed rice cereal (Rice Krispies)
Raspberry jam or preserves (optional)


Preheat oven to 375F.
Whisk together flour, baking soda and salt in a small bowl.
In a large bowl, beat together butter and sugars. Add egg and mix until thoroughly combined. Mix in peanut butters.
With the mixer on low speed, gradually add in the flour. Using a large spatula, carefully fold in the rice cereal.
Roll the dough into 1 1/2 inch balls and place on a lined baking sheet. Using your thumb, poke a shallow well into each cookie and fill with a bit of raspberry jam. If baking plain, simply flatten the cookies slightly.
Bake for 11-13 minutes, until golden brown around the edges. Allow to cool on the baking sheet for at least 5-10 minutes before transferring to a rack to cool completely.
Makes 3 1/2 dozen.

-----------------
In other news, Jessica is coming into town (meaning Los Angeles) at the end of December and we wanted to arrange an LA Food Blogger Lunch for December 30th. Since we'll probably want to make a reservation at Newsroom, please email us and let us know if you want to come. Jessica even said she'd try to bring some of her world famous macaroons!

Thursday, December 01, 2005

Cooking School: Cloud-like Lime Souffles


For me, almost anything paired with citrus makes a winning combination and I have been on a citrus kick for the past two weeks. Maybe it will pass and maybe it won't, but I'm certainly going to enjoy a good thing while it lasts.
Combining the two main components of last week's Lemon Meringue Pie, curd and meringue, I made some simple Lime Souffles this week. The recipe is a slight adaptation of a Donna Hay recipe, from her book Modern Classics 2. Though the name makes it sound like a sequel, it is actually the sweets volume of her two-part Modern Classics set. This book covers everything from cookies to cakes to puddings, including souffles.
This recipe, given in the book as a Lemon Souffle, is used by Donna to liiustrate a basic souffle. A simple syrup mixture is thickened with cornstarch and, once cooled, is folded into beaten egg whites. The total active cooking time is less than ten minutes, including juicing a few limes and beating the egg whites, though the lime base does need to be prepared in advance and given a chance to cool to at least room temperature. It can be kept, covered, in the refrigerator if you want to make it a day or two ahead.
There is no fat added to this souffle and the tartness of the lime cuts cleanly through what turns out to be the softest cloud of fluffy souffle. I am not sure that I have had a souffle with this even and delightful a texture before, but I will definately be making it again, both with lemon and possibly even orange. I think that this is a great souffle to test your skills with because it is so easy and, tastewise, so rewarding.


Lime Souffles
3 1/2 ounces (100mL) fresh lime juice
2 tbsp water
1 cup sugar, divided
1 tbsp cornstarch
1 tbsp water
5 egg whites (I used 4 extra large), room temperature
butter and sugar, for greasing the ramekins


In a small saucepan, whisk together lime juice, 2 tbsp water and 2/3 cup sugar. Bring to a boil. Meanwhile, throughly combine 1 tbsp cornstarch with 1 tbsp water in a small bowl. Whisking constantly, pour into lime syrup and continue cooking for 1 minute, until slightly thickened. Transfer to a medium bowl, cover with plastic wrap and refrigerate until cool.

Preheat oven to 350F.
Butter six, 6-ounce ramekins and coat them with sugar.
In a large bowl, use an electric mixer to beat egg whites until foamy. With the mixer on high speed, stream in the remaining 1/3 cup sugar and beat to soft peaks. Stir 1/4 of the egg whites into the lime mixture to lighten it. Pour lime mixture into the large bowl with remaining egg whites and fold gently until thorougly combined.
Distribute mixture even between ramekins, making sure each souffle is level. Use your finger to wipe the rim of each ramekin, which will ensure a clean rise.
Place on a baking sheet and bake for 12-15 minutes, until souffles are a light golden brown.
Serve immediately.
Makes 6.