Sunday, July 31, 2005

Sunday Brunch: Very Blueberry Muffins


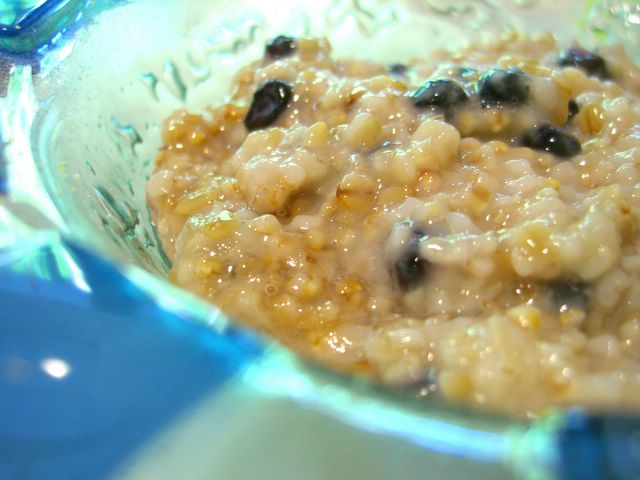
Though it may not be immediately apparent, there are a lot of blueberries in these muffins. This is, of course, the best way for blueberry muffins to be.
These came about as the result of having a bit of sour cream and a bit of blueberry juice in my refrigerator. There wasn't enough of either to do anything elaborate and, since it's a weekend morning, I felt like baking. I felt that sour cream woul add a bit or richness to what is a very low fat muffin. If you don't have sour cream, you can substitute milk, buttermilk or yogurt, but increase the oil to 2 tablespoons for a more tender muffin.
These are great fresh out of the oven. Very moist and sweet. Yes, they're sugary. But sometimes we need some sugar to get going in the morning. The lemon gives a hint of brightness to the muffin. I like the leftovers best when they're reheated a bit, too.


Very Blueberry Muffins
1 ¾ cups flour
½ tsp baking powder
½ tsp baking soda
½ tsp salt
1 cup sugar
1 tbsp oil
zest of one lemon
1 egg
¼ cup sour cream
½ cup blueberry juice or milk
1 cup blueberries, fresh or frozen
¼ cup dried blueberries
1 tbsp sugar

Preheat oven to 350F. Line a muffin tin with paper liners.
Whisk together flour, baking powder, baking soda and salt. Set aside.
In a large bowl, beat together sugar, oil, lemon zest and egg for 1 minute or until smooth. Stir in sour cream and blueberry juice. Gently stir in dry ingredients until almost fully combined. Add the blueberries and continue mixing until just combined.
Spoon mixture into muffin tins, filling each one 2/3 full. Sprinkle with sugar.
Bake 20-23 minutes at 350F, until tester comes out clean and the muffin springs back when lightly pressed.
Makes 12.

Saturday, July 30, 2005

IMBB #17: TasteTea Tea Bread


While I am a dedicated coffee drinker, I do love tea. One of my favorite coffee shops, The Coffee Bean and Tea Leaf carries over 40 original tea blends, one of which I picked up the very day that IMBB #17: TasteTea was announced by Clement of A La Cuisine!: Pomegranate Blueberry Tea. This tea makes a fabulous iced tea because it is a black tea filled with dried fruit. The natural sweetness really shines through when you brew it. I thought this was a sign that I was meant to use it for my entry. Alas, it was not to be. The tea, while lovely, is just a tad too fruity for what I had in mind.
Instead, I decided to use Stash Double Spiced Chai tea to make a tasty apple bread. I added powdered milk because I wanted the added bit of richness but didn't want a milk flavor to overwhelm the tea, though this is a particularly spicy tea and I think it would have been fine.


Chai-Tea Apple Bread
1 tbsp yeast
1 cup stong chai tea, brewed and cooled until warm (105F)
1/2 cup powdered milk (nonfat is fine)
1/2 tsp cinnamon
1 1/2 tsp salt
3 tbsp brown sugar
2 1/2 - 3 cups ap flour, plus more for dusting
2 cups apples, peeled and chopped, plus 6-8 thin apple slices
1 tbsp brown sugar

Mix yeast, tea and 1 cup of flour in a large bowl. Let stand for 15-20 minutes, until foamy and the mixture has risen a bit.
Stir in powdered milk, cinnamon, salt, sugar and 1 cup flour. Add remaining flour gradually until the dough comes together and pulls away from the side of the bowl. Transfer dough to a floured work surface and knead until smooth and elastic, about 5 minutes. Place in an oiled, covered bowl and let rise until doubled, 1 1/2 hours.

Meanwhile, combine apples with 1 tbsp brown sugar in a small bowl.
Once dough has risen, flatten in gently onto work surface. Place apple mixture onto dough, reserving the apple slices. Knead apple pieces into dough gently, giving the bread about 4 turns. They will look almost ready to poke through. Shape into an oblong loaf and place on a cornmeal dusted baking sheet. Make 6 or 8 small slashes across the bread and tuck one apple slice into each one. Allow bread to rise until nearly doubled, 1 hour.

Preheat oven to 400F.
Bake bread for 30 minutes, until the bottom sounds hollow when tapped and the loaf in nicely browned. If it starts to get too dark on top, just cover the bread loosely with a bit of foil.
Allow to cool on a wire rack before slicing.

Thursday, July 28, 2005

Cooking School: Self Frosting Cupcakes


Thank you Donna Hay.
If you don't know who Donna Hay is, imagining a cross between Nigella Lawson and Martha Stewart from Australia will put you in the general vicinity. She is a cook and food stylist with her own lifestyle magazine and bunches of cookbooks, all available the world over. Her recipes are simple and generally unfussy, but always look good enough to be the star of the meal. The bonus is that they taste as good as they look.
These cupcakes are a great example. The gorgeous swirl on top is from Nutella topping the batter and being swirled around with a toothpick. The batter for these cupcakes is very short - meaning that it has a high proportion of fat to flour - and very rich. Because of this, it is very difficult to swirl the topping throughout the batter. Swirling it around the top of the cake bakes the "frosting" right in, so there is no messy goo on top. These are perfect for taking to a potluck or a picnic.
The cupcakes are tender, rich and very, very tasty. These are really perfect for anyone who doesn't like things to be too sweet. The Nutella has a nice presence. I wouldn't increase it, but if you want something really decadent, fill the tin half way with batter, add a teaspoon of nutella, top with the remaining batter, add the topping, swirl and bake.
Even though I usually follow the recipes pretty strictly here in the cooking school features, I admit that I took some liberties this time. For example, I used Nutella instead of the peanut butter that was originally called for and, because of the richness of the topping, I reduced the butter slightly. I didn't reduce it much, but 12 tablespoons was quite a lot of butter for 12 cupcakes.


Nutella Frosted Cupcakes
10 tbsp(140 grams) butter, softened
3/4 cup white sugar
3 eggs
1/2 tsp vanilla
1 3/4 cups (200 grams) sifted ap flour
1/4 tsp salt
2 tsp baking powder
Nutella, approx. 1/3 cup

Preheat oven to 325F. Line 12 muffin tins with paper liners.
Cream together butter and sugar until light, 2 minutes. Add in eggs one at a time, until fully incorporated. Don't worry if the batter doesn't look smooth. Add vanilla. Stir in flour, salt and baking powder until batter is uniform and no flour remains.
Using an ice cream scoop, fill each muffin liner with batter. They should be 3/4 full, if you're not using a scoop. Top each cake with 1 1/2 tsp Nutella. Swirl Nutella in with a toothpick, making sure to fold a bit of batter up over the nutella.
Bake for 20 minutes.
Remove to a wire rack to cool completely.
Makes 12.

Tuesday, July 26, 2005

Orange, Honey and Chipotle Chicken

It's a good sign when the things you make turn out to look just like the pictures. It's also a good sign when it tastes as good as it looks.
This recipe from Bon Appetit caught my interest in an article about great barbeque. I only made the glaze, instead of additionally marinating the chicken, and used it on both chicken and grilled eggplant slices. Delicious! It was slightly sweet, tangy and spicy. All the flavors melded very well. I will definately make this again.
This recipe can be doubled, which I did, but be aware that it takes a long time to reduce that much liquid down to 1 1/3 cups.

from Bon Appetit
2 cups orange juice (fresh squeezed, if possible!)
5 tbsp honey
1/4 cup soy sauce
2 tbsp orange zest
2 teaspoons minced canned chipotle chiles in adobo sauce*


Combine all ingredients except chiles in a saucepan and boil until reduced to 1/3 cup, about 30 minutes. Stir in chiles.
Use as a glaze in the last few minutes of grilling, or as a sauce when baking or roasting.
Makes enough for 1 chicken or 4-6 chicken breasts.

Monday, July 25, 2005

More of Maida: Mexican Chocolate Cookies


Lest you think that I am posting all of Maida Heatter's recipes, be assured that this one is quite popular. It was published in Saveur magazine earlier this year, too. So I have no qualms about publishing it, again, here.
These are icebox cookies, the slice-and-bake variety of cookies that are great to have in your freezer because the dough will keep for weeks and you can baked them off as you crave them. This specific cookie is no ordinary cookie, however. Because of its use of a variety of spices, the cookie tastes much better as it ages and the flavors have a chance to meld. This is a characteristic of many spice-filled products, from chili to gingerbread. The spices included here are cinnamon, cocoa and cayenne pepper. The cookies will have a tiny hint of pepper when they first come out of the oven, but after ageing for several days, the spice will be noticeable.
I love the heat from these cookies. It makes them fun to eat and they pair wonderfully with hot cocoa or coffee. In the summer, though, I think they make perfect little ice cream sandwiches. Use vanilla or dulce de leche for an amazing snack. You can even make the sandwiches ahead of time and store them, wrapped, in your freezer for emergency snacking.

Mexican Chocolate Icebox Cookies
1 1/2 cups ap flour
3/4 cup cocoa powder
3/4 tsp ground cinnamon
1/2 tsp cayenne
1/4 tsp salt
1/4 tsp freshly ground black pepper
12 tbsp butter, room temperature
1 cup sugar
1 1/2 tsp vanilla extract
1 egg
Sift together flour, cocoa, cinnamon, cayenne, salt and pepper in a medium bowl.
In a large bowl, cream together butter and sugar. Beat in vanilla extract and egg. Gradually add flour mixture until dough is uniform in color and no unmixed flour remains.
Shape in two 9" long logs and wrap tightly in plastic wrap or foil. Make sure your wrapping is airtight.
Freeze overnight or up to 6 weeks.
When ready to use, preheat your oven to 375F and bake for 8-10 minutes. Cookies should feel a bit firm at the edges. Store in an airtight container when cool.
Makes 4 dozen

Sunday, July 24, 2005

Berry Delicious Margaritas


Not only are berries in season, but they are on sale at the market! How could I resist coming home with lots of fresh blackberries, raspberries and strawberries.
I accidentally stumbled upon this recipe on Epicurious and knew it was meant to be.
The prep took a bit of work, since the berries must be pureed and strained to remove any seeds. I considered trying to purchase berry juice, but they all included banana and, frankly, a banana margarita does not sound appealing to me. The result was outstanding: extra smooth and very fruity. I used equal parts blackberries and raspberries, but you could tip the scales either way as long as the proportions stay the same. The only problem I had with the original recipe was that it didn't tell me how much puree I would need to make the drinks. I noted how much to look for below. I rimmed the glasses with salt. Sugar could be used instead, but I personally think salt is the way to go.
Serve these at a bbq. You only need these drinks, a bowl of salsa and some chips to start a great party.


Triple Berry Margaritas
2 cups blackberries
2 cups raspberries
1/2 cup fresh lime juice
2/3 cup sugar
1 1/2 cups tequilla
2/3 cup Grand Marnier
2 cups strawberries, frozen but thawed slightly
5 cups ice, divided

Whizz or blend blackberries, raspberries, lime juice and sugar until smooth. Strain through a fine sieve to make about 3 cups of puree. Stir in tequila and Grand Marnier and refrigerate until ready to use, or at least 1 hour.

Combine 1/2 of berry-lime mixture with 1 cup of strawberries and 2 1/2 cups of ice in your blender. Blend until smooth and serve in salt rimmed glasses. Repeat with remainder of berry puree, strawberries and ice.
Serves 8-10.

Saturday, July 23, 2005

Sour Cream Pound Cake


Pound cakes have been around for a long time and began with one pound each of flour, butter, sugar and eggs, hence the name. A cake made from the original recipe is going to be plain, dense and a little on the dry side.
I have never heard anyone request a plain, dense, dry cake.
Modern pound cake is lighter, but still very dense and quite moist. Its simplicity makes it a popular target for flavors like vanilla, almond and lemon, though some people will prefer the subtlety of the natual butter and egg. Any flavor will be featured beatifully in a cake like this. Sour cream is a particularly popular addition to pound cake because it adds a slightly tangy richness and a lot of moisture to the cake.Pound cake, because if its simplicity, is commonly used as a vehicle for fresh fruits and whipped cream. Instead of relegating it to a sideline dish, I like to make it the star.
In this recipe, I reduced the number of whole eggs and increased the number of whites, both for health and to whiten the color of the final cake. This particular cake is very moist and vanilla-y. It is wonderfully dense with a tight crumb, without being heavy at all. Covered, it keeps for several days. I topped it with a lemon glaze, but I really prefer it plain. This cake is outstanding on its own.


Sour Cream Pound Cake
3 cups ap flour
1/2 tsp baking powder
1/2 tsp baking soda
1/2 tsp salt
2 eggs
4 egg whites
2 tsp vanilla
1 cup sour cream
10 tbsp butter, softened
2 cups sugar
Preheat oven to 350F. Grease a 10-12 cup bundt pan.
Sift together flour, baking powder, baking soda and salt into a medium bowl. In a small bowl, lightly beat eggs and egg whites together.
In a large bowl, cream together butter and sugar until light and smooth, 2-3 minutes. With the mixer on low speed, gradually pour in eggs until well mixed. Stir in 1/3 of flour mixture until blended, followed by 1/2 cup of sour cream. Repeat with another addition of flour, followed by remaining sour cream. Stir in the rest of the flour until batter is just smooth.
Don't worry if the batter looks curdled at any point, just keep going and it will smooth out.
Spoon batter into prepared bundt pan and tap it on the counter to eliminate any bubbles. Bake for 50-55 minutes, until tester comes out clean and the cake springs back when gently pressed.
Let cake cool in pan for 10 minutes, then turn out onto a wire rack to finish cooling.
Serves 12-16

Thursday, July 21, 2005

Cooking School: Suprising Chocolate Pie


In a bit of a twist this week, the recipe I've made came from Good Eats, Alton Brown's TV show, instead of a cookbook.
In every episode of Good Eats, AB picks an ingredient or a cooking method and explains and investigates it in depth. He will cover great recipes and great techniques, even including which gadgets to use and why. He will also include lots of historical and scientific information related to the topic at hand. All this is done with a sense of fun in an entertaining production that takes food television why beyond the average cooking show. I'm a big fan. If the show is aired in your area, check it out.
Some time ago, I caught an episode about Tofu where Alton Brown made a chocolate tofu pie. I was led to believe that this episode would rerun this week, but it did not and thus I was unable to refresh my memory of the show. Fortunately, Traditional chocolate pies often contain lots of cream and several eggs. They taste great, but waistband-friendly, they are not. It's a very simple pie that is much healthier than your typical chocolate pie because tofu takes the place of cream and eggs.
My only complaint with the recipe is that it calls for "a block" of silken tofu. I have several blocks of tofu in my fridge which varied in size from 6-14 ounces. I used a 12 ounce block. I had to scrape down my food processor several times while making the filling because nothing would look worse than a chunk of pale white in a slice of dense cholate pie.
Perhaps I should have titled this post "How to trick your friends into eating tofu" because my tasters (and coworkers) loved this pie. It was dense. It was creamy. It was chocolatey. It was great! I though detected a subtle soy taste, but that could have been my imagination as no one else appeared to notice anything. I did use a store bought chocolate graham cracker crust for this recipe rather than making one. I think a graham cracker crust provides a nice textural contrast for the filling as well as adding sweetness to the dish.
I prefer to call this Chocolate Silk Pie, versus the original title of Moo-less Chocolate Pie, both because it describes the pie to the people you serve it to and because it's a cute reference to the silken tofu in the filling.

AB's Chocolate Silk Pie
12 oz silken tofu
2 cups chocolate chips
1/3 cup coffee liquor (chocolate and orange would work well, too)
1 tsp vanilla
1 tbsp honey
1 graham cracker crust (chocolate, if available)


Place tofu and honey into a blender or food processor.
Melt chocolate chips and coffee liquor together until smooth in a double boiler. Remove from heat and stir in vanilla. Pour over tofu and whizz/blend the mixture until completely smooth, stopping to scrape down the sides of the bowl occasionally.
Pour into a pie crust and chill until firm, at least 2 hours.

Serves 10.

Wednesday, July 20, 2005

Spiced Up Ginger Cookies

Good things come from liquor stores. Besides the liquor, I mean.
The Liquor Control Board of Ontario, LCBO, regulates the sale of alcoholic beverages in Ontario, Canada. Here in California, unlike many other places, all you need is a permit to sell liquor and you can purchase it just about any time at the market or corner store. But corner store does not have a wonderful publication put out several times a year by the LCBO. A very good (Canadian) friend of mine first turned me on to Food&Drink, which is filled with amazing photographs, wonderful recipes and very useful drink pairing suggestions. This is far and away the best marketing plan they could have devised, in my estimation. If I picked out a recipe, I would be likely to purchase whatever they recommended to accompany it. And how else would I know what pairs well with these cookies?
The answer is more cookies.
These Spiced Up Ginger Cookies are really good. Certainly the best in recent memory, if not the best chewy ginger cookies I've ever had. They have a lot of spice. They have nice crispy edges when they're freshly baked. They use oil instead of butter so they remain very chewy, even after a few days!
I'm reprinting the recipe here. I added a pinch of salt and rolled the cookies in sugar before baking. The rolling could certainly be omitted, but I love the way it looks.


Spiced Up Ginger Cookies
2 cups ap flour
1 tbsp ground ginger
2 tsp baking soda
1/4 tsp salt
1 tsp ground cinnamon
1/2 tsp each ground cardamom and black pepper
1 cup granulated sugar
2/3 cup vegetable oil
1 egg
1/4 cup molasses
1/2 cup chopped candied ginger
1/4 cup coarse sugar, for rolling
Preheat oven to 350F and line a baking sheet with parchment paper.
In a medium bowl, whisk together flour, spices, baking soda and salt.
In a large bowl, beat together sugar and vegetable oil. Beat in egg and molasses until smooth. Stir in flour mixture until well combined, then add in candied ginger.
Shape dough into 1 inch balls, roll in coarse sugar and place on baking sheet. Bake 7-8 minutes until very lightly browned.
Let cookies cool for 3-5 minutes on cookie sheet, then remove to a wire rack until cool.
Makes 3 dozen.

Tuesday, July 19, 2005

Fresh Tomato Pasta Sauce


One of the best uses for fresh tomatoes is pasta sauce. This is particularly true when you have a jungle-like "garden" of tomato plants threatening to take over your yard. Pick the tomatoes, wash them, toss them in salads, sandwiches, soups and anything else you can think of. The problem is that these plants produce a lot of tomatoes. Recipes that use multiple tomatoes are suddenly highly appealing to me.
Pasta is a great, easy dinner. Pasta sauce from fresh tomatoes is only marginally more involved that using jarred sauce. Including prep time, it takes about 30 minutes from start to finish. While your sauce cooks, bring a large pot of water to a boil, add salt and cook your pasta. The pasta should be done around the same time as your sauce. Everything is homemade and perfect for a weeknight dinner.
This sauce is very simple and tastes very fresh. Use a shaped pasta to catch pieces of the sauce, not a long noodle.


Fresh Tomato Pasta Sauce
1 medium onion
2 large cloves of garlic
1 tbsp olive oil
8 medium-large tomatoes
2 tbsp fresh basil, plus more for garnish
1/4 tsp red pepper flakes
salt and pepper

Heat olive oil in a large sauce pan over medium heat. Dice onion and mince garlic. Sautee onion and garlic until soft and fragrant, about 3 minutes, stirring occasionally. In the meantime, coarsely chop tomatoes into small pieces. Add them to the pan. Add basil, red pepper flakes, salt and pepper and simmer sauce, stirring occasionally, until it reduces and the tomatoes are very tender; this should take 15-20 minutes.

Serves 3-4, depending on how saucy you like your pasta.

Meat Variation, shown above:
As sauce simmers, heat 1 tbsp oil over medium heat in a medium sauce pan. Break 1/2 pound of ground beef into small chunks and brown in the oil. Drain some of the grease from the meat, then add beef into the tomato sauce and continue to simmer until the sauce is thickened.

Sunday, July 17, 2005

You can't go wrong with Maida Heatter


You can't go wrong with Maida Heatter. I'm sure that there are recipes of hers that are not universally popular (Check out the judging panel's comments in Cathy's Mondays with Maida to see if they ever find a bad one), but I have yet to try a recipe that does not work. And, of course, I love just about all of them.
Case in point, these cardamom cookies struck me as calling for an unusual mixing process. The spice, baking soda and salt were creamed into the butter before the sugar was added. Perhaps this is for more even distribution of the spice in the cookies? In any event, I went ahead with the recipe as written with only two small changes. First, I slightly increased the cardamom and did not use fresh ground. Too lazy for that. It is well over 100F here today and I am not grinding spices. Please overlook the illogic in refusing to grind spices but unhesitatingly running my oven to bake. Second, I added some vanilla because I think that cardamom and vanilla are an amazing combination.
If you do not know who Craig Claiborne is, take a peek at his biography. Among other things, he definately knew a good cookie. You can read the original recipe text here, where it is reprinted from Maida Heatter's Brand-New Book of Great Cookies.
I have no guilt at reprinting the recipe here because I love these. I also simplified them into drop cookies because, to blame the heat again, I didn't feel like rolling them out.
The cookies are slightly chewy, slightly crunchy and slightly shortbready. They're also very good.


Craig Claiborne's Cardamom Cookies
2 1/4 cups flour
1 tsp cream of tartar
1/2 cup butter, room temperature
3/4 tsp ground cardamom
1 tsp baking soda
1/4 tsp salt
1 cup light brown sugar
1 egg
1 tsp vanilla (optional)

Preheat oven to 350F.
Sift together flour and cream of tartar into a medium bowl.
In a large bowl, cream butter, cardamom, baking soda and salt. Add sugar and beat until well combined. Beat in egg and vanilla. Gradually stir in flour mixture.
Shape dough into 1 inch balls and flatten them slightly with the palm of your hand onto a parchment lined baking sheet. They will spread a bit, but not too much, as they bake.
Bake for 10 minutes, until cookies are a light, golden brown. Let them rest on the baking sheet for several minutes before removing to a wire rack to cool completely.
Makes 45 cookies.

Saturday, July 16, 2005

SHF #10: Oh, Honey - A roundup? For me?


First and foremost, I want to thank everyone who participated in this month's Sugar High Friday. All 50 of them! Let's see what we ended up with, shall we?


Kicking us off is the creator of Sugar High Fridays, Jennifer, with Bee-Nut Butter Ice Cream Sandwiches.
Lashings of honey topped the Honeyed Oranges with Baked Sweet Ricotta that EatzyCath made.
The Baker contributed not one, but two honey treats: A Honey of a Honey Cake and Turrone.
Lori submitted her first ever SHF entry with a sticky, soft and crunchy Honey-Almond Crunch Cake.
Highlighting the theme ingredient, AugustusGloop brings us some wonderfully addictive Honey Snaps.
Piggy presents a simple and elegant Phyllo Nests with Nectarines and Honey - made and eaten in less than 30 minutes!
Not one, not two, but three great summer desserts were prepared by Ruth: Nectarine Tart with Honey and Pistachios, a Honey Cake and a Fruit Salad with Lavender Honey.
J was still thinking of tarts from last month's theme and submitted a Fig & Honey Caramel Tart with Miel du Gatinais Parfait.
Michelle grilled up a summer treat with Grilled Honey Glazed Stone Fruit with Honeyed Mascarpone.
Elderflower and Champaigne Honey Flapjacks, using some unusual honey, were baked up by Dagmar.
boo_licious whipped up some Honey Mousse with Honey Mango Sauce.
Stephanie is a girl after my own heart with her S'mores Sunday featuring Graham Cracker Honey Ice Cream.
Amy topped her ice cream with Honey Orange Cinnamon Sauce.
Andrew's less than traditional presentation of Almond Tuilles with Honey Cream still tasted great.
First time participant Chris made an Apple Compote with Honey Caramel Sauce.
The Skinny Epicurean highlighted her hand gathered, gift-from-a-remote-tribe-in-Oman honey with her Honey and Roasted Cashew Blondies.
Ji's first SHF entry is simple and summery: Honey Basted Peaches with Mascarpone Cream.
Linda jumps on the bandwagon with Ginger~Honey Mangoes with Honey Mousse and Ginger~Honey tuilles.
Stephen walks the line between sweet and savory with his Fig, Goat Cheese, Rosemary and Honey Tart.
Goat cheese is also featured in Ann's Goat Cheese Mousse with Fig and Orange Compote in Honey Sauce.
Mrs. Happy Housewife whipped up her refreshing Parlez Vous Parfait, with Honey Almond Granola.
The Muffin Man made Fresh Cheese and Honey Tartlets, using a honey beer in the pastry!
Mika's Baklava Inspired Honey Gelato has me reaching for a spoon.
The Honey Butter Scrolls from Clare are what I'm having for breakfast soon.
Part Time Pro-Bono Baker's Honey Pistachio and Rum Palmiers balance the natural sweetness of honey with a good spalsh of rum.
Conny cooked up a batch of Honey Orange Yogurt and Granola.
Keiko is always inspiring with White chocolate and honey cream summer berry parfaits with lavender-scented meringues.
Celia's simple and delicious Honey Cake will have your co-workers clammoring for more!
Miss Maco's spicy Honey Cake is a refershing look at tradition.
Alice took advantage of some family resources to make her Grapefruit Raspberry Honey Jelly.
Cathy didn't commit to a name and left us with some delightful looking Chai or Honey Ice Cream Zarah's presentation of Honey Glazed Cherries served in a Martini Glass would bring elegance to any summer party.
Get a double dose of honey with Megan's Star Anise Pinenut Tart.
Ajay serves up a sweet batch of Honey Banana Pancakes.
Eternal Sunshine Mousse and Sunburn Salve from McAuliflower is exactly what I want on a hot summer day.
Sweet, simple and quick is the mantra of the day with Christine's Honey Roasted Nectarine with Honey Ricotta.
Jennifer outdid herself with Triple Honey Cheesecake Cups with Honeyed Figs.
I learned the meaning of the word "scroggin" when I read Stef's post about GORP Balls.
Jeanne was sent spinning with delight by Lavender and Wildflower Honey Creme Brulee.
Niki finally found a great Dutch Honigkoek recipe, the perfect breakfast for winter in Melbourne.
Barbara's Breakfast on the Run would be a refreshing start to any day.
Ana contributed another one of her mother's recipes, a typical, delicious Bolo de Mel.
Emily's beautifully named - and tasty - The Silk Road at Sunset dessert is a worthwhile effort.
Nupur has an easy and sweet Tropical Honeyed Banana Sundae.
Sometimes, when she's not in the mood, she's not in the mood. Liz learned to take no for an answer while she baked her Honey I Shouldn't Have Cake.
How could anyone say no to Lyn's Honeyed Fig and Mascarpone Creme Brulee?
Carolyn takes us back over the history of her traditional Nougat Blanc.

Try out Becky's dessert version of anitalian hors d'oeuvre: Sweet Polenta Crostini with Mascarpone, Blackberries, Pistachios and Wildflower Honey

Emily just slipped in with her spur of the moment Honey Bunches.
Nicky conducted a honey tasting at a specialty shop, but is looking to others for culinary inspiration. I don't think she'll have any trouble with all these great entries!

Finally, we have the honey drizzled scones that made my SHF breakfast, in the photo above, and my attempt at reconstructing an Australian classic with my Homemade Violet Crumble.

Thanks for a great event, everyone!

Friday, July 15, 2005

SHF# 10: Homemade Violet Crumble


My entry for this month's Sugar High Friday comes from my addiction to Violet Crumble.
Ok, ok. I am overstating things a bit. It's not an addiction because, frankly, it has always been difficult to get the stuff in the States. Fortunately for me, it is becoming much more common in stores and markets.
Violet Crumble is Australia's most famous candy bar. It is a delicate, crisp honeycomb enrobed in creamy milk chocolate. It was first sold in the 1920s by Abel Hoadley of Hoadley's Chocolates, later acquired by Nestle Australia. Hoadley originally wanted to call his unique candy "Crumble" after the way that it breaks apart, but this was an unprotectable name. His wife, an avid gardener, inspired the addition of Violet to the name, after both her favorite flowers and the color of the wrapper.
This starts with a syrup of sugar, corn syrup and honey. After it is cooked, baking soda is added to create bubbles. My recipe came from the Gourmet Cookbook and I have to say that I am not entirely satisfied. I wanted it to be lighter and less dense, though the flavor is great. I'll be trying this again and probably adding more baking soda in an attempt to get closer to the commercially made version.

Thursday, July 14, 2005

Cooking School: Grilled Pizza


Given the heat wave that some of us are experiencing now that summer is upon us (namely me, here, in Southern California), I thought that I would try my hand at some outdoor cooking this week. It's only logical: to avoid heating up your kitchen by cooking indoors, you just stand in front of a 500 degree grill outside where it's already hot. And not being one to bypass carbs, I decided to make grilled pizza this week.
Pizza dough is not something new to me. This particular recipe was given to me in class a few weeks ago. It makes a really soft dough. It isn't wet, but it is very flexible. This makes it very easy to handle and easy to roll out. I find that it is actually much easier to roll out the dough for a pizza when you begin making the dough yourself because it takes time to develop a feel for the dough. If you don't want holes, stick with rolling for a while.
I had no idea what to expect from grilling this dough. I heated up my BBQ - it's a gas grill - to high heat. I laid the dough down and after a couple of minutes on each side, it was done! Toppings have to be put on after the first side is grilled. Since they only get a brief cooking, it's best that you cook them in advance. Keep the amount of cheese on the low side, otherwise it won't melt. I topped one with corn, tomatoes, red peppers, onions, black beans and clilantro (above) and the other with sauce, mozzarella, chicken and sauteed onions and peppers (below).
The dough turned out to be very crisp and flakey. I would definately grill dough either as pizza or as an appetiser at a BBQ.


Grilled Pizza
Basic Pizza Dough
2 1/4 tsp active dry yeast (1 package)
1 cup warm water
2 1/2 cups all purpose flour
1 tbsp olive oil
1 tsp salt
Dissolve yeast in water and let sit for 5 minutes, until foamy. Stir in flour, olive oil and salt. Turn dough out onto a floured work surface and knead until smooth, adding a bit of extra flour if necessary. Place dough in a lightly oiled bowl, cover with plastic wrap and let rise until doubled, about 1 hour.
Grilling the Dough
When dough has risen, divide it into two pieces and roll them into balls. Cover with a dish towel and let the dough rest for 20 minutes. Turn up grill heat to high and prepare your toppings.
Roll dough out until it is quite thin. It will be thinner in the center than on the sides, but should be thin all over. Lay dough onto grill. It will probably stretch into a rectangle. Grill until the bottom is lightly browned, 2-3 minutes.


Carefully flip the dough over and place your toppings on the cooked side. If you're using cheese, turn the heat down a bit and shut the lid of your barbeque. Continue cooking for 3-4 minutes, until the dough is browned and crispy.
Transfer pizza to a large serving platter or cutting board and serve immediately.


Wednesday, July 13, 2005

SHF #10 Reminder: Honey, am I forgetting something?

Just a reminder that this month's edition of Sugar High Friday is just two days away! If you haven't started on your entry, just know that there is still time to get to work on your honey-filled sweets.
Please e-mail me a link to your entry on Friday!

Tuesday, July 12, 2005

Raspberry Apple Muffins


When I saw the recipe for Raspberry Apple Muffins, I was immediately attracted. In fact, because they used honey in the recipe, I thought about using them as my SHF entry.
When I started to make the recipe, I realised that there was no added fat - just buttermilk and an egg. I worried about the texture, but went ahead. I made sure not to overmix because I know that can toughen low fat recipes.
The muffins were moist and not tough, but a bit chewier than I would like. The recipe says to serve them immediately and the muffins were definately best when eaten warm with a bit of butter. Later in the day, after they had cooled, they were less satisfying.
I liked how easy and healthy they were, so I would consider making them, or a variation, again. In the future, I would increase the amount of lemon zest, perhaps adding a bit of juice as well, since it was the most interesting flavor in the muffin. Hm... perhaps some candied ginger as well...
The verdict is that they're not bad, but not great either. If you're going for healthy and quick, give these a try. If you're looking to impress, you had better keep looking.

Monday, July 11, 2005

Uses for Leftover Oatmeal


If you end up making more oatmeal than you can eat, a great thing to do is add it to bread dough. It adds moisture, heartiness and great taste and texture. Because I often add a bit of vanilla and molasses to my oatmeal, I find that it lends a bit of extra sweetness to the final bread. Sometimes I boost this with a bit extra molasses or honey in the dough.
Sourdough has a long first rise to let the sour flavor develop. I wouldn't recommend using olive oil in this bread, as a milder vegetable oil will let the flavor of the bread come through. This makes a great sandwich bread.


Oatmeal Sourdough
1 cup sourdough starter
1 cup cooked oatmeal (steel cut)
1 ½ cups water, warm
2 tbsp molasses or honey
1 tbsp salt
1 tbsp oil
3.5 - 4 cups bread flour


Combine all ingredients in a large bowl. Add in the flour gradually until the dough comes together into a ball. Turn out dough onto a floured surface, adding extra flour if necessary, and knead until dough is smooth and somewhat firm. Place into an oiled bowl, cover with plastic wrap, and let rise at least 4 hours or overnight.
After the first rise, turn dough out onto a floured surface. Gently deflate it and shape it into a round loaf. Transfer loaf to a parchment lined baking sheet and let rise, covered with a clean dish towel, for 1-1 1/2 hours. Preheat oven to 425F.
Slash dough two or three times with a sharp knife. Bake at 425F for 40 minutes. The bottom of the loaf will sound hollow when tapped when the bread is done.
Allow bread to cool on a wire rack and come to room temperature before slicing.

Sunday, July 10, 2005

Sunday Brunch: Steel Cut Oats


I must admit that I don't know if I would serve this at a brunch. It is something I am more likely to make for myself. Indeed, I have oatmeal very frequently for breakfast.
Growing up, oatmeal was not one of my favorites. I didn’t dislike it, I just tended to make it when it was very cold or when I was sick. I didn’t make it well, usually overcooking the “quick cooking” variety of rolled oats in the microwave until it was sort of rubbery. I would then drown my breakfast in cinnamon, sugar and milk.
While I love ordinary oatmeal, I think I love steel cut oats more. It’s no secret that steel cut oatmeal takes longer to cook than rolled oats do. This is what really makes it appropriate for a weekend: time. It is not labor intensive to prepare, but it does take quite a while. Fortuantely, you can make a huge batch and store the leftover in the fridge. On busy weekdays, just spoon (or slice) some off and microwave it with a little bit of water to keep it moist.
This recipe makes 3-4 servings. According to the manufacturer, 1 cup cooked oatmeal is a serving. I like to have my oatmeal with dried and fresh fruit. With a chopped up banana or a big handful of blueberries filling up the bowl, I can only fit in so much oatmeal! If you add dried fruit towards the end of cooking, it will absorb moisture and become nice and tender.


Steel Cut Oatmeal
¾ cup oatmeal
3 ¼ cups water
½ tsp salt
1 tbsp molasses
1 tsp vanilla
1/4-1/3 cup dried blueberries/currants/other (optional)

Combine oats and water in medium saucepan. Bring water to a boil. Once the water is boiling, after about 15 minutes, turn the heat down to medium. Stirring occasionally, cook for an additional 15 minutes. Once 30 minutes of total cooking time has elapsed, you need to watch the oatmeal. Stir it frequently – don’t worry if it stuck to the bottom of the pan earlier – for the next 5-10 minutes. Add the salt, vanilla, molasses and dried fruit, if using, and remove from the heat when the oatmeal has reached the consistency that you like. 10 minutes should yield an oatmeal of medium thickness. If you like yours very thick, continue cooking for an extra five minutes.
Top with butter, syrup, milk or sugar and enjoy!
Serves 3-4

Friday, July 08, 2005

Cobbler for a BBQ


An easy way to use up fruit without bothering to make a pie crust is to make a cobbler. A cobbler is a baked fruit dish of fruit topped with a sweetened biscuit topping. Actually, I think a cobbler could be savory as well, if you dropped pieces of buttermilk biscuit on top of a meat or vegetable base before baking it.
The name comes from the "cobbled" look that results from dropping pieces of dough onto the dish rather than rolling out a crust. It's a traditional American dessert and I would venture to say that it can be found in all parts of the country, as it can be made with just about any type of fruit. Berries, apples and stone fruits make the best, in my opinion. I think it's great to serve for company because it looks as good as it tastes and it's very easy. The filling can be prepared ahead of time, it has a fairly long bake and it can sit around for an hour before serving it, so it requires little attention.
My inspiration was a Honey Peach and Blackberry Cobbler from Cooking Light. Unfortunately, I had neither peaches nor blackberries and I didn't have enough fruit to make a 1:1 substitution in the recipe. Armed with a good idea, I made a blueberry and nectarine cobbler. I kept the lemon zest in the topping from the original recipe and I kept the "light"ness, by using only a small amount of butter. The topping should be broken up into small pieces and scattered around. It absorbs the juices from the fruit, so I don't feel anything is lost by reducing the butter as I have; a high degree of flakiness would be neither desireable nor noticeable in this recipe. The topping is not dense, but anything reminiscent of cobblestones should not be ethereally light.
I loved this. The hint of lemon was lovely and there natural flavors of the fruit really stood out. The topping was crisp the night it was made and pleasantly soft the next day. If a soft topping is not your favorite, then simply scoop out any fruit leftover the next day and use it to top oatmeal or yogurt.
I personally like to have cobbler plain, but it is also great served with a bit of vanilla ice cream or sweetened whipped cream.


Blueberry and Nectarine Cobbler
For filling:
1 pint blueberries (2 cups)
8 nectarines
2 tbsp flour
2 tbsp honey
1 tbsp lemon juice
pinch salt

For topping:
1 cup flour
1/4 cup sugar
1/4 tsp salt
1/4 tsp baking powder
1/4 tsp baking soda
zest of one lemon
2-3 tbsp butter, chilled and cut into small pieces
3/4 cup buttermilk
Preheat oven to 375F.
Wash and peel nectarines. Slice each into 8-10 slices, as desired. Wash blueberries. Place fruit into a medium bowl and add 2 tbsp flour, 2 tbsp honey, 1 tbsp lemon juice and a pinch of salt. Stir to combine then pour fruit into an 8x8 inch baking dish.
In a medium bowl, whisk together flour, sugar, salt, lemon zest and the baking powder and soda. Using your fingers, rub in butter until mixture resembles very coarse meal. Stir in buttermilk. You should have a wet dough.
Drop the dough in golf ball sized pieces evenly over the dough. It will spread a bit as it bakes, so don't try to cover the whole surface. The pieces of dough do not have to be evenly sized, either.
Bake for 40-45 minutes, until juices are bubbly and topping is a nice brown color. Let stand for at least 30 minutes before serving to give the juices a chance to thicken and reabsorb.
Serves 6-8.


By the way, does anyone have any thoughts as to which photo I should enter from June for this month's DMBLGiT?

Thursday, July 07, 2005

Cooking School: Southern Style Buttermilk Biscuits


Not being from the South, I will state that I am not an authority on biscuits. In fact, most of the biscuits I have eaten in my life have been the kind you might find in the refrigerated section of the market. I probably have never had an authentic Southern biscuit. They look tasty, though, so I set about to make some.
If you have no idea what I'm talking about, you're probably not reading this from inside the US. Biscuits are small, round breads that have fat cut into the flour and are leavened with baking powder, similar to scones. They are flakey, light in both texture and color and have a golden brown top. Traditional biscuits are rarely sweetened prior to cooking and are served as a savory side dish or are eaten with butter and jam.
The ingredients are simple: flour, leavening, salt, fat and buttermilk. A more traditional southern recipe, as pointed out by Alton Brown's recipe, calls for White Lily flour, low gluten, self rising flour originating in the southern US. All purpose flour, being more widely available, is what I used. I rubbed in the butter, leaving some the mixture looking fairly coarse, with chunks of butter as when I make pie crust, and stirred in the buttermilk. The dough was sticky. I used lots of flour when handling it as I rolled it, kneaded and folded it in half several times - 5 or 6 six. I was careful not to twist my biscuit cutter (flouring it liberally instead) so my biscuits would rise straight and high. The final biscuits were noticeably flakey. I think that the repeated rolling and folding of the dough that A.B. mentioned actually did help create a flakey final product. I was very pleased. I skimped a bit on the salt as I mixed my ingredients, but using salted butter when eating the finished biscuits made up for it.
My final recipe is a hybrid between Alton Brown's recipe and a recipe from Southern Living magazine.

Southern Buttermilk Biscuits
2 cups ap flour
3 tsp baking powder
1/4 tsp baking soda
1/2 tsp salt
4 tbsp butter, chilled and cut into small pieces
1 cup buttermilk, chilled, plus more for brushing

Preheat oven to 400F.
Whisk together flour, baking powder, baking soda and salt. Rub in butter with your fingers until mixture resembles coarse crumbs of varying sizes, but none larger than a pea. Stir in buttermilk until dough comes together.
Turn dough out onto floured surface and knead or roll out until dough has been folded 4 or 5 times. Roll dough out until it is 1 inch thick. Using a 1 1/2 - 2 inch round cutter, push straight down through dough (do not twist the cutter!) and place biscuit on a parchment lined baking sheet. Repeat. Any biscuits made from the scraps will not be quite as flakey as the first pass, but will still be good.
Brush biscuit tops with buttermilk and bake for 15 minutes, until tops are a light golden brown.
Makes 12-16 biscuits.

Tuesday, July 05, 2005

Red, White and Blue Upside Down Cake

Red raspberries, blueberries and white cake. Gorgeous? You bet.
Upside down cakes, particularly the pineapple variety, are an American tradition. I'm personally not a huge fan of the pineapple ones, as they tend to be too sweet. Of course, I've never made one myself and when you can tailor something to your individual tastes it does tend to improve. These types of cakes have a caramel layer - butter and sugar - laid into the pan, topped with fruit and spread with a cake batter. As it bakes, the caramel cooks itself into a nice, sticky glaze for the cake. There are only two tricks to making one of these.
First, make sure you use enough fruit because the cake batter will surely stick to the caramel.
Second, you must flip it out onto a serving platter between 5 and 10 minutes after it comes out of the oven. If you do it too soon, the caramel glaze won't be set enough. If you wait too long, the caramel will set the cake into the pan and you'll have to pry it out.
Any plain, basic cake will work for an upside down cake. This also works with many types of fruit: citrus, berries, bananas, stone fruits, etc. It is very easy to make and makes a nice dessert or can be served as part of a weekend brunch.
For an 8x8 square pan or an 8 or 9 inch round cake pan, melt 3 tablespoons of butter into the pan and top it with 1/2 cup sugar. Cover with the fruit of your choice - use 2-3 cups. Set aside while you prepare the cake batter. Pour batter over fruit, spread evenly, and bake according to cake directions, until a tester comes out clean. Wait 5-10 minutes, cut around the edge of the pan with a knife and turn the cake out onto a serving platter. It is best served warm, but still very good at room temperature.
If you're wondering why I didn't add my recipe to this post, it's because I entered this in the Pillsbury Bakeoff this year. Scoff if you will, but the odds of winning the million dollar grand prize are better than my odds of winning, say, the lottery. And it was fun to come up with the recipe!

Monday, July 04, 2005

Black Cherry Frozen Yogurt


Happy Fourth of July!

It's Independence Day here in the US and that means barbecues and fireworks. It also means that it's summer, so I made a great, healthy frozen dessert: Black Cherry Frozen Yogurt. Incredibly creamy and delicious, without leaving that lingering cream taste that some ice creams do. The best part is it's fat free, except for the few mini chocolate chips I added, but who counts something to tiny anyway. I want to make more of this every day. Maybe not with the same fruits, but it's that good.
Several weeks ago, I saw a rerun of an episode of the Barefoot Contessa, Ina Garten's cooking show. She had Patricia Wells as a guest and they made frozen yogurt from scratch. The thing that stuck in my mind was the fact that the recipe was very simple. Also because, unlike many of Ina's recipes, it didn't involve a lot of butter. As much as I love making things like sorbet, you really have to plan ahead so the base can chill before you freeze it. For this recipe, you beat egg whites with sugar, folded it into yogurt and froze it.
Now I did not attempt to write down the recipe or the directions during the show. The recipes are posted online, so I assumed I could look it up later. Unfortunately, FoodTV informed me that this recipe had expired. Expired? I didn't know that was possible! I set about to find the recipe and, after a long hard struggle, I located it.
This recipe is dead easy, especially if you know how to beat egg whites and own an ice cream maker. If you don't own one? Buy one! They're not that expensive and they're worth it. I have this one, which is available used for $25! I added frozen cherries and a handful of mini chocolate chips, but feel free to substitute any thing you'd like. I wouldn't recommend using any more than 1 cup of add-ins, though, as I think that might inhibit the churning process.
I used Fage Total Greek yogurt, which is much thicker than ordinary yogurt because it is strained. I recommend draining your yogurt in cheese cloth for a bit to thicken it, but this is clearly not entirely necessary because the original recipe did not call for this.

Black Cherry Frozen Yogurt
2 egg whites
2/3 cup sugar (castor or superfine, if you have it)
3 1/2 cups nonfat yogurt (500 grams)
1 tsp vanilla extract
1 cup chopped frozen sweet cherries and chocolate chips
Whisk vanilla into yogurt until it is smooth and set aside.
Beat egg whites until frothy, add sugar gradually and continue beating at medium-high speed until you have soft peaks, 4-5 minutes. Do not overbeat.
Fold yogurt into egg whites in 4 additions, making sure it is well incorporated. Fold in cherries and chocolate chips and pour mixture into your ice cream maker. Freeze as directed and store inan airtight container in the freezer if you are not going to eat it right away.
Serves 6

Saturday, July 02, 2005

Chocolate-Chunk Caramel Cookies


Could these be the best cookies ever? Possibly. They were very, very popular. Very popular.
Actually, there was nothing surprising about these cookies. They were just very tasty. Not earth shattering, but they had a quality that made you reach for a second right after you finished the first. They also left a pleasant caramel-y aftertaste behind.
I baked them as a graduation gift for my neighbor's daughter, who just finished high school. I left out the nuts because when you're taking something for a group of kids, I think it is better to be safe than to have to contend with nut allergies. The kids also didn't get actual chocolate chunks in the cookies, as I decided not to use my 71% Valrhona block of chocolate. They got stuck having Callebaut 56% chocolate chips. I'm sure they all cried themselves to sleep.
Just kidding. Those chocolate chips are fantastic!
The recipe is from Epicurious. I thought that it was a great way to use up some of the caramels I had lying around the house. It was tedious to chop up the caramels, but I followed the advice of other reviewers and coated the pieces in flour as I worked. I also made sure to use parchment paper to line my baking sheets. By letting the cookies cool on the cookie sheet for about 10 minutes, I allowed the caramel to re-solidify, making removal to the cooling rack very easy.
I also cut the baking time, so here's the recipe with my notes included.

Chocolate Chunk Caramel Cookies
2 1/2 cups all-purpose flour
1 tsp baking soda
1/2 tsp baking powder
1 tsp salt
1 cup unsalted butter, softened
1 cup sugar
1/2 cup brown sugar, packed
2 eggs
6 ounces chocolate, chopped (or 1 1/2 cups chocolate chips)
18-20 caramels, such as Kraft (about 1 cup)

Preheat oven to 375F. Line a baking sheet with parchment paper.
Place 1 tablespoon of the flour into a small bowl. Chop each caramel into 6-8 pieces and lightly coat with the flour. Whisk together remaining flour, baking soda, baking powder and salt in a medium bowl.
In a large bowl, cream together butter and sugars until light, about 2 minutes. Add in eggs one at a time. Don't worry if the batter separates, just keep beating until it becomes smooth. Stir in flour mixture, followed by caramels and chocolate chunks/chips until batter is uniform and no streaks of flour remain.
Drop rounded tablespoonfuls onto the baking sheet. Cookies will spread, so allow at least 2 inches between each cookie. Bake for 10-11 minutes, until cookies are lighlty browned around the edges. Allow to cool on the cookie sheet for 5-10 minutes before removing to a wire rack to cool completely. If the cookies stick to the parchment, allow them to cool longer before moving them.
Makes about 4 dozen.

Friday, July 01, 2005

Announcing SHF# 10: Oh Honey, You Shouldn't Have!


"The only reason for being a bee that I know of is making honey....and the only reason for making honey is so I can eat it." Winnie the Pooh in A.A. Milne's 'The House at Pooh Corner'

Sugar High Friday is a monthly blogging event created by none other than The Domestic Goddess, Jennifer, a few months back. It is my absolute honor to be the host for this month and my pleasure to announce that the theme is Honey.
Honey is a sweet, golden liquid produced by bees from the nectar of various flowers. Honey was probably the first sweet discovered by humans that wasn't some form of fruit. Its use was extensively documented in ancient Egypt, both as a treat for people and as a food for sacrificial animals. Many varieties of bees produce wildly different honeys all over the world. There are even single origin honeys, all from only one type of plant or flower. These can be created by meticulous bee keeping or by keeping bees where there is naturally limited flower selection. The honey pictured above, for example, is produced from desert wildflowers and citrus in the Anza-Borrego Desert.
Honey is a great natural sweetener - but is quite a bit sweeter than sugar, so it does not always work to substitute 1:1. Honey is also a great preserving agent, keeping goodies moist long after they have been baked. I personally like to use it as a topping for crumpets. How can you not love anything that fills up all those little holes?
So go ahead and pick out a recipe that uses or features honey. With a few thousand years of documented use, I don't think anyone will have trouble with this one, though narrowing it down may be a challenge. Write up what you made and post it to your blog on Friday, July 15th. Feel free to include recipes and photos. We're all secretly doing this for the food porn.
E-mail me with a link to your entry and I'll get the roundup out by Sunday. For those you you who don't have a blog, you can e-mail me your entry and I'll put it up here.

'"Well," said Pooh, "what I like best -- " and then he had to stop and think. Because although Eating Honey was a very good thing to do, there was a moment just before you began to eat it which was better than when you were, but he didn't know what it was called. ' Winnie the Pooh in A.A. Milne's 'The House at Pooh Corner'