Friday, September 30, 2005

Baguette a l'ancienne in progress


I was perusing the forums at eGullet and noticed an interesting "demo". A member posted his (her?) process for making baguettes a l'ancienne, also known as slightly sour, naturally yeasted baguettes.
Now I was immediately impressed by the photos of big, uneven holes and a lovely crispy crust. Though the recipe takes a few days, it is a very low maintenance dough. All you need is about a tablespoon of sourdough starter, which doesn't have to be fed, or a small hunk of dough from an already proofed loaf. My results tasted great - moist, open texture and a fabulously crispy crust. I ended up simply brushing the baguettes with water before slashing them to avoid tossing water into my oven. Did I mention how great the crust was?
I am bad at shaping baguettes. They poof out all over the place in the oven. But I will make every effort never to complain about it again because the uglier baguettes turned out to have the more open, highly irregular crumb I was looking for. Though I have made this recipe a few times now, I will add a bit more water in the future, as I don't want the dryness of Southern California to mess with my results. The high hydration of the dough is important for the texture of the bread and the crust.
I highly encourage you to head over to the eGullet forums and read the original post. I am going to take the advice of the poster and tweak this a little more until it is as good as I can get it. And I won't say no to any of the trial runs.

Thursday, September 29, 2005

Cooking School: Donuts/Doughnuts


There is nothing wrong with spelling the word for these fried rings of dough as "doughnuts" or "donuts". They are both correct. Just ask spell check. I personally use the "donut" spelling, as it is faster and simply more economical as far as I am concerned. There is nothing wrong with spelling or dialect variations, particularly when involving pastry.
This week, as you may have guessed, I made donuts.
Fried dough is a bit tricky. Most fried bread products are rather small: dumplings, beignets, klejner, etc. They are small because the outside browns very quickly and large pieces of dough will not be cooked all the way through. In fact, one of the tales about the origin of the donut states that the center was poked out because it was always soggy. Where the "nut" came from, I simply do not know.
Homemade donuts are something that I never really thought that I would make. I know a good place in my neighborhood to get them, but to be honest, I rarely do. Health concerns, you know. But when I was little, I loved to get a sugar coated, fluffy yeasted donut whenever possible. I hated the glazed ones. One day, my donut was not cooked through as well as it should have been (perhaps the origin myth is true!) and I became rather ill. Same thing the next time. That was the end of those donuts.
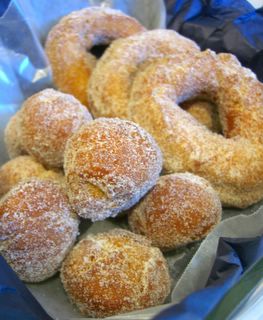
My favorite donuts are plain cake donuts and cake donuts with rainbow sprinkles. The sprinkles make me feel like a kid, which I love. Cake donuts are not yeast-raised, but are put together much like a quick bread and leavened with chemical leaveners. The batter is a snap to put together, you chill it for at least 3 hours to make cutting it easier and then you fry it. Which means that you can prepare it the night before and have fresh donuts in the morning. I opted for a pumpkin donut recipe from Epicurious - what better way to celebrate fall? The dough has little fat in it, but the frying compensates. The pumpkin flavor was subtle, but there and they tasted very good plain. The crumb was moist but not dense and they weren't as greasy as I expected them to be at all. I tried them with a maple flavored glaze, but the glaze overpowered the pumpkin flavor. I switched to a spiced sugar mixture, using the same spices as the pumpkin dough. Once the donuts were rolled in the spiced sugar mixture, they were outstanding. Why haven't I seen these down at the donut shop?


Pumpkin Donuts with Spiced Sugar
(from Bon Appetit)

Donuts
3 1/2 cups ap flour
4 tsp baking powder
1/2 tsp baking soda
1 tsp salt
1 tsp ground cinnamon
1/2 tsp ground ginger
1/4 tsp ground cloves
1/8 tsp ground nutmeg
1 cup sugar
3 tbsp butter, softened
2 eggs
1 tsp vanilla
1/2 cup plus 1 tbsp buttermilk
1 cup cooked, mashed pumpkin (canned is ok)
Canola oil (for deep-frying)


Spiced Sugar
2 cups sugar
1 1/2 tsp cinnamon
1/2 tsp ground ginger
1/4 tsp ground cloves
1/8 tsp ground nutmeg
----------------------------------------------

Whisk together flour, baking powder, baking soda, salt and spices in a medium bowl.
In a large bowl, cream together butter and sugar. Beat in eggs one at a time. Add in vanilla, buttermilk and pumpkin. Gently stir in flour mixture until fully incorporated. Cover bowl is plastic wrap and refrigerate at leat 3 hours.


Sprinkle two baking sheets with flour. Working with 1/3 of the dough at a time, press the chilled dough out, on a lightly floured surface, to about 1/2-2/3 inch (2 cm) thickness. Using a 2 1/2 inch diameter round biscuit cutter, cut out rounds and place on a baking sheet. Use a 1 inch cutter to remove the center of the round, and set the dount hole on the baking sheet as well. Repeat until all the dough is used. You may reroll the scraps. You should end up with 24 donuts and 24 holes.


In a large sauce pan, heat 2-3 inches of oil to 365F/185C. Make a thick stack of paper towels to drain the donuts on. Working one or two at a time, fry the donuts until golden brown, about 1 minute per side. You may fry the donut holes in groups of 4 or 5. Check the temperature to make sure it remains constant. Remove dough to drain and cool thoroughly on paper towels.


In bowl, whisk together sugar and spices. Coat donuts and donut holes in sugar mixture. The sugar will stick to the residual oil (though no one likes to think about that). Enjoy!
Makes 24 donuts and 24 donut holes, but can be halved.

Tuesday, September 27, 2005

IMBB #19: I Can't Believe It's Vegan Cheesecake!


I could definately be vegan. A great deal of the foods that I eat are vegetarian and many can be made vegan. I have experimented with vegan baking, which, by and large, has produced some wonderful results. I actually have many other vegan recipes and substitutions that suprise people, from cookies to cakes. Does it seem like I am dwelling on the sweet side? I am. Anyone who bakes will know that the biggest challenge about being vegan is the baked goods. It is hard, and in some cases nearly impossible, to replicate the properties of ingredients like eggs and dairy in baked goods. I will not be trying a vegan flan, meringue or whipped cream in the near future. This isn't to say that it cannot be done, but it certainly won't be easy.

I'm glad that Sam picked Vegan cooking as the theme for this month's IMBB. I think it will increase awareness. Beyond the basics, veganism covers a wide range of eating habits. Many vegans are "activists". They are vegan because they believe that it is wrong to eat/use/exploit animals in any way. No leather, no silk, no wool, no honey. Other vegans share these same beliefs to varying degrees, perhaps eating honey or wool. Just like any other lifestyle, I don't think that this is "incorrect", though I know that many people might disagree. I believe that if you think you are doing the right thing by not using leather or eating animal products, but you still eat honey, there is nothing wrong with considering yourself to be a vegan. I don't know how vegan activists feel about the group of people, ever growing, who are vegan for health reasons. A low fat, vegan diet may slow or stop the progression of some types of cancer, including prostate cancer and lymphoma. Many people eat vegan, but continue to use other types of non-food animal products.
When I make something vegan, I do not tell people - excluding veg friends - that it is vegan. I prefer to suprise them with it once they've already eaten some. This cheesecake got good reviews, even after it was revealed to be vegan. Now, it was not as creamy or decadent as the cheesecake I made before, but I don't think anyone would deny that this is a tasty cheesecake. It was a cross between a dense, New York style cheesecake and a lighter, European style cheesecake. It had a great texture, a bit melting, light and fluffy. I chose to make it lemon flavored, not wanting another dense chocolate dessert, but you could substitute orange or lime juice for the lemon.
I don't think you want to see the nutritional information for my last cheesecake, but this one has no saturated fat and no cholesterol. Per slice, not necessarily by weight, this cheesecake has half of the calories and more than 3 times less fat than the regular cheesecake. Good reason to have seconds!


(Vegan) Lemon Cheesecake

1-14 oz package firm silken tofu
1-8 oz package Better than Cream Cheese
2/3 cup sugar
¼ cup lemon juice
½ tsp almond extract
2 tbsp cornstarch
1-9 inch pie crust

Preheat oven to 350F.
Place silken tofu and vegan cream cheese in the food processor. Process for 1 minute, then add sugar. Process until smooth and no sugar granules remain, 3-5 minutes.
In a small bowl, combine lemon juice and almond extract. Whisk in cornstarch. Pour mixture into the food processor and process until very smooth. Pour into prepared crust and bake for 45 minutes.
Allow to cool at room temperature for 2 hours, then refrigerate overnight.
Serves 10


Tagged with: +

Monday, September 26, 2005

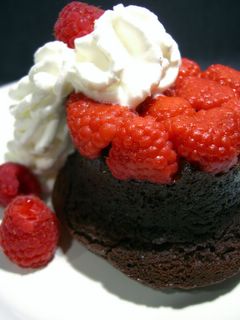
Raspberry Chocolate Mink

Gourmet Magazine's September 2005 Cook the Cover contest ended yesterday. The featured recipe was fur a chocolate pudding cake called the Chocolate Mink. I couldn't resist giving the recipe a shot, particularly when it was formulated for the convenient serving size of two portions. I decided that my addition to the recipe would be to add raspberries, since raspberries and chocolate make a wonderful combination. I layered them along the bottom of the ramekin and stirred a few into the batter.
According to the recipe, it was supposed to be a "gooey, flourless chocolate pudding cake". I like chocolate pudding cake quite a lot and was suprised when mine didn't turn out as advertised, but I quickly realised that this unexpected outcome was the result of my failure to read the recipe all the way through.
I admit that I was hoping for a sort of raspberry sauce to form, but, though my little cake was neither puddingy nor saucy, it was still tasty. It looked gorgeous, unmolded very easily and was a nice, rich chocolate brownie cake. Baking uncovered gave it a nice crust and the raspberry layer made sure that every bite had a hint of berry to compliment the chocolate.
I'm not sure if it would have been a contest winner, but it definately proves that with good ingredients, you can't go wrong even if you don't follow the recipe.


Raspberry Chocolate Mink
1/4-1/3 cup fresh raspberries, divided
3 1/2 oz bittersweet chocolate, coarsely chopped
2 tbsp butter
pinch of salt
1 egg, separated
1 tbsp sugar


Preheat oven to 350F and butter two 5 or 6 oz ramekins or oven safe dishes. Place a single layer of raspberries on the bottom of each ramekin. Reserve 2 tbsp of the berries and mash gently with a fork. Set aside.
In a small bowl, over a small saucepan of simmering water, melt together chocolate and butter. Stir in a pinch of salt and set aside to cool for 5 minutes. Whisk in egg yolk.
In a small bowl, beat egg white to soft peaks with the sugar. Fold 1/2 of the egg white and the mashed raspberries into the melted chocolate. Fold in remaining white until no streakes remain. Divide evenly into prepared ramekins.
Place ramekins into a deep baking dish. Fill the dish with hot or boiling water until it reaches halfway up the sides of the ramekins. Bake for 30 minutes.
Remove ramekins from water bath and allow them to cool for at least 20 minutes before unmolding the cakes and serving.
Makes 2.

Sunday, September 25, 2005

Stuff on My Cat

Just in time for Weekend Cat Blogging, hosted by Eat Stuff, you can see the hazards of leaving the newspaper unattended at my table.
Phoebe loves to get under things, but not as much as some of the cats at Stuff on my Cat. Too cute!

Saturday, September 24, 2005

Zucchini Cornbread


I feel like I have been in a bit of a rut lately. Looking back through the last couple of weeks, I can see that this isn't entirely true, not as far as posting is concerned, but that doesn't change the way I feel.
I think it's because of the seasons. It's the end of summer and the end of the summer season means cooler days and heartier meals. Some of my favorites - grilled corn on the cob, for example - are approaching their inevitable disappearance from my table. This means that I've been doing quite a bit of repetitious eating.
I can't hang onto the old favorites forever, particularly when it is darn hard to get ahold of fresh corn on the cob in the middle of winter, so some new favorites are just beginning to make an appearance. This cornbread fuses the changing of the seasons.
I love cornbread because it's a bit hearty and a bit sweet. This one is very moist due to the inclusion of shredded zucchini, which I know is still prevalent in people's gardens. The buttermilk and molasses make this bread taste sweet and buttery. Serve it on the side of a hearty winter stew or with butter and jam along side of something grilled.

Zucchini Cornbread
1 cup ap flour
3/4 cup cornmeal
1 1/2 tsp baking powder
1/2 tsp baking soda
1/2 t salt
1/4 cup brown sugar
1 cup buttermilk
1 egg
1 egg white
2 tbsp molasses
3 tbsp butter, melted
1 cup shredded zucchini, with extra moisture squeezed out


Preheat oven to 400F. Lightly grease an 8inch square baking pan.
In a large bowl, whisk together flour, cornmeal, baking powder, baking soda, salt and brown sugar.
In a medium bowl, whisk together buttermilk, egg, egg white, molasses and melted butter until smooth.
Pour buttermilk mixture into the flour mixture. Stir until just combined, add the zucchini and stir to evenly distribute. Pour batter into prepared pan and spread evenly.
Bake for 25-30 minutes, until a tester comes out clean and the bread springs back when lightly pressed.
Allow it to cool in the pan for 10 minutes, then remove the bread to a wire rack.
Makes 9 pieces.

Friday, September 23, 2005

Editing


I was enjoying the last of the donut cookies, made from a recipe posted by Joe at Culinary in the Desert, when I saw that I was tagged on Grab Your Fork for a meme: find the fifth sentence of your 23rd post and post it. Curiosity overcame me and I looked back through my archives.
Looking at some of my earliest posts, I couldn't help but wonder if I should delete some of the more pointless ones or edit the writing here and there. I like everything to be nice and streamlined, so some of the posts seemed like "fluff" that wasn't serving a purpose; I was not a worse writer than I am now, I just didn't know exactly what I wanted to say. I was mentally picking out posts to axe when I came to the 23rd post and read the fifth line:


It would probably take a force of nature to stop me once I have my mind set on baking something.


I'm not editing the old posts.
I'll just go on from here.

Edit: As I neglected to mention above, the cookies are very good. They're fun and easy to make, and have a nice butter cookie texture. They go famously with coffee but tea is a nice choice, too. I ate the ones I put sprinkles on first and called it breakfast. The cookies prove that sometimes a bit of editing is ok. Spell check proves the same thing.

Thursday, September 22, 2005

Cooking School: Boca Negra


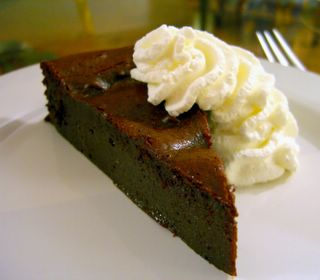
Close your eyes. Imagine the fudgiest brownie you have ever tasted. And understand that this cake is a million times better. It is all the fudge and none of the dryness, none of the chew of a brownie or a cake. It is silky, liquid fudge.
Interested?
I turned back to Baking with Julia this week to find the Boca Negra cake. Boca negra means "black mouth" in Spanish. It is named because, the book claims, it will turn your mouth black with chocolate ater one bite. I can't verify this because I had it with tea.
I suspect that this "cake" is really a baked custard in disguise. It is mixed very quickly in a food processor and baked in a water bath. The recipe directs you to unmold it directly after taking it out of the oven. I was apprehensive, as often cakes don't hold their shape as well as promised, but this one popped right out. Not only that, I was able to turn it out and re-invert it onto a cake platter with ease - which made for a shockingly beautiful presentation. Unlike most flourless or nearly flourless chocolate cakes, there is no flaky crust waiting to crumble into a fine dust at first knife cut.
I served it after cooling it for about a hour, while it was still warm, but it kept well at room temperature. This cake can also be made ahead, but it will have the texture of fudge if served cold, so let it come up to room temperature before serving.


Boca Negra
12 oz bittersweet chocolate, coarsely chopped
1/2 cup bourbon (or rum)
1 1/3 cups granulated sugar
8 oz (2 sticks) butter, cut in 10 pieces
5 eggs


Preheat oven to 350F. Butter a 9 inch round cake pan, line the bottom with a circle of parthment or wax paper and butter again. Set the cake pan in a roasting pan and set aside. Set a kettle of water to boil while making the batter.
Place the chocolate in the bowl of a food processor fitted with a metal blade.
In a medium sauce pan, combine bourbon and sugar. Cook over high heat, stirring, until sugar is dissolved. Bring it to a full boil and pour over chocolate. Whizz chocolate and syrup until smooth, about 20 seconds.
With the motor running, drop in the butter piece by piece, making sure each is fully incorporated before adding the next. Add in the eggs one at a time.
Pour batter into prepared pan. Place roasting pan in the oven and fill it with boiling water from the kettle until it reaches 1/2 way up the side of the cake pan.
Bake for exactly 30 minutes.
Carefully remove the cake pan from the water bath. Dry the cake pan. Lay a piece of plasti wrap over the top of the pan. Invert cake (and plastic wrap) onto a flat plate and remove the parchment paper circle. Reinvert cake onto a serving platter and remove plastic wrap.
Serve warm, or at room temperature, with whipped cream.


Note: This cake can be stored at room temperature for one day or in the refrigerator for up to three days. It can also be made well ahead and kept frozen for up to a month. If it is frozen, defrost it, wrapped, in the refrigerator overnight. Bring the refrigerated cake to room temperature before serving.

Tuesday, September 20, 2005

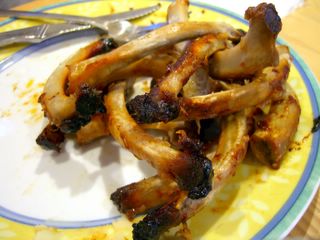
Slow Cooked Ribs and Root Beer BBQ sauce


Ordinarily, I would make ribs in the oven. They would be seasoned, sauced, wrapped tightly in foil and baked long hours at a low temperature until the meat was falling-off-the-bone tender. I am not thrilled with the heat that this generates in my kitchen, butt the only real problem I see with this method is that it renders my oven unavailable to other baked goods. I like to have cornbread with barbeque and it just doesn't turn out quite right when you try to bake it in a 250F oven.
To free up that valuable oven space, I used my crockpot. I have a 5 quart slow cooker (crockpot), so I used 4 pounds of baby back ribs. If you have a small one, use two. This is important because the sauce will scorch a bit if you are not filling your cooker with enough meat. And who ever complained about a few extra ribs?
I was incredibly pleased with how well these turned out. I needed two spoons to get the ribs out, rather than tongs, because the meat came off the bones as though it had never been attached. And the taste? Teeth were completely unnecessary.
I started with a recipe from Epicurious for barbeque sauce and altered it a bit according to the comments left by other users and my own tastes. The sauce was on the sweet side, but the paprika and dash of red pepper flakes cut it just enough. It was great with the ribs. You could taste many flavors in the sauce, and while you can taste a hint of root beer if you know it is there, no one else is likely to guess the "secret ingredient". If you don't have root beer, substitute some brand of cola. I like the sauce to be a little thinner for roasting and crock pot cooking, as opposed to grilling, where I like it thick. If you like it thicker, continue to reduce the sauce down to 1 1/2 cups, which will take an additional 10-15 minutes.

Root Beer BBQ Sauce
(inspired by this recipe)
1 cup root beer
1 cup ketchup
1/4 cup orange juice
3 tbsp worcestershire sauce
2 tbsp molasses
1/2 tsp ginger
1 tsp garlic powder
1 tsp onion powder
1/2 tsp sweet paprika
1/4 tsp red pepper flakes (a bit more if you like it spicy)


Whisk all the sauce ingredients together in a medium sauce pan. Bring to a boil over medium heat, then simmer, stirring occasionally, for about 10 minutes. This will reduce the sauce to about 2 cups. Set aside.
This sauce can be made ahead and kept in the refrigerator.


Slow Cooked Ribs
1 recipe for Root Beer BBQ sauce (above)
2-4 pounds baby back ribs (pork ribs)
salt, pepper

Remove fatty membrane from the underside of the ribs. Rub the meat with salt and pepper.
Pour 1/2 of the sauce into the bottom of the slow cooker (aka the crock pot). Add ribs and coat with remaining sauce.
Cook on low setting for 6-7 hours.


Monday, September 19, 2005

The Best Cheesecake

Hot on the heels of Friday's custardy SHF entry, is another type of custard: cheesecake.
The first time I read Lori's excellent post on making the best cheesecake on the planet, I was sold. Did you know that she used to make cheesecakes for a living?
I wanted to try making her bulls eye cheesecake, but I chickened out after preparing the batters. I was nervious about pouring even chocolate and plain layers into the pan, so I settled on making a marbled cheesecake. I filled the pan with large, haphazard dollops of batter and swirled them together with a knife. This cheesecake does not need to be baked in a water bath, so that makes it that much easier.
Cheesecakes crack when they are exposed to a sudden temperature change. Cool your cheesecake in a fairly warm place after removing it from the oven to allow the custard to set without cracking. Make sure to chill it overnight in the refrigerator; creamy cheesecakes taste their best when cool. When you are going to serve the cheesecake, keep a moist dishtowel at hand and wipe down the knife after each slice. This will keep your slices clean and even.
Is it really the best cheesecake on the planet? I will say that it is outstanding. The plain cheesecake has an excellent flavor. The chocolate cheesecake is incredibly rich and chocolately without being heavy or truffle-like. Overall, it isn't too sweet and the whole thing is unbelieveably creamy. The thick crust is a perfect balance to the richness of the cheesecake. I would not change a single thing about this recipe.
In truth, I do not think that I eat enough cheesecake to really pass judgment on a global scale, but I will say that it is certainly the best I have had in recent memory.


Marbled Cheesecake
2 cups graham crackers, crushed into crumbs
1/4 cup sugar
1/2 cup butter, melted
2-8 oz. packages of cream cheese, softened
1-14 oz. can sweetened condensed milk
3 eggs, room temperature
4 oz bittersweet/semisweet chocolate


Preheat oven to 350F.
Mix together graham cracker crumbs, sugar and melted butter until mixture is wet (or pulse in a food processor until crumbs clump together) and begins to stick together. Spread mixture evenly in a 9 inch springform pan and press down firmly. Bake for 10 minutes. Set aside.
Reduce oven temperature to 300F.
Melt chocolate into a medium sized bowl.
In a large bowl, beat cream cheese until smooth. Add condensed milk and beat until smooth. Add eggs, one by one, beating each until fully incorporated. Pour 1/2 of the batter into the bowl with the melted chocolate and stir well. Pour chocolate and plain batters into the prepared pan, evenly distributing and alternating batters. Swirl with a clean knife.
Bake cheesecake for 50-55 minutes. It will not look totally firm when done; it will jiggle. The whole cake should jiggle evenly, though the center might be a bit looser.
Cool cheesecake at room temperature for at least 1 hour before refrigerating. Refrigerate overnight or at least 4 hours.
Store in refrigerator until ready to serve.

Serves 12

Sunday, September 18, 2005

Sunday Brunch: Rice Flour Crepes


I have been meaning to experiment with alternative flours for some time. Anything from rye to buckwheat to rice to mesquite. Did you know that your can actually make some rather strange types of "flour"? To make pumpkin flour, for example, all you have to do is dry/dehydrate pumpkin and then puree it into dust. Now, I couldn't find a single recipe that told me exactly how to dry out my pumpkin, so I supposed I'll have to hold off on that. Using flours other than wheat can dramatically change the taste and texture of your baked goods. For example, adding a tablespoon of instant mashed potato - aka potato flour - to your bread will make it a bit moister than usual.
Never one to go only halfway (well, maybe sometimes), I went out and purchased a bag of white rice flour and plunged headlong into an attempt at gluten-free baking. Not because Shauna guilted me into it. No sir.
Did you know that 1 in 133 Americans are gluten intolerant? I tried some of the recipes on the back of the bag of flour, too, and discovered that a major concern of the manufacturer is sugar content. Let me tell you that a nearly unsweetened muffin, no matter what kind of flour is used to make it, is not a muffin that I want to eat. Fortunately, I didn't have to, since I filled up on crepes before I started baking.
Tender, tasty and a bit thicker than your typical crepe, I liked these a lot. You can see from the photo that I made them in a nonstick pan; if I had greased the pan with butter, they would have browned a bit more. They held up well to jam (my favorite on crepes), but you could easily smear them with nutella or wrap them around sausages and dip in maple syrup. And they're gluten free, so you can share the recipe with your Celiac friends.


Rice Flour Crepes
1 cup white rice flour
1/4 tsp salt
2 eggs
1 cup milk
1 tbsp oil or melted butter

In a medium mixing bowl, beat together all ingredients until smooth. Pour, using a 1/4 cup measure, into a medium-sized, hot, nonstick (or greased) skillet. Turn skillet to thinly, evenly distribute batter in a circle. Cook for about 30 seconds per side.
Spread with jam, nutella or simply butter and sugar, roll up and serve immediately. You can also roll these around breakfast sausages to make pigs in a blanket.
Makes about 8 crepes
Serves 2-3, depending on hunger and fillings.

Friday, September 16, 2005

SHF #12: Cooked Up Custard


In his safety control room, Homer pokes at all the donuts... [poking at each jelly donut in turn] [poke] Igh, lemon. [poke] Ugh, cherry. [poke] Ooh, custard. [poke] Mmmmm.... purple... -- Homer, enjoying the finer things in life, ``Homer Defined''

Hosted by Elise of Simply Recipes, the theme of this month's Sugar High Friday is Cooking up Custard. Rich, creamy custard. I was almost tempted by Homer Simpson's love for custard filled donuts in my search for an entry. But I chose to make a dish that was one of the first "real desserts" I ever baked on my own in my mother's kitchen: flan.
Prior to attempting that first flan, I had mostly baked cookies and cakes from boxed mixes. And I baked them a lot. Looking back, I don't remember exactly why I chose flan, but I do know that my mom played a part in my decision: she said that flan was too difficult and that I shouldn't bother trying it. Let me tell you that she was wrong. That flan turned out wonderfully and so did this one.
This time, I used the Perfect Flan recipe from Bon Appetit. The only change I made was to infuse the caramel with vanilla as well as infusing the custard.
Don't be intimidated by flan. Making the custard is easy, in large part because the cream cools slightly before you combine it with the eggs; the risk of curdling is quite low. The caramel doesn't have to be cooked to a specific temperature, just make it a dark amber and pour it into ramekins. Boil water in a kettle for the water bath and bake. Refrigerate. Eat.
And while you're eating, why don't you check out the other custardy delights in this month's roundup?

Thursday, September 15, 2005

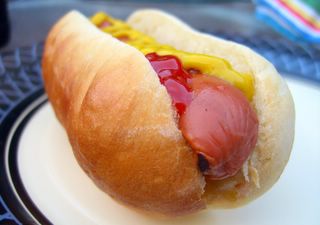
Cooking School: Hot Dog Buns


I have never been a big fan of store-bought hot dog buns. I know that the sumber one complaint about them is that buns are sold in packages of 8, while many hot dogs are sold in packs of only 7, but that doesn't bother me too much. Who hasn't over-toasted a bun and been glad for the extra? I say that it's good planning. What bothers me is that they are never the right size for the the sausage. They're usually too long or are so bready as to overwhelm the hot dog. I also take issue with the buns being overly soft or stale.
But I love hot dogs and, carb lover that I am, I am unwilling to eat them plain.
Making buns has one huge advantage over store bought, besides freshness, taste and fun: customisation. You can make the buns in the precise shape and size to fit your sausages. If you are using a spiced sausage, you can include a tablespoon or two of fresh, chopped herbs. As with any bread product, the variations are endless.
The recipe came from King Arthur Flour, but I halved the recipe instead of making a full batch. I also found that they called for a bit too much flour and that the dough was not "slack", though they descrbed it that way. I estimated the amount of oil I added, so it was probably a bit less than stated. The directions below are given for an electric mixer, though you can certainly mix this by hand. I also tried to elaborate on shaping.
I really enjoyed the fact that I got to practice shaping dough while I made these. I am very confident with round loaves now, but, more often than not, my shaped breads look a bit rough. This dough was very soft and easy to work with. It wasn't sticky, but it was easy to pinch the seams together to create smooth buns. I strongly feel that the only way to get good at shaping is to practise. This is a perfect chance to do so because you get 9 tries in one batch of dough! If it doesn't work out on your first try or two, you have many more to work on. And you can always eat your mistakes because it tastes great. It also stands up to condiments without getting soggy. Excellent.


Hot Dog Buns
(ever so slightly adapted from King Arthur's recipe)
1 tbsp sugar
2 1/2 tsp active dry yeast (1 packet or 1/4 ounce)
1/4 cup warm water (105-110F)
1 cup warm milk (105-110F)
2 tsp vegetable oil
2 tsp salt
3-3 1/2 cups ap flour
1 egg white (for egg wash)


In the bowl of an electric mixer, combine sugar, yeast and warm water. Stir to dissolve and let set until bubbly, about 5 minutes. Add in milk, vegetable oil and salt. With the mixer on a low speed with the dough hook attached, gradually add the flour. Once 3 cups have been incorporated, add the remaining flour a tablespoon at a time until the dough begins to pull away from the sides of the bowl. Turn dough out onto a floured surface and knead for 2-4 minutes, until smooth and supple. The dough should be soft, but not sticky. Place in a lightly oiled bowl, cover with plastic wrap, and let rise until doubled, 1-1 1/2 hours.

Shaping the dough:
Gently remove the dough from its bowl onto a floured surface. Flatten it slightly into a large rectangular log. Divide dough into thirds and divide each third into three equal pieces. Cover unworked dough with a clean dishtowel while shaping.
Gently flatten dough into a long rectangle. Fold left and right sides to meet in the center. Fold the top and bottom sides towards the center. Keep pinching the edges together, pulling the dough into a tight roll shape (Not that I'm advocating smoking - because I'm not and I don't - but it is similar to hand-rolling a cigarette. Except bigger. And dough). Repeat until you have 9 rolls.
Place hot dog buns on a parchment-lined baking sheet and cover with a dishtowel. Let them rise for 30 minutes.
Preheat oven to 400F.
Brush buns with egg white and bake for 20 minutes.
Remove to a rack to cool before slicing.
Makes 9 buns.

Wednesday, September 14, 2005

Simple Summer Strawberries

I love strawberries and I prefer to eat them fresh than to use them in a cake or muffin when I can. As summer fades, though, so decreases the availabilty of good fresh strawberries.
Balsamic vinegar makes a great contrast to sweet fruit. This isn't a breaking trend, but that doesn't make it any less true. Though you can certainly do this with perfect, incredibly ripe strawberries, I actually prefer to use slightly less than pristine fruit. The balsamic flavor boosts the sweetness of the berries. Use 1/4 cup balsamic vinegar per cup of sliced berries. Let the mix marinate in the fridge for a few hours, then spoon over yogurt or ice cream.
Use any balsamic, but the best choice - my opinion, of course - is a berry flavored vinegar, like the strawberry balsamic at Trader Joes or a berry balsamic from the St Helena Olive Oil Company.

Monday, September 12, 2005

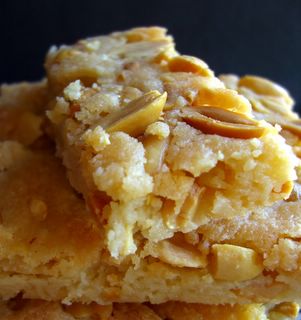
Peanut Brittle Bars

You might find yourself wondering if I like Maida Heatter. If you are, you must be very bored. This also must be the first time you are visiting bakingsheet.
These are Peanut Brittle Bars. The recipe comes from Maida Heatter's Book of Great Cookies(thank you Cathy). Maida says these remind her of peanut brittle candy. I know how addictive peanut brittle is, so once I saw how simple these were, I immediately set about baking a batch.
Once I was done, I noticed that Maida used a picture of them on the cover of the book. The bars are salty, crunchy, buttery, peanutty and dead easy. They are a bit more reminiscent of shortbread than brittle, so they tend to crumble as you eat them instead of snapping. You'll probably get a slightly chewier cookie by using brown sugar, but why mess with perfection? Go crunchy and use a napkin.


Peanut Brittle Bars
from Maida Heatter's Book of Great Cookies
1 cup (2 sticks) butter, softened
1 cup white sugar
2 cups sifted ap flour
1 cup roasted, salted peanuts, coarsely chopped and divided


Preheat oven to 375F.
Cream together butter and sugar. Gradually add flour, mixing at low speed, until fully incorporated. Stir in 1/2 cup of the peanuts.
Turn batter into ungreased jelly roll pan (10x15) and, after flouring your fingertips, press batter into thin layer. Evenly sprinkle remaining peanuts into the pan. Cover dough with a piece of wax paper and press peanuts into the dough, smoothing the mixture into an even layer. Remove wax paper.
Bake for 25 minutes, until golden brown.
Let cookies cool in the pan for 10 minutes, then slice into bars. Let the bars cool completely in the pan. They will be quite firm when completely cooled. Store in an airtight container.
Makes 24 bars.

Sunday, September 11, 2005

Sunday Brunch: Light and Fluffy Silver Dollar Pancakes


Diners do a big business in pancakes the size of dinner plates. They often have an item on the menu called "Silver Dollar Pancakes", which are a stack of small cakes often targeted towards children. I believe that the theory is that children want small sized things and they want a lot of them. I am fairly sure that you end up with the same amount of pancake regardless of the size you order. Personally, I loved the idea of stacking pancakes. I would never attempt to eat them in a stack, preferring to separate the layers and eat them one by one, but I loved the look. Hence, my stack o' pancakes shown above, rather than an assortment of evenly sized pancakes.
Cake flour makes them tender and the beaten egg whites make them light. The pancakes are thin and light, a little bit eggy and a little bit sweet. You can eat a lot without filling up. They absorb syrup faster than a sponge, though, so I recommend dipping them judiciously if you are not someone who likes a lot of syrup with breakfast. Make them into small rounds - silver dollar sized, or about 2 inches across - and eat them with your hands.


Light and Fluffy Silver Dollar Pancakes
1 cup ap flour
1/3 cup cake flour
1 tsp baking powder
1/2 tsp baking soda
1/4 tsp salt
1 tbsp sugar
2 egg yolks
1 cup low fat milk
1 tbsp butter, melted
1 tsp vanilla extract
2 egg whites, at room temperature

Sift together flours, baking powder, baking soda, salt and sugar in a large bowl. Whisk together egg yolks, milk, butter and vanilla in a small bowl and pour into dry ingredients. Stir until throughly combined.
Beat egg whites to soft peaks and fold into batter. Make sure there are no streaks of egg white remaining.
Heat a nonstick skillet or griddle (grease with butter if not nonstick) over high heat and drop batter into 2 inch rounds. Cook 1-2 minutes per side, or until golden brown. Turn down the heat slightly if the pancakes cook too quickly.
Serve immediately.
Serves 6-8 kids and about 4 kids at heart.


Saturday, September 10, 2005

Cranberry and Cabbage Soup


Somewhat unseasonably cool weather sparked a desire in me to make soup . Generally, during the summer, I stick with cold soups. I love gazpacho, for example. Elise has an excellent recipe for it, though I like mine on the thick side, so I cut down on the tomato juice that she calls for. But the cool weather made me think of fall, which made the fact that this soup contains cranberries - something I associate with fall and Thanksgiving - particularly appealing.

The original recipe called for adding beets, which I am not a fan of, so I simply used more cabbage. Red cabbage, red cranberry sauce and red onion. I must say that the simple ingredients blended well and it tasted great.
It was also one of the prettiest soups I've ever eaten.

Cranberry and Cabbage Soup
1/2 cup cranberry sauce, with whole berries
1 medium red onion, sliced thin
1/2 head red cabbage, sliced thin (approx 3 cups)
6 cups water
1 tbsp sugar
salt to taste
Combine all ingredients in a large pot and stir to combine. Bring to a boil and simmer until cabbage is tender.

Thursday, September 08, 2005

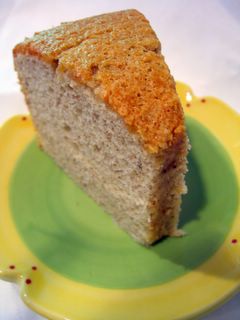
Cooking School: Chiffon Cake


Chiffon cake is a foam cake, similar in appearance to an angel food cake, but more similar in construction to a sponge cake. Angel food cakes contain no fat and derive their moisture from the sugar content of the cake and proper handling of egg whites. Sponge cakes get their leavening from beaten eggs and do not contain added fat. Chiffon cakes contain both egg yolks and vegetable oil. They have chemical leavening for extra lift, but also have beaten egg whites folded into the egg yolk/oil batter to achieve a lovely, light texture. Vegetable oil keeps this light cake moist and soft for several days after baking.
Chiffon cake lore states that in 1927, a Los Angeles baker, Harry Baker, invented the original chiffon cake. It was light, airy and a huge hit with the stars in Hollywood. He kept the recipe a secret for 20 years before selling the recipe in 1947. Chiffon cakes were introduced to the American public by Betty Crocker (aka General Mills) in 1948. Chiffon cake became the most stylish cake of the 1950s and into the 1960s - which should be no suprise, given it's star studded Hollywood origin. It's also very impressive looking, not too sweet and quite tasty.
They are baked in a tube pan, much like angel food cakes, and must be cooled upside down to prevent collapse. The cakes are traditionally turned out, upside down, onto a cake stand and covered with glaze. Citrus flavors are the most popular and most traditional for chiffon cakes, though they can be made in just about any flavor. It is here I broke with tradition and found a banana flavored recipe. Not only did I use bananas, I used non-trational red bananas. Feel free to use regular bananas for this recipe, though.
I love making foam cakes and this one was no exception. It could have been a bit higher because I inadvertantly only used 5 egg whites instead of the 7 called for in the recipe. Because I used freshly ground nutmeg, I used much less than called for, perhaps about 1/8 tsp, and the flavor still came through. The batter came together easily, the cake cooled overnight and I had some with my coffee in the morning. I did not glaze the cake, but a simple chocolate or caramel glaze would be excellent with this recipe. I really enjoyed the banana flavor of the cake, which was perfectly complimented by the cinnamon and nutmeg.


Banana Chiffon Cake
(original recipe by Flo Braker)

2 cups unsifted cake flour
1 1/3 cups white sugar
1 tbsp baking powder
1 tsp salt
1/2 tsp cinnamon
1/4 tsp ground nutmeg (a bit less if using freshly ground)
5 large egg yolks
3/4 cup (2 large) ripe bananas, mashed
1/2 cup vegetable oil
1 tsp vanilla extract
7 large egg whites, room temperature.
2 tbsp white sugar


Preheat oven to 325F.
Sift cake flour, 1 1/3 cups sugar, baking powder, salt, cinnamon and nutmeg into a large mixing bowl. Mix egg yolks, banana, vegetable oil and vanilla together in a small bowl. Pour banana mixture into flour mixture. Stir to combine and set aside.
In a medium mixing bowl, beat egg whites until foamy. Add in remaining 2 tbsp sugar. Continue to beat to soft peaks. Using 1/3 of the egg mixture at a time, gently fold beaten egg whites into banana mixture until batter is uniform in color. Pour batter into an ungreased, 10-ingh tube pan. Gently tap the side of the pan once or twice to eliminate any large air pockets.
Bake for about 50-55 minutes, until the top springs back when gently pressed. If it is not done, a small indent will remain on the surface of the cake where you poked it. Return to the oven for 2 more minutes and check again until done.
Invert pan over a wine bottle or cooling rack until completely cool, 3 hours or overnight. When cool, carefully separate the cake from the pan with a thin knife and invert onto a serving platter or cake stand. Glaze as desired.
Serves 12-14

Wednesday, September 07, 2005

Save the Bananas. But make muffins first.


I know that some people think that the extinction of bananas is a myth. While not every variety of banana is at risk, the most known and available type of banana in the US, the Cavendish, is heading towards extinction. There are hundreds of varieties of bananas, which many Americans would be suprised to learn as 90% of the time bananas in the market are yellow and uniform in size.
The plants - not trees - that yield bananas are actually giant herbs, the largest herbs in the world. The bananas themselves are actually berries. Bananas ripen best off of the plant they grow on and are picked and shipped every day of the year. Bananas are the most popular fresh fruit in the United States. In fact, the average American eats nearly 30 pounds of bananas every year, roughly 100 bananas! Currently, bananas are the world's fourth most profitable food crop, behind rice wheat and potatoes. Almost 88 million tons (80 million metric tonnes) are harvested each year, with India being the largest producer. Bananas have 1.2 grams of protein, are high in vitamins b6, C and potassium and contain lots of fiber, among their other nutrients. It is possible to live on a diet of just milk and bananas. Good to know.
Now, I love bananas. I love them plain and I love to cook with them. I'll miss the cavendish if and when it goes, but I will enjoy having more banana options at the market. To thoroughly enjoy the lovely, yellow bananas currently in my kitchen, I made some banana muffins and topped them with a banana crumb topping. I put such a thick crumb layer on the muffins, it only covered 8 of the 12 in the batch. I did not mind that the rest were plain, but I would advise you to use a more judicious distribution of the crumb topping. Shortening makes a slightly softer crumb in the topping, but you can substitute an equal amount of butter.


Banana Crumb Muffins
Muffin batter:
1 ½ cups ap flour
½ tsp baking soda
½ tsp baking powder
½ tsp salt
2/3 cup sugar
3 tbsp vegetable oil
½ cup buttermilk
1 egg
2/3 cup (2 medium) mashed bananas, divided
1 tsp vanilla

Crumb topping:
½ cup flour
1/3 cup sugar
¼ tsp salt
3 tbsp shortening, cut into small pieces.
1 tbsp mashed banana (reserved from 2/3 cup mashed banana)


Preheat oven to 350F. Grease or line 12 muffin tins with paper liners.


Prepare the crumb topping: In a small bowl, whisk together flour, sugar and salt. Cut shortening into flour mixture until it resembles coarse crumbs. Larger crumbs are a bit more desirable. Stir in the mashed banana and set bowl aside.


Prepare the batter: In a medium bowl, sift together flour, baking soda, baking powder and salt. In a large bowl, whisk together sugar, vegetable oil, buttermilk, egg, bananas and vanilla. Pour flour mixture into banana mixture and stir until batter is just combined. Spoon into muffin tins, filling each 2/3 full. Top each muffin with crumb mixture, dividing it evenly.
Bake for 18-21 minutes, until a tester comes out clean and the muffins spring back when gently touched.
Makes 12 muffins

Monday, September 05, 2005

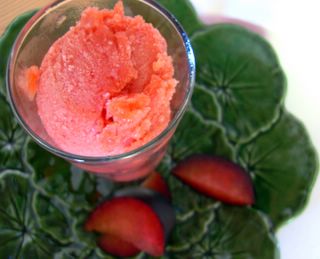
Plum Sorbet


I read a great post on Chowhound about making peach sorbet. The poster determined that a minimal churning time would produce the creamiest, best tasting sorbet. I, not having given a tremendous amount of thought to the issue before, would have guessed that a longer churning time would produce a creamier result. Always game for an experiment, I tried the short churning method with a plum base.
Wow.
This may only be true of non-custard based sorbets, but I got great results and completely agree with the original poster. My plum sorbet was dense, creamy and delicious. I don't think I've ever tasted an ice cream, sorbet, or gelato that tasted so wonderfully like the fresh fruit. It was also very easy to whip up. You do have to blanch the plums to remove their skin, but everything else in done in the blender. Depending on how large your plums are, you may need more plums. Mine were large and I used 7 or 8 to make 4 cups of plum puree.
If you do not have an ice cream maker, pour puree into a shallow pan or bowl and stir with a fork every hour, to break up the ice crystals, until mixture is frozen.
It's very refreshing by itself, but for an delicious and elegant dessert, serve in a glass with some prosecco or a bit of sweet white wine poured over it.

Plum Sorbet
7-10 plums, blanched, skins removed
5 tbsp sugar
1/4 cup water

Chop plums coarsely to remove pits. Combine plums, sugar and water in a blender and process until smooth. You should have about 4 cups of plum mixture.
Pour into your ice cream maker and process until it just begins to look creamy, roughly 1/2-1/3 of the time that would ordinarily be required by your machine (about 15 minutes).
Freeze, covered, until ready to use.
Note: You can also use pluots for this recipe (a hybrid plum/apricot that is just delicious!).

Sunday, September 04, 2005

(Vegan) Chocolate Walnut Muffins


Have a muffin.
Once you taste one of these, you might not believe they were vegan.
They were inspired by a recipe in Sweet And Natural Baking, which I picked up on clearance at a local bookstore. The recipes in the book mostly call for using a fruit juice reduction - concentrated, syrupy fruit juice - in place of sugar or other sweeteners. I haven't tried too many things in it yet, but so far I'm fairly pleased with the results.
Muffins are cakes that you have a socially acceptable excuse to eat at breakfast. Chocolate muffins are really just chocolate cake. Socially acceptable though it may be, you might feel a bit guilty after your second one. But these are pretty healthy, particularly for a chocolate muffin. Low in added fat, no refined sugar or flour! And did I mention that they are very tasty?
These muffins are quite chocolatey, with a nice taste and moist texture. My tasters actually found these difficult to describe. One said that they were more muffin-like than cake-like. Another found them to have a vaguely brownie-like cakiness. Confused? Everyone agreed that they were great and much more satisfying than your average muffin. And that's all that really matters.
These would also be appropriate for the upcoming IMBB....


(Vegan) Chocolate Walnut Muffins

1 ¼ cups whole wheat flour
¼ cup cocoa powder
½ tsp baking soda
½ tsp baking powder
½ tsp salt
½ cup maple syrup
¾ cup vanilla soy milk (or plain, with ½ tsp vanilla added)
2 tbsp vegetable oil
½ cup chopped walnuts, plus 8 walnut halves

Preheat oven to 350F. Grease 8 muffin cups in a baking tin.
In a medium bowl, whisk together flour, cocoa, baking soda, baking powder and salt.
In a small bowl, whisk together maple syrup, soy milk and vegetable oil. Pour wet ingredients into flour mixture and stir until smooth, adding walnuts at the last minute. Do not over mix, but try not to have any pockets of dry ingredients left in the batter. Spoon into prepared muffin tins, filling each 2/3 full. Garnish each muffin with a walnut half.
Bake for 18-20 minutes, until the top springs back when lightly pressed.
Let cool slightly before serving. Allow to cool completely on a wire rack, before storing well wrapped or in an airtight container.
Makes 8 muffins

Saturday, September 03, 2005

Maybe if I just reach a little higher...

I could be wrong, but I think Phoebe saw something outside...


Check out the other Weekend Cat Blogging photos at EatStuff!

Friday, September 02, 2005

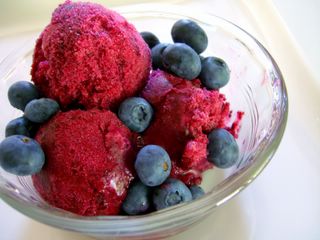
AWW Blueberry Sorbet


I have been meaning to make something from my Australian Women's Weekly booklet of Ice Creams and Sorbets for some time now. More accurately, I have been meaning to post this for some time now. Clare, of Eat Stuff, sent me this wonderful publication. Clearly, she knows me well. It covers everything from the simplest granita to the most decadent tiramisu ice cream (with liquored berries, no less). The photos are very tempting, as well.
I chose a simple sorbet, hoping to do justice to the massive quantity of blueberries that had been accumulating in my kitchen. The recipe called for including 1/4 cup of lemon juice, but I left it out. The lemon zest gave a nice hint of lemon, but I think the juice would have improved it slightly. I decided to deviate from the directions and ended up over-churning it a bit in my ice cream maker; it was a bit icy the next day. The blueberry flavor was great, though. I thought it made a very refreshing after dinner sorbet. The recipe below is paraphrased from AWW's book.


Blueberry Sorbet
3 cups blueberries
1 1/2 cups water
1/2 cup sugar
2 tsp lemon zest
1/4 cup lemon juice
2 egg whites

Combine blueberries and water in a medium sauce pan. Bring to a boil, then simmer for 15 minutes. Add sugar and stir to dissolve. Remove from heat and let stand until the mixture reaches room temperature. Stir in lemon zest and juice. Pour mixture into a shallow pan or bowl and freeze until almost set and the mixture has reached a slushy, consistency, like wet snow.
In a blender, whizz blueberry mixture with egg whites until smooth. Pour into a freezer safe bowl or pan, cover and freeze until firm.
Serves 4-6

Thursday, September 01, 2005

Cooking School: Batter Bread and English Muffins


This post is not actually about english muffins. It is about how to create a simple, tasty stand-in for an english muffin. I will admit that nothing could replace a tasty, fresh english muffin, but most of us eat the kind sold in the market. They make great toast, but are hardly exceptional. Unfortunately, though undoubtedly worth doing, they are time consuming: raise the dough, shape the dough, repeat and bake on a griddle.
To bypass this tedium and still produce the great flavor, open texture and extreme toast-ability of an english muffin, I turned to a batter bread. A batter bread is one that is simply mixed and transferred directly to a baking tin. There is no hand kneading, no shaping and only the briefest rise time. This is the perfect type of yeast bread for those who are beginning to dabble with home baked loaves or more experienced bakers who are short on time. This particular recipe, as I discovered, is perfect for those of use who like toast.
The recipe comes from King Arthur Flour this week. It is incredibly easy. Mix, divide and bake. The final product is moist and slightly yeasty. The crust is crisp and the crumb is coarse and a bit irregular. It makes fantastic toast. Use lots of butter and jam.


English Muffin Batter Bread
adapted slightly from King Arthur Flour
6 cups ap flour
2 tbsp active dry yeast
1 tbsp sugar
2 tsp salt
1/4 tsp baking soda
1 cup milk (I used low-fat), about 110F
1 1/2 cups water, about 110F
a few tbsp cornmeal

Grease two 8x4 inch loaf pans. Dust sides and bottom with cornmeal.
In a large mixing bowl, combine 3 cups flour, yeast, sugar, salt and baking soda. Whisk to combine. Add milk and water and stir until smooth. Gradually add remaining flour, continuing to stir until dough is smooth. If using a stand mixer, use the dough hook and work the batter for about 4-5 minutes, until smooth and uniform.
Divide batter evenly into prepared pans and use your fingers to even the tops. Cover with a dish towel and let rise for 45 minutes.
Meanwhile, preheat your oven to 400F.
Bake loaves for 25 minutes.
Remove to a wire rack and allow to cool for at least 30 minutes before slicing.

Makes 2 loaves.