Monday, October 31, 2005

Dirt Cups


The best part about being, say, under the age of 11 is that you get to order off the kid's menu in restaurants. The main course offerings of kid's menu are not the terribly exciting. In fact, many such menus are limited to plain hamburgers, grilled cheese and french fries. No, the thing that makes me nostalgic is the free dessert that comes along with the meal. I will admit that it isn't usually anything exciting, but what kid could resist a restaurant meal that includes dessert?
The most common dessert wass a scoop of vanilla ice cream, occasionally turned into a sunday with a bit of fudge and whipped cream, but I would always order a dirt cup when it was on the menu. A dirt cup is a layered dish of chocolate pudding and chocolate cookie (or cake) crumbs that vaguely resembles a cup of dirt. This similarity is played upon with the inclusion a few gummi-worms.
I will freely admit that I actually ordered the dessert for the gummi worms alone. I still eat them first.
This dirt cup may not trick anyone, but it makes an adorable dessert for kids of any age and a fun one for grown-ups on Halloween.There is no recipe for these, just put some chocolate pudding into a cup and top with crushed chocolate biscuits or cake crumbs. I used an extra cupcake I had frozen a few weeks back. Top your dirt cup with gummi-worms and any other appropriate decorations you have on hand. If you're a Harry Potter fan, like me, perhaps you'll notice that my dessert bears a striking similarity to the dark mark. What could be spookier?
Happy Halloween, everyone!

Saturday, October 29, 2005

Tuna Ceviche


When you're celebrating a cat's birthday, like Clare is celebrating Kiri's birthday this weekend, it is probably a good idea to put fish on the menu. I love my cats, but I'm not about to go out and purchase a big piece of sushi grade Ahi tuna for them. I bought this for human consumption, but in the spirit of Kiri's birthday, I did give the scraps to my cats. With the rest of the tuna, I made a lovely ceviche, which is more than appropriate for human parties. It is incredibly easy, since it requires no actual cooking and can be prepared in advance.
Ceviche is a latin American dish where fish that is "cooked" with citric acid, lime juice in this case, which gives it a slightly firmer texture than raw seafood. Just about any kind of seafood can be used, from tuna to shrimp to scallops. In its simplest form, ceviche is just citrus and fish, but it is very versatile. I like to keep the latin flair and make mine with tomato, onion and avocado. If you really want to minimise the work, just purchase some high quality, fresh salsa and add that to the fish, along with the lime juice and oil.
Ceviche is a great appetiser or first course. Many restaurants, for reasons I'm not entirely certain of, serve ceviche in cocktail or martini glasses. I'm not one to go against tradition (not all the time, anyway), so I did the same here. Serve ceviche with tortilla chips or just hand your guests a fork.


Tuna Ceviche
¾ lb sushi grade Ahi tuna
¼ cup lime juice (2 limes)
zest, 1 lime
1 tbsp olive oil
¼ cup chopped fresh tomato
½ haas avocado, cubed
¼ cup fresh, prepared salsa
(if not using salsa, use 2tbsp each onions, tomatoes, cilantro and 1 tsp jalapeno peppers)
salt and pepper to taste


Cube the tuna and toss in a large bowl with all the other ingredients. Marinate for at least 30 minutes and up to 3 hours before serving.
Garnish with lime and additional avocado.
Serves 4

-------------------
And in the spirit of Weekend Cat Blogging, you can see that Dusty looks content after his tuna scraps.

Since it was a party, I put out some catnip, too. Phoebe, as the younger and less responsible cat, might have had a bit too much.


For more cat photos, why don't you check out Clare's WCB roundup?

Friday, October 28, 2005

Pumpkin Hummus and Pita Chips


Having recently acquired some seasonal cookie cutters, it was not a big leap to decide to use them to cute something other than dough, although you might not suspect that if you've been paying attention this week. I layered some fresh pitas and pressed the butters through them to make lots of thin chips. There is no magic number here, simply make as many as you'd like. I, personally, like a lot. Place in a single layer on a baking sheet, syrap or brush lightly with vegetable oil and sprinkle with salt, pepper and paprika. Rubbing the pitas with a split garlic clove before hand is a good idea, if you want a little more flavor from your chips. Bake for 4-6 minutes at 400F, until browned and crisp at the edges.
But chips, as delightlyfull shaped as they may be, aren't very interesting without dip.
The moment I saw this Pumpkin Hummus in the new issue of Cooking Light, I went into the kitchen and made it. Lucky I already had all the ingredients on hand.
The dip has the familiar tahini and garlic taste of traditional hummus, but lacks the slight density of the usual chickpeas. It's light, flavorful and delicious. I omitted the extra teaspoon of olive oil called for in the recipe, since I felt that the tahini had the oil content well-covered. It makes a fairly large batch, but will store well for a few days in the fridge, if it lasts that long.


Pumpkin Hummus
2 tbsp tahini
2 tbsp (fresh) lemon juice (lime will work, too)
1 tsp ground cumin
3/4 tsp salt
1/8 tsp ground red pepper
1 (15-ounce) can pumpkin puree (scant 2 cups)
1 garlic clove, smashed

In a food processor, combine all ingredients and puree until very smooth. Add a bit of extra lemon juice if the mixture is too thick to blend thoroughly.
Makes about 2 cups.

Thursday, October 27, 2005

Cooking School: Gingerbread Skeletons


Halloween is a fantastic holiday. It is low pressure and all of the individual elements are fun: dressing up, carving pumpkins, eating treats. For anyone who doesn't celebrate it, kids dress up in costumes and people give them candy. I practically lived for the holiday when I was little; I didn't get much candy at home. Of course, as I got older I learned to appreciate things in life other than free candy. And they are... well, you know what they are. They're very important.
I can't "Trick or Treat" anymore. The only person who still thinks I could pass for a primary school student is my great aunt, and, between us, she may not be entirely clear on what year it is (of course I love her anyway). I still have a lot of fun decorating, picking out a costume and, of course, making Halloween goodies.
The distinct chill in the air makes this the perfect time of year for my first batch of gingerbread. I couldn't resist making the Gingerbread Skeleton cookies. I knew that I wanted to make these when I first saw them on Epicurious. Unfortunately, I didn't have any animal cookie cutters. Only a unicorn. And I think we can all agree that nothing is scarier than agree that nothing is scarier than a skeleton unicorn. Except maybe a zombie unicorn, but you're on your own for that one.
Gingerbread dough is simple and spicy. I added a bit of cinnamon and extra ginger to mine. This dough rolled out very easily with a bit of flour and rerolled without seeming to develop much, if any, toughness. I went for a baking time in the middle of the frame recommended by the recipe and got soft, chewy cookies. The flavor was very good, neither too spicy nor too bland. There isn't much sugar in the recipe, so I actually prefered the iced cookies to the un-iced, enjoying that extra hint of sweetness.
My icing was a simple, stiff mixture of confectioners' sugar, vanilla extract and milk. I used a small, plain tipped piping bag. This icing couldn't be any easier, but if you buy a tube of white decorator icing at the market, I won't tell.


Gingerbread Skeletons
(originally from Epicurious.com)
2 1/2 cups ap flour
1/2 tsp baking soda
3/4 tsp salt
1/4 tsp nutmeg
1 tsp ginger
1/4 tsp cinnamon
1/8 tsp allspice
1/2 cup butter, room temperature
1/2 cup sugar
1/2 cup molasses
1/4 cup water
1 tube white decorating icing with small tip


In a medium bowl, sift together flour, salt, baking soda, nutmeg, ginger, allspice and cinnamon.
In a large bowl, cream together butter and sugar until smooth. Beat in molasses and water. Mixture may look a bit curdled, which is ok. With your mixer on low speed, or by hand, beat in flour until a uniform dough forms. Divide dough into two or three pieces, cover with plastic wrap and refrigerate for at least 2 hours.
Preheat oven to 375F.
On a lightly floured surface, roll out dough to 1/4 inch thickness. Use cookie cutters of your choice (animals are nice!) to cut dough. Place cookies on a parchment-lined baking sheet. Bake for 9-12 minutes, depending on size of cookie cutter (Mine needed 9 minutes. I got about 40 cookies.). Cookies should be just brown at the edges.
Cool completely before decorating with white icing.


___
Chubby Hubby will announce the results of Steptember's DMBLGiT soon. Thanks to everyone for the advice on which photo to enter!

Tuesday, October 25, 2005

Candy Corn Cookies, Made with Real Honey

Brachs Candy Corn are one of the great things about Halloween. They are small, sugary lumps that vaguely resemble corn kernals (think of the yellow end facing outward) and I, for some unknown reason, can't seem to stop eating them. Oh well. They only come out once a year, so I can't feel too bad about bringing a bag home.
I picked up another bag of them last weekend. If you've ever had these candies, do you notice anything odd about the packaging?


The "Made with Real Honey" claim is something I had never noticed before. Indeed, the older bags lacked this text. I checked the ingredients. On the new package:


And on the old:


It seems that Candy Corn have always contained real honey, but the company has only chosen to promote this fact now. It also looks like they increased the amount of honey, reduced the amount of wax (aka: confectioner's glaze) and removed the partially hydrogenated oils, making them trans fat free! Great news - I can eat just as many and be slightly less unhealthy!
I even noticed a difference in the taste. The new ones were larger, softer, significantly less waxy and sweeter. The sweetness was a distinct honey flavor, not simply a tooth-aching sweetness. Delicious, if you like that sort of thing.
Because I know not everyone likes these little candies - though they should - I decided to turn them into a batch of cookies to showcase the soft texture and honey flavor of the reengineered candy corn. I made a slightly soft, honey-sweetened cookie and painted on the colors with a egg-yolk based paint. The egg yolks create a very shiny finish, much like confectioner's glaze, and don't add any extra sweetness to the cookie. The colors look quite brilliant in person, so be generous when you paint them on.
I find these to be just as addictive as the candy version and there is no doubt in my mind that they are similar. Don't let that put you off because they are still, in fact, cookies and not sugar-ladenconfections. This definately gives them a wider appeal. They keep very well due to the honey, so don't worry about extra cookies going to waste. You can also freeze the dough for a week or two before using.

Candy Corn Cookies
2 1/4 cups ap flour
1/2 tsp baking soda
1/2 tsp baking powder
1/3 cup butter, room temperature
1/2 cup sugar
1/2 tsp salt
1 egg
1/2 cup honey

In a medium bowl, sift together flour, baking soda and baking powder.
In a large bowl, cream together butter, sugar and salt. Beat in egg and, when combined, add honey and beat well. Gradually add the flour mixture to the honey mixture until you have a smooth dough. Shape the three discs into triangular logs (2 inches on each side) and freeze. If you want to roll out the dough, freeze as discs. Chill at least 2 hours.
Prepare paints (see recipe below).
Preheat oven to 350 F.
Take dough out of the freezer and place on a lightly floured surface or a sheet of wax paper. Slice into 1/4 inch thick triangles. You may also roll out to 1/4 inch thickness and cut with a cookie cutter. Place slices on parchment lined baking sheet. Paint stripes on the cookies, yellow at the base, orange in the middle and plain at the top.
Bake until just brown at the edges. This will be 8 minutes for 2x2x2 triangles, as directed above, or up to 10 minutes for a slightly large cookie.
Cool completely on a wire rack before storing.
Makes about 4 dozen.


Egg Yolk Paints
3 egg yolks
3 tbsp water
Food coloring


Place one egg yolk and one tbsp water in each of three small dishes. Add several drops of desired coloring to each dish, noting that un-colored egg yolk will produce a clear, shiny glaze. For candy corn cookies, leave one egg yolk uncolored and add yellow and orange dyes to the others. Apply with a damp paintbrush in two or three coats.

Monday, October 24, 2005

Pumpkin Chocolate Chip Cookies


Given that, for those of us in the northern hemisphere, fall is upon us, I am much more inclined than usual to make things with pumpkin. I know other people are, too. The subtley sweet and easy spiceability of the squash make it practically the symbol of fall. I just love it any time, but certainly am aware of a higher level of acceptability as the year progresses.
Along with casseroles, cakes and pies, cookies seem like a good vehicle for pumpkin. Unfortunately, many pumpkin cookies are spongy and cakey and rubbery. The flavor is good, but you just don't want to keep chewing them. Even if they are fine the day they come out of the oven, the next day they are dry and bland. Tempting, isn't it?
These pumpkin cookies, fortunately, do not seem to have those problems. They are very soft and a bit chewy, but not cakey. They are moist and have a good pumpkin flavor. The whole cookie presents a slightly unusual, but excellent, combination of texture and flavors. Best of all, they retain all of these qualities, making them just as good (if not better) on the second day. I think that they are best with chocolate chips and a few nuts, but they work well with raisins and dried cranberries, too. I always like to add the optional pecans for crunch.
I recommend using freshly cooked, cooled and pureed pumpkin because I think that the extra moisture helps the cookie's texture; canned pumpkin may result in an ever so slightly cakey cookie.

Pumpkin Chocolate Chip Cookies
2 ½ cup ap flour
1 tsp baking powder
1 tsp baking soda
3/4 tsp salt
1 tsp ground cinnamon
1/4 tsp ground cloves
pinch nutmeg
½ cup butter, room temperature
1 cup white sugar
1/2 cup brown sugar, packed
1 egg
1/2 tsp vanilla extract
1 cup pumpkin puree
1 c chocolate chips or raisins
½ - 1 cup pecans or walnuts (optional)


Preheat oven 350F. Line two baking sheets with parchment.
Whisk together flour, leavening, salt and spices.
In a large bowl, cream the butter with the sugars. Beat in egg, then vanilla, then pumpkin. Add flour mixture and stir until just incorporated. Stir in chocolate chips and pecans, if using.
Drop by tablespoons and bake for 12-14 minutes at 350F. Bake them until they’re lightly browned at the edges, but not dark.
Remove to a wire rack to cool.
Makes about 3 1/2 dozen.

Saturday, October 22, 2005

IMBB#19: A Day of Souffles


The brilliant theme of Souffles was chosen by our host, Kitchen Chick, for this month's Is My Blog Burning event. Souffles are wonderful things and one of the few dishes that should really only be prepared inside the home, though of course, I would not refuse if the souffle is part of a tasting menu at the French Laundry.
A souffle is a mixture of egg whites and some sort of sauce or custard base. You can really souffle just about anything, though moister, softer things will make better souffles. Would you prefer a cheese souffle or a cracker souffle? Souffles are light and airy creations that get their structure from beaten egg whites. The protein in the egg whites forms pockets of air that, much like rising bread, expand when heated and give the souffle lift. Of course, egg whites are rather more delicate than the gluten in bread, so the temperature difference between the oven and your kitchen will cause the souffle to deflate. Souffles should be served immediately to preserve the look and their soft, fluffy texture.
What are, arguably, the two most common souffles? Cheese and chocolate. I make banana souffles often, too. None of that from me for this event. I wanted to be a little bit different and try out a few souffle ideas I had recently. I ended up with a whole day of souffles.
I started off breakfast with souffled oatmeal, since its creamy consistency made it a good candidate for souffle-ing. I had too high a ratio of egg whites to base here, so it was a bit lighter than I would have liked. The dish tasted fine, but I was left unsatisfied. The sugar topping that I sprinkled on before putting the souffle into the oven crisped wonderfully, though. No photo of this one.


I remembered seeing tiny souffles in egg shells on an old rerun of Iron Chef, so I tried the same trick for lunch. Basically, I made a cross between scrambled eggs and bechamel and souffled it. I whisked together buttermilk, a bit of flour, egg yolks and salt and pepper, then folded in an egg white and piped the mixture into egg shells (On Iron Chef, they had a neat gadget that took the tops off eggs cleanly in a split second. I want one!). The little souffles were extremely tasty and the presentation was gorgeous. Served with a salad, I felt like I was at a little bistro. Perhaps it was a little time consuming for what it was, but I would consider making it again.


The final souffle is more of a side dish, though I ended up having it for dinner. It is a take on sweet potato casserole, though I made it substantially less sweet than most recipes. The texture was almost like a very moist and tender sponge cake and the bourbon gave it an addictive quality. I'm not sure if I loved it, but I couldn't seem to stop eating it. Perhaps the sugar I sprinkled on top, which caramelised during baking, had something to do with it. This is definately a repeater and I might play around with sweetness and turn it into dessert!


Sweet Potato Souffle

1 lb sweet potatoes, cooked and peeled
2 tbsp brown sugar
¼ tsp each cloves, cinnamon
½ tsp salt
1/3 cup buttermilk
1/3 cup half and half or light cream
1 tbsp brandy
1 egg yolk
2 egg whites, room temperature.
2 tsp sugar, for sprinkling
butter and 2 tbsp breadcrumbs, for coating


Note: If you roast or microwave your potatoes, as opposed to boiling them, you may have less moisture, in which case add 1 tbsp more liquid. You may also substitute milk for the cream. I also used a 3-cup capacity dish for this souffle, but you can put this into individual ramekins and reduce the baking time.


Butter the sides of a 3-cup souffle dish, or an oven-proof dish with high, straight sides. Add breadcrumbs and shake to coat sides. Use a dish towel and remove any butter or crumbs from the top 1/2 inch of the dish, to ensure a straight rise.
In a food processor, blend potatoes, sugar, spices, buttermilk and light cream/half and half, brandy and egg yolk until very smooth.
In a large bowl, beat egg whites until they reach soft peaks. Add potato mixture to egg whites and fold together until the mixture is uniform and well-combined.


Bake for 30-35 minutes at 425F, until souffle is mostly set when you jiggle it.
Serves 4-6 as a side dish.

Tagged with: +

Friday, October 21, 2005

SHF #13: Dark Chocolate Yogurt Mousse


Kelli, of Lovescool, picked Dark Chocolate as the theme for this Anniversary edition of Sugar High Friday. Good choice, eh? She included a note telling people to try something new, since quite a few food bloggers have a weakness for the cocoa bean. But while I like to eat a nice bit of dark chocolate, I often prefer to use cocoa in my baked goods since I like the flavor and it couldn't be any easier to incorporate into any mix. So, the fact that I had little risk of repeating myself with this event gave me a lot of freedom. But I just couldn't bring myself to do anything too boring.
I chose a recipe that I tried to adapt semi successfully before. Working with it again, I now know for certain that my big mistake was using too many egg whites. Yes, the difference between 7 ounces of egg white and 7 egg whites is a big one. This is good news because the mouse tasted great, it was just a bit liquidy at the bottom of the glass. For this SHF, I went back and made the original recipe for Chocolate Yogurt Mousse.
This adaptation of the recipe makes four servings, since I decided to halve the recipe. Because I used thick, greek-style yogurt, I didn't drain it first. If you can't get the greek yogurt, just drain plain, nonfat yogurt through a cheesecloth overnight in the fridge before making the mousse. It turned out to have a smooth and creamy consistency, but was very bittersweet. Not a dessert for everyone, but if you really like good bittersweet chocolate, you'll love this. I used Callebaut bittersweet and tasted every bit of it. Next time, I think I'll add a dash of almond and vanilla extracts (or a shot of amaretto) for fun.
If you're feeling decadent, top it with a bit of whipped cream. If it's not sweet enough for you, you can increase the sugar in the mousse by 1-2 tbsp.


Bittersweet Chocolate Yogurt Mousse
(courtesy of the CIA)
8-oz. plain, Greek-style yogurt (about 1 cup), room temperature
1 oz. dark/bittersweet chocolate, melted
2 tbsp cocoa powder, sifted
3 tbsp sugar
2 egg whites


Fold melted chocolate into yogurt in a medium (glass, preferably) bowl. Fold in cocoa powder. Heat the mixture over a water bath or in the microwave for a few seconds until it is warm and smooth, eliminating any remaining bits of unmelted chocolate.
In a small sauce pan, bring about an inch of water to a simmer. Set a bowl containing sugar and egg whites over the simmering water and beat to soft peaks. Remove from heat and fold meringue (egg white mixture) into yogurt mixture. Divide evenly between 4 ramekins or small wine glasses. Refrigerate at least 3 hours, or until ready to serve.

Thursday, October 20, 2005

Cooking School: The Story of a Starter


There are three ways to come by a starter:
Catch wild yeast
Use packaged yeast
Buy/Borrow/Steal

I would say that the best way to start a starter is to get some from a friend. Sourdoughs - and their starters - get their flavor from long and slow development, so the older your starter is, the more character it is likely to have. Of course, a fresh starter will still produce excellent results and it is the way to go if you don't have any friends who keep starters in their fridge.
Yeast is easy to catch and not too hard to maintain. The flavor of your particular starter will depend on the yeast that live in your enviornment. San Francisco sourdoughs have a strong, unique flavor due to their sea side location. The flavor can also be influenced by any additions you make to your starter. You can enhance the yeast-catching ability of your starter by adding things to increase fermentation - like grapes, peaches, potatoes or simple sugars.
Excessive heat is pretty much the only thing that will kill yeast, which is why water temperatures are called to be below 120F. Moderate heat encourages the growth of yeast, which produces carbon dioxide and causes your bread (or starter) to bubble and rise - hence the reason for allowing your dough to rise in a warm place. The cold does not kill yeast, it merely causes it to slow down or, in extreme cases, hibernate completely. Active dry yeast has been freeze dried, but it reactivates when exposed to water. Slow rises are done in a refrigerated enviroment where it can take ten times the length of a normal rise for your dough. Slow rises, like slow cooking, allow the flavors of the dough to meld and increase in strength. Slow rises also allow some breads which might have difficulty rising quickly, due to low gluten content or high fat content (like rye breads or brioche), to achieve a better rise.

--------------------

After some prompting from Barrett, I decided to make and chronicle a batch of starter. This is the story of what I did. Please be advised that I am not claiming that this is the only, nor necessarily the best, way to begin a starter. But it works for me and it will work for you. This is a method, a guideline. Don't time things down to the minute. If you haven't worked with a starter before, you may not know what to look for, and hopefully this will help you.

I used all whole wheat flour, as I already have a regular sourdough starter, but you can use all purpose or a combination of the two. Other flours can and flavors can be added but I strongly recommend starting with something simple. The timeline reflects the days that I worked on the starter. Any work I did, I usually did in the mornings.


Saturday
To get started, mix 1/2 cup all purpose flour and 1/2 cup warm water in a bowl - I like clear glass - and leave out in a warm place. You don't need to cover it, but you can do so loosely if you wish


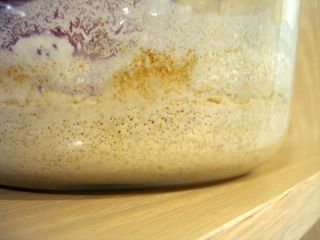
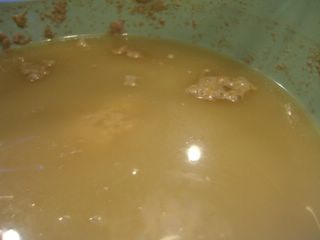
This photo is from sometime Sunday. Note the tiny bubbles.


Sunday
24 hours later, dump out half the starter and add in another 1/2 cup flour and 1/2 cup water. It may start to smell, so you might want to cover the bowl with plastic wrap.


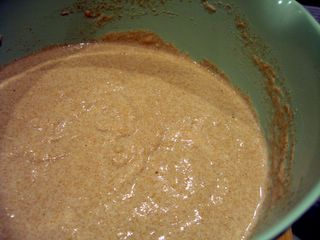
Monday morning, before dumping into a larger container.


Monday
Transfer starter to a larger bowl or a more permanent container. Add in 3 cups flour and 2 1/2 cups water and mix well. Make sure that your container has enough room for the starter to expand.


Monday, after transferring the starter.
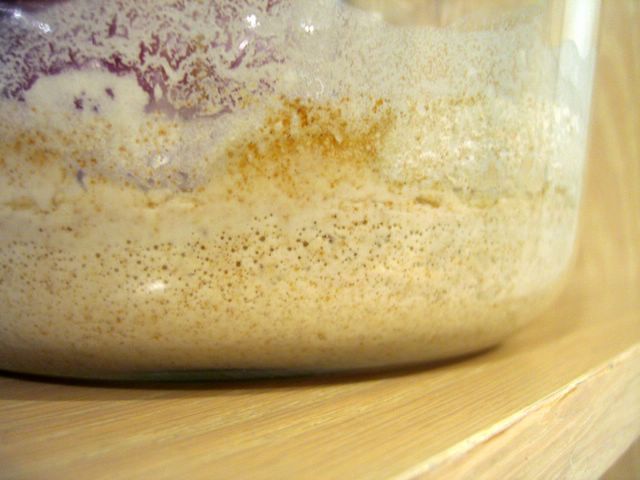


Monday - Wednesday
Starter will be frothy and still smell rather cheesy and not sour. Have patience. Eventually, the froth will subside and the mixture may separate a bit.


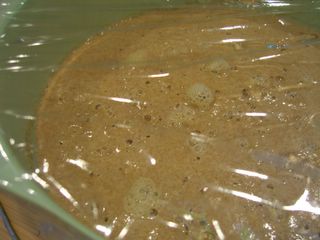
The froth is evident here. It did not smell good, so I left the plastic wrap on.
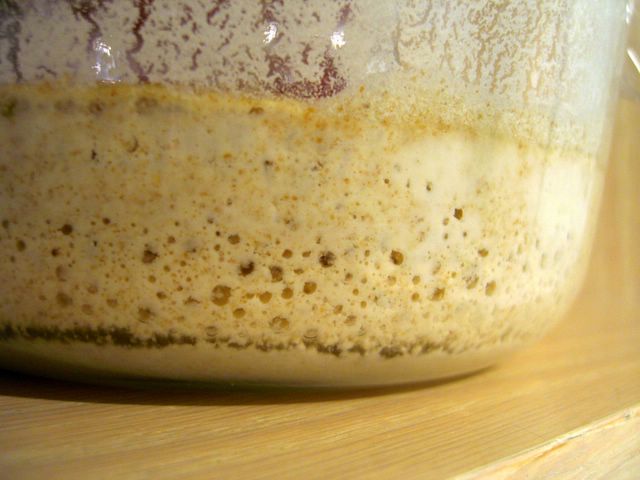


Thursday
It's safe to peek now. The starter should smell sour, but not aggressivly unplesant anymore. There will probably be some liquid on top. That's ok. Stir it all together (it may be quite liquidy), then pour out half of the liquid (about 2 cups), until you have about 1 1/2 cups left in the bowl. Add in 2 cups flour and 1 cup water. Cover and return to its resting place.


Smell is pleasant now, starter has separated.

Now that the sourness is established, it has to develop. You starter will only get better with time.


Friday
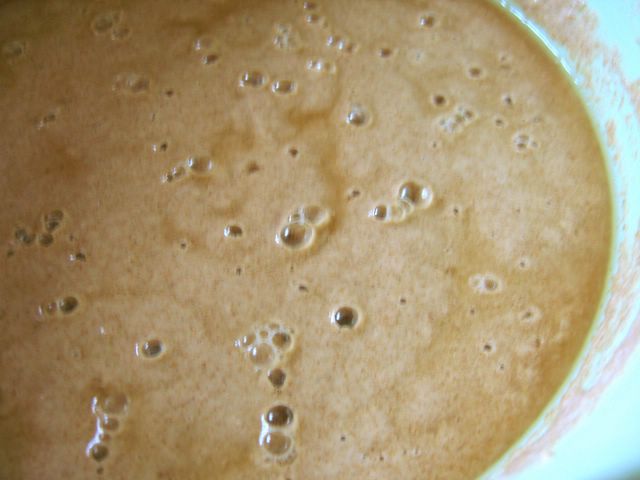
There should be some good sized bubbles in your starter. It should smell plesant and yeasty.

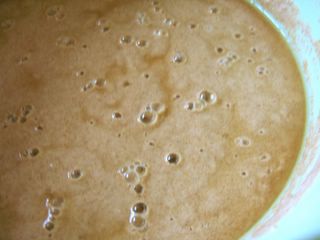
Friday morning bubbles.


Remove 1 cup from your starter (either to a small bowl for crumpets or into the trash) and replace it with 1 cup flour and 1/2 cup water. Let it sit out for at least 3 hours, loosely covered. Repeat this once more, then you can refrigerate your starter.
This method is the basis for feeding your starter. Roughly every 2 two weeks, or the night before each use, remove one cup of starter, add in 1 cup flour and 1/2 cup water, stir and let it sit until bubbly. It should sit out at least three hours, but I often leave mine overnight. Remove starter for use as desired, add back in the same amount of flour as you removed (1 cup of starter = 1 cup flour + 1/2 cup water), let stand until bubbly, and return, to the fridge.
--------------------


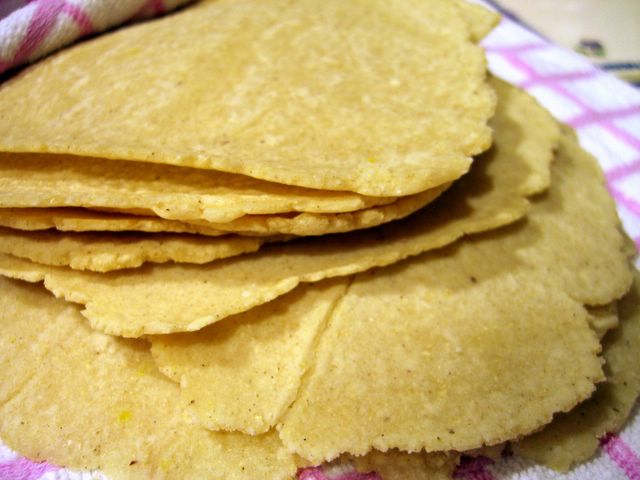
This starter method doesn't produce as much excess starter as some, which I like. Instead of disposing of your unfed (1 cup each feeding, starting on Friday above) starter, you can use it to make 
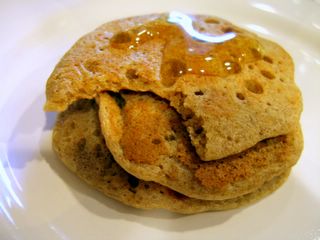
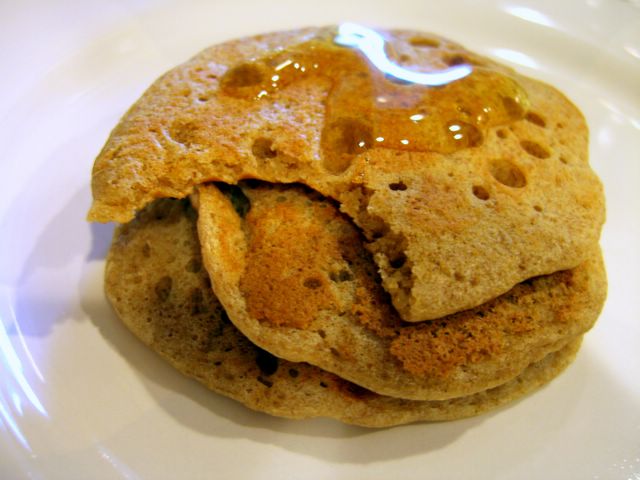
crumpets. Mmm... crumpets.... Unless you're eating them as they come off the grill, it is better to toast them before slathering them with butter or jam because the crisp exterior is what makes a crumpet worth eating. They freeze very well once cooled. Since they can be heated up in the toaster, I often make them ahead for weekday breakfasts. Mine don't always have big holes, so don't worry if yours look a bit like pancakes. They still taste great.
The baking soda counteracts the acidity in the unfed starter. If your crumpets taste too sour, and they might if your first batch is with your first or second feeding, simply increase the amount of baking soda to 3/4 tsp.


Sourdough Starter Crumpets
1 cup (unfed) sourdough starter
2 tsp sugar
1/2 tsp salt
1/2 tsp baking soda

Mix all ingredients together in a medium bowl. Heat a nonstick, dry skillet over medium heat. Drop dollops of batter (size is up to you) onto the skillet and cook until tops are set. Flip over to brown the holey side for a minute.
Toast until crisp and eat immediately, or cool completely and freeze.
If you have crumpet/biscuit rings, grease them and pour batter in. Follow procedure as above. Yours will be thicker than free-form crumpets will.


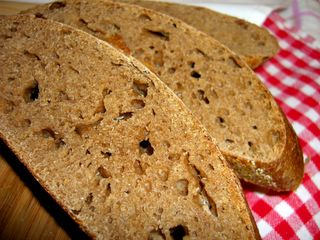
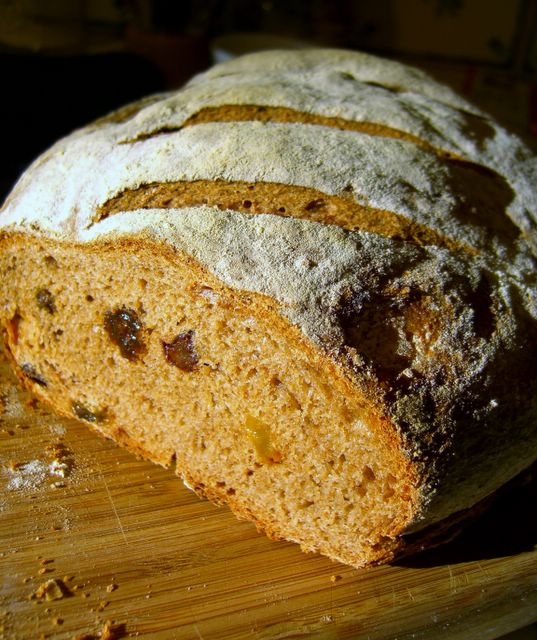
Now that your starter is fed, you can try making bread. If your bread doesn't rise at all, feed the starter over the course of two or three days and try again. The bread I made above was done according to this recipe, adapted from a King Arthur recipe I have used many times before. This is a flexible recipe. You can use any type of flour. Here, in the photo at the top of the post, you can see I used all whole wheat flour.
Take this to be, like the starter method, simply a guideline and not the holy grail of sourdough.


Sourdough Bread, Abriged

(Longer version found here)
1 cup fed sourdough starter
1 1/2 cups warm water (105-110F)
3 cups flour
1 tbsp sugar (optional)
1 tbsp salt
1-3 cups flour


Combine starter, warm water and 2 cups flour in a large bowl (the sponge) and let stand for 2-8 hours.
Stir in sugar, salt and 1 cup of flour. Stir in additional flour as needed, until the dough starts to come away from the side of the bowl. Turn out onto a floured surface and knead until smooth and elastic, about 3-5 minutes.
Rinse out your bowl, lightly oil it and place the dough inside, turning to coat. Cover bowl and allow to rise until doubled, about 2 hours.
Shape dough, on a floured surface, into 1 large, round loaf. Place on a floured baking sheet to rise for an additional hour.
Preheat oven to 425F.
Brush dough with water, slash as desired and bake for 35-40 minutes, until crust is browned and loaf sounds hollow when tapped. Cool completely on a wire rack before slicing.
My thanks to Barrett, for getting me started on this project.

Wednesday, October 19, 2005

Lime Curd Thumbprint Cookies


I love citrus curds. Lemon, lime - even orange. They're velvety, slightly sweet, quite tart and the perfect topping for a wire variety of baked goods.
I am not going to claim that this is the best use for a curd because I still think that my spoon is the finest vehicle, but it is a darn nice way to eat it. A crisp buttery cookie makes a great shell for the lime curd, though, like all cookies with moist fillings, the crispness does not last for more than a day. It gives way to a moist, buttery, crumbly cookie that melds into the curd in a very appealing way.
I used Alice Medrich's recipe for lemon curd and simply substituted lime juice for lemon juice. I didn't believe that a curd without butter would work, either, but it's great! Tanvi adapted the recipe to a lighter lemon curd a while back, reducing the sugar from the original. I advise against reducing the sugar in this recipe if you are going to use limes, unless your limes are far less tart than mine. If you have a strong aversion to tartness, you can add one more tablespoon of sugar. Next time, I think that I will stir some lime zest into my curd, which I forgot to do this time, to emphasize the fact that this is lime and not lemon. The vanilla flavor came through wonderfully after refrigeration.
The cookies are easy and versatile. I made them in the "thumbprint" style of cookie here, but you can roll them out or refrigerate the dough and slice them later. The dough produces nice, crisp cookies when unadorned. You can also use jam when making little mini-tarts here, but the lime curd makes them zesty, bright and addictive. esides, you can eat more than one tart and feel good about it. How often can you say that?


Lighter Lime Curd
(adapted from Chocolate and the Art of Low Fat Desserts)
1/3 cup strained, fresh lime juice
1-2 tsp lime zest
5 tbsp sugar
1 egg, room temperature
1/2 tsp vanilla extract


In a small sauce pan, over medium heat, dissolve sugar into lime juice. Add zest.
Lightly beat egg in a small/medium bowl. Whisking constantly, slowly pour lime/sugar syrup into the egg. Beat for 2 minutes (only 1 if you're using a mixer), then transfer back into the saucepan. Heat over low heat, stirring constantly, until it just starts to bubble at the edges. Remove from heat and stir in vanilla
Transfer to a small container and store in the fridge.
Makes 2/3 cup.


Thumbprint Cookies
¼ cup butter, room temperature
½ cup sugar
pinch salt
1 tsp vanilla
3 tbsp milk
¼ cup cornstarch
1 ¼ cup ap flour
Lime curd (above) or jam


Preheat oven to 375F. Line a baking sheet with parchment paper.
Cream together butter, sugar and salt. Beat in vanilla, milk and cornstarch. Stir in flour until just combined.
Roll into 1 inch balls and roll in coarse sugar. Place on baking sheet and make a shallow indentation with your thumb. Fill indentation with a bit of lime curd or jam.
Bake tarts for 12-13 minutes, until cookies just start to brown.
Cool on a wire rack.
Makes about 2 dozen.

Monday, October 17, 2005

Tomato and Sweet Onion Focaccia


I was kneading the dough for what seemed like ages. It felt grainy and rough no matter what I did. Then I remembered that there was cornmeal in this dough and was glad that there was no one in the room to see how silly I was being.
This focaccia is based on this Cooking Light recipe. I started it without thinking too much about the recipe - a bad habit, I know - and realised that the recipe was not a great one once I started to knead the dough. Could you possibly describe the coarse texture of this as "smooth"? There are no instructions given as to how to shape the dough as you work with it, which is unfortunate, given that the neat little pockets in the surface of the bread are one of the characteristics of focaccia. It also bothered me to see how much onion was called for. 4 cups of onion to top a bread this size was rather excessive. I wasn't trying to make onion pie, so I felt that, while the topping should be the star, the bread should still be recognisable as focaccia.
My other complaint about Cooking Light is that they seem to use an awful lot of cheese in their dishes. Cheese is good, but when you're putting cheese inside your falafel patties, I think you've crossed a line. The recipes I have made have usually turned out well, but I just don't find them to necessarily be all that "light".
Getting back to the focaccia, I wanted neither pie nor pizza, so I cut back on the onions, eliminated the cheese and sprinkled the whole thing with coarse salt before baking it. In spite of all this - my annoyance with the recipe, my changes in the topping and method - it turned out very well. I did have to use more oil, for greasing the pan and prodding the dough than I expected. The focaccia has a nice little crunch, which comes both from the relative thinness of the bread and the addition of cornmeal to the dough. It makes a great starter and because it was less doughy than some focaccias, it didn't cry out to be dipped in anything (though you certainly could).


Tomato and Sweet Onion Focaccia
(inspired by Cooking Light)
1 cup warm water
1 package (2 1/4 tsp) active dry yeast
1 tbsp olive oil
1/4 cup cornmeal
1 1/2 tsp salt
2 1/2 cups ap flour
Topping
3 medium sweet onions (Maui is my favorite, Vidalia or Panoche)
3 medium tomatoes
3 tbsp fresh basil, divided and finely chopped
1/2 tsp salt
1/4 tsp ground black pepper
Coarse salt, for sprinking


In a large bowl, combine warm water, olive oil and yeast. Let stand for 5-10 minutes, until foamy. Stir in cornmeal, salt and 2 cups flour. Add in the remaining flour gradually, stirring until the dough comes together, away from the sides of the bowl.
Turn dough out onto a lightly floured surface and knead until dough is elastic, about 3-5 minutes. Place dough into a well oiled bowl, turning to coat, and cover it with plastic wrap. Allow to rise until doubled, 1 1/2 hours.


Prepare the topping:
Cut onions in half and slice thinly. In a medium sauce pan, cook onions with 1 tbsp basil, salt and pepper over medium heat, stirring occasionally, until golden, 20-30 minutes. Set aside to cool.
Slice each tomato into 3 1/4 inch thick slices. Layer slices between a few paper towels to remove excess moisture. Cut slices in half.


Finish the dough:
Oil a 10x15 inch jelly roll pan. Gently lift risen dough out of its bowl and into the pan, stretching it to fit. Lightly oil and splay your fingers, gently indenting the dough and pressing it into the corners of the pan. Cover the pan with a clean dish towel and let rise for 30 minutes.
Preheat oven to 425F.
Lightly oil your fingers again and gently dimple the surface of the bread, creating little pockets. Arrange sliced tomatoes evenly over the dough, spread onions on top and sprinkle with remaining basil. Sprinkle dough with coarse salt, if desired.
Bake for 20-25 minutes, until golden brown.
Let cool in the pan for 20-30 minutes, then remove to a cooling rack.

-----------------------------------------------------

Chubby Hubby is hosting this round of DMBLGiT. Which September photo do you think I should enter?

Sunday, October 16, 2005

Sunday Brunch: Chocolate and Cinnamon Pancakes

I think that the birthday weekend is a time to indulge, hence the chocolate syrup on these pancakes. Ok, I'll admit that I just put it on for the photo and ate the rest with maple syrup, but I did put some mini chocolate chips in the batter. I couldn't resist tasting it with the chocolate syrup, though, and I think that this could make a fun dessert. Pancakes, ice cream, chocolate syrup....
The pancakes themselves are not very rich. The base is a very simple pancake batter with a few additions. The cinnamon pancakes have but a bit of spice to them. The chocolate pancakes, by themselves, are not very sweet, which makes them still work well with syrup. If you choose not to use syrup, you may want to increase the sugar by another tablespoon I have included additional options in the recipe below for add-ins to spice up the pancakes. Go with mini chocolate chips for something a bit more decadent, dried cranberries for a bit of tang or add a pinch of cayanne to each batter, eat them together and call them mexican chocolate pancakes. It is probably best to add something to either the chocolate or the cinnamon, but not both, for balance. The butter is optional, as I have made them with and without the butter. The pancakes will be slightly more tender with the butter, but the difference is very small. These pancakes simply fun.


Cinnamon Pancakes
1 cup ap flour
1 tsp baking powder
1/4 tsp salt
1 tbsp sugar
1 tsp cinnamon
1 cup milk
1 egg
1 tbsp butter, melted (optional)

Chocolate Pancakes
1 cup ap flour
1 tsp baking powder
1/4 tsp salt
3 tbsp sugar
2 tbsp unsweetened cocoa powder
1 cup milk
1 egg
1 tbsp butter, melted (optional)

To either batter: 1/4 cup chocolate chips (mini is best), cinnamon chips, dried cranberries or coarsely chopped, toasted walnuts. You can also add 1 tsp vanilla to each batter, a pinch of cayanne or 1 tsp orange zest. Use all at once at your own risk.


Using one bowl for each batter (the method is the same), whisk together flour, baking powder, salt and sugar. Sift in cocoa/stir in cinnamon.
In a separate bowl, whisk together milk, egg and butter (if using). Pour wet ingredients into dry ingredients and stir until well combined, with only a few lumps. Stir in any additions, if using.
Heat a griddle or nonstick pan over medium/high heat. Drop batter to form 3 inch pancakes. Cook for about 2 minutes, until pancake bubbles and looks slightly dry around the edges. Flip and cook until golden brown. If you make the chocolate and cinnamon pancakes at the same time, you will be able to judge the donness of the chocolate by the color of the cinnamon.
Serve immediatey with maple syrup.
Each batch makes about twelve 3-inch pancakes.

-----------------------------------------------------
Chubby Hubby is hosting this round of DMBLGiT. Which September photo do you think I should enter?

Saturday, October 15, 2005

Easy as Corn Tortillas


All through my childhood, I viewed corn tortillas as just being "okay". They were often dry and bland. Flour tortillas, though not often completely insipred, had a chewiness and breadier flavor that I prefered. This opinion completely changed the day that I made corn tortillas at home. In fairness, since memory is not always completely accurate, I am sure that I had reached some level of acceptance of corn tortillas before I made them myself. If I hadn't, why would I have thought to make them?
Corn tortillas, made fresh, are tender and flavorful. They also couldn't be easier: masa harina and water. I often add a pinch of salt, but you can easily spice them up if you'd like. Masa harina is a very finely ground corn flour, finer than ordinary cornmeal. Masa harina is inexpensive and widely available in California, but you may need to visit a specialty store to find some in your area. Corn is dried, cooked, ground up and dried again. It is cooked in water with slaked lime, the only culinary application of this rock that I am aware of, which gives the masa its unique flavor.
Corn tortillas are usually made smaller than flour tortillas. Once you have your dough, roll it into 1 1/2-2 inch balls, roughly the size of a golf ball, and roll them out. You can use a tortilla press, but if you have a tortilla press, you probably already know how to make corn tortillas. Some very skilled tortilla-makers can press the dough out thin enough with their hands, but I use a rolling pin and place the dough between sheets of wax paper. The tortillas are dry cooked in a hot skillet. Once they come off the heat, store them between two dishtowels. The trapped moisture and warmth will keep the tortillas soft and tender until you are ready to eat them. Corn tortillas are best if eaten shortly after they are made.
In the photo above, I filled the tortillas with sauteed portabello mushrooms, fresh salsa and avocado. You can also cut them into triangles and deep fry them to make your own tortilla chips.


Corn Tortillas
2 cups masa harina
1 cup + 2 tbsp water
pinch salt (optional)


Combine masa and water in a large bowl. Mix until a smooth, but not dry or sticky, dough forms. You may need to add a bit more water or a bit more masa. Break dough into golf ball-sized pieces (1 1/2-2 inch balls) and cover it with plastic wrap. Placing dough between two pieces of wax paper, on a flat surface, roll each one until it is a rough circle, 6 inches in diameter. It should be fairly thin, but the thickness is a matter of taste. If the dough tears, simply roll it back up and try again. After a few, you'll get a feel for how thick to roll them. Stack them up between pieces of wax paper.
Heat a nonstick skillet over medium-high heat. Place tortilla on the skillet and cook for 30-60 seconds on each side. The surface of the tortilla will look slightly dry. Taste the first tortilla to see if you would prefer it cooked slightly more or less. The timing is not critical.
Place cooked tortillas between two clean dish towels to keep them moist until ready to eat.
Makes about 12 tortillas.


Friday, October 14, 2005

Happy Birthday to Me


Honestly, I like baking my own birthday cakes. I always have and always will. I feel like there is a lot of freedom for me to choose what my favorite cake is. Unfortunately, I don't really have a favorite. I like some things better than others, but when it comes right down to it, baking a birthday cake with no one's preferences but my own in mind is a tricky thing: I want it to be for me, but I want everyone else to love it. I guess I get selfish around my birthday. After much deliberation about flavors and a strong leaning towards doing something complicated and "fancy", I did a 180 (meaning that I changed my mind) and baked myself a yellow sheet cake.
I'm certain that the only yellow sheet cakes I have ever eaten, until now, have come from boxes. Yellow cake is a vanilla cake that gets a faint yellow color from egg yolks. Many cakes are slightly yellow, so in the realm of birthday cakes, it's just about as basic as you can get.
I would say that there is nothing wrong with boxed cake mixes, but if I had to compare them to this cake, I would be lying. This cake is moist and incredibly fluffy, soft and tender. It is easy to make and easy to handle. It tastes amazing, not due to some exotic flavor, but because it absolutely tastes homemade.
The method is the best thing about this cake. I use the same one for white cake, actually. Beating the butter into the dry ingredients gives the finished cake a beautiful and tender crumb, inhibiting gluten development by creating a protective coating of fat around the flour. Beating the flour/butter mixture with some of the eggs gives the remaining gluten a chance to develop and incorporate air into the cake. The little bit of gluten development is a good thing in this case. I’m not going to nay-say all the warnings about over-mixing, but we do need some gluten to hold things together and let the cake rise. If we didn't mix at all, we're just have a big bowl of butter, flour, milk and sugar. Yum.
This cake can also be baked in round cake pans and layered. The baking time will need to be reduced, probably to 25-30 minutes, depending on the size of your pan. Also, note that the cake itself is not super rich (in fact, I used skim milk to make it, though whole and lowfat are fine), so you can go crazy with a real buttercream icing.


Yellow Sheet Cake
2 ½ cups cake flour
2 tsp baking powder
½ tsp salt
1 ½ cups sugar
½ cup butter, softened
3 eggs
1 cup milk
2 tsp vanilla extract

Preheat oven to 350F. Line a 9x13 inch sheet pan with parchment paper, or lightly grease it with shortening or oil (butter will produce a harder "crust").
Sift cake flour, baking powder and salt into the bowl of an electric mixer. Add sugar and, using the paddle attachment, mix on low speed to blend. Cut butter into 4 or 5 chunks and drop into the bowl with the flour. Blend on low speed until mixture looks sandy and no large chunks of butter remain, 1-2 minutes.
In a large measuring cup, combine eggs, milk and vanilla. Beat lightly with a fork until combined. With the mixer on low, pour 1 cup of the egg mixture into the bowl. Turn speed up to medium and beat for 1 ½ minutes. Reduce speed back to low and pour in the rest of the egg mixture. Continue to beat at low speed for an additional 30 seconds, until liquid is fully incorporated. Scrape down the sides of the bowl and beat for a few more seconds, if necessary.
Pour into prepared 9x13 pan and spread batter evenly with a spatula. Tap gently a few times to eliminate any bubbles.
Bake at 350F for 30-35 minutes, until a tooth pick inserted into the center comes out clean.
Let cool for 30 minutes in the pan before turning out onto a rack to cool completely. You can leave it in the pan if you're serving it casually.
Serves 16 (or 12 birthday-sized pieces)


Update: I wanted the cake to have a really fun feel, so I used Wilton edible giltter around the edges and made some blue and green piping gel to write on the cake. You can see the whole thing here.

Thursday, October 13, 2005

Cooking School: Chewy Chocolate Chip Cookies


This is for Niki. She has been on a quest (part 2 and 3) to find the perfect chocolate chip cookie. I agree with her completely in that personal preferences play a big part in the "perfect" cookie. Of course, ingredients and oven temperatures do, too. I like slightly crisper cookies and I simply love oatmeal in cookies. Niki wants a chewy cookie, the kind you might find at a coffee shop, that retains it's chew even the day after it has been baked. No strange ingredients and no cakiness to be found.
I turned to The Best Recipe for these cookies and, low and behold, they had them! The recipe claimed that the secret was not just in melting the butter, but in the extra egg yolk. Apparently the little bit of extra fat adds just enough moisture to keep the cookies chewy, without making the cookies greasy, as extra butter might.
Just barely cooled and straight out of the oven, these large cookies are perfectly crisp at the edges and chewy - but not cakey - in the center. This may be the perfect way for cookies to be, but all cookies are good fresh from the oven. To test the longer-term claim of chewiness, I left a few out on the counter (out of the reach of my cats) overnight and put the rest into an airtight container. Both groups were still nice and chewy. Success!
I did increase the salt slightly from 1/2 tsp, which I didn't feel was enough. Using salted butter in addition will make them practically irresistable, but unsalted is fine, too. Baking time will vary slightly based on the size of your cookie. The book got 18 cookies from their "scant 1/4 cup" measure. I thought I had just about a full 1/4 cup and still got 24 cookies.
Chewy Chocolate Chip Cookies
(thanks to the Best Recipe)
2 cups plus 2 tbsp ap flour
1/2 tsp baking soda
1 tsp salt
3/4 cup butter (12 tbsp), melted and cooled until just warm
1 cup brown sugar
1/2 cup white sugar
1 egg
1 egg yolk
2 tsp vanilla extract
1 1/4 cups chocolate chips

Preheat oven to 325F. Line a baking sheet with parchment paper.
In a medium bowl, whisk together flour, baking soda and salt.
In a large bowl, whisk together butter and sugars. Beat in the egg, egg yolk and vanilla. Stir in flour mixture, followed by chocolate chips.
Drop by (scant) 1/4 cups onto the baking sheet and pat lightly so the cookie is an even thickness, not a ball shape. Cookies will spread as they bake and this ensures a more even spread.
Bake at 325F for 15-17 minutes, until just turning light brown all over. The edges should only be very slightly more brown, if at all, from the rest of the cookie. Allow cookies to cool before removing them from the baking sheet.
Makes 18-24 large cookies

Tuesday, October 11, 2005

Onion Pie with Dan and Steve!


In keeping with the flood of variously popular reality shows, the Food Network hosted their own earlier this year to find The Next Food Network Star. Of many worthy and entertaining candidates, two caterers from Chicago won a six episode special: Party Line with Dan and Steve. I really like these guys and I like their show. They're entertaining, informative and, most importantly, their recipes are good.
When I saw the show a few weekends ago, their recipe for Rustic Onion Pie really caught my eye The dough was simple and lean (flour, water and a touch of olive oil) and the filling was even more so (sweet onions, with salt and pepper). Dan said that the recipe is a tradition in his Italian family's get-togethers. The onions are cooked, steamed but not caramelised, until they are quite soft and acquire an almost melting quality after their second cooking in the oven. The dough has a nice flavor and a pleasant, crisp chew. I rather doubt it makes good leftovers, but then, I didn't have any.
The dough can be prepared in advance and it isn't too difficult to roll out. I used Maui onions, but any variety of sweet onion would be wonderful, like Vidalia or Panoche. There is an option to use anchovies in the filling, but I omitted it. This is a great main dish with a salad, or it could be cut into smaller pieces and served as an appetiser or as a side. My only complaint is that the slices were a bit difficult to handle, given that the best way to eat it is to pick up the pieces. Next time I might make individual onion pie pockets.


Rustic Onion Pie
(original, larger recipe from Food Network)

2 cups ap flour
1/2-2/3 cup water
1 tbsp olive oil
pinch salt


2 lbs sweet onions (5-6 onions)
1 tbsp olive oil
1 tsp salt (a bit more, to taste)
1/2 tsp black pepper


Combine flour, water, 1 tbsp olive oil and a pinch of salt until it comes together into a slightly sticky dough. Remove dough to a lightly floured surface and knead a few times, until it is smooth. Divide dough into two balls and wrap each in plastic wrap. Refrigerate at least 30 minutes, or until ready to use.
To make the filling, peel and thinly slice onions and place into a large pot with 1 tbsp olive oil, salt and pepper. Cover onions and cook over medium heat, stirring occasionally, until onions are tender and translucent, 20-30 minutes. Set aside to cool slightly.
Preheat oven to 350F.Cover a baking sheet with parchment paper.
Roll out one ball of dough until it is approximately 1/8 inch thick and roughly an 10x13 inch rectangle (this is rustic, so you don't have to be exact!). Transfer dough to prepared baking sheet. Place filling on dough, spreading it evenly, but leaving an inch of dough uncovered around the sides. Roll out second dough ball in the same manner, but try to make it a bit larger, an extra 1/2 inch on all sides. Place dough over onion filling and pinch dough together to seal the pie. Crimp the edge of the pie with your fingers (pinch the dough every 1-2 cm). Cut a few small vents in the pie. Brush pie lightly with olive oil.
Bake at 350 for 40-50 minutes, until the pie is a nice, golden color and the filling bubbles slightly through the vent holes. Allow it to cool, on the baking sheet, for at least 20-30 minutes before slicing (I recommend a pizza cutter).
Makes an (approx) 9x12 inch pie

Monday, October 10, 2005

Thin Minties


Occasionally, when attempting to organise my freezer, I will come across some forgotten bit of food. I'm good about keeping dates on things like meat products, so I don't usually find anything icky, but perhaps I will com across a roll of unsliced cookie dough or a baggie of frozen cupcakes. One other thing I find with regularity, once a year, is a forgotten package or two of Girl Scout cookies. This year, there were none for me to find because, though Girl Scouts is a wholesome organisation by all accounts, their cookies are full of not-so-wholesome trans fats. Yum. Struck by a sudden nostalgia for these, I decided to have a go at some similar cookies.
These cookies are inspired by the popular Thin Mint cookies. Thin mints are a crispy chocolate wafer covered in a mint flavored, chocolate-like shell. I opted to mint-flavor my cookies and forgo the chocolate coating. They don't use real chocolate anyway, as you can see from the ingredients. Make sure to bake these long enough, or they won't be crispy. It really repends on how thick you cut the cookies, so try baking a few as a test batch and letting them cool and crisp up before baking the rest. Mine were crunchy, chocolatey and had a nice hint of mint. They are slice and bake cookies, so the dough can be prepared in advance and left in the freezer. If you want to, drizzle a little melted chocolate over the tops of the cookies once they're cool.


Thin Minties
2 1/4 cups ap flour
1/4 cup cornstarch
6 tbsp unsweetened cocoa powder
1/2 tsp salt
1 cup white sugar
1/2 cup butter
1/3 cup milk (I used skim)
1/2 tsp vanilla extract
3/4 tsp peppermint extract


In a small bowl, whisk together flour, cornstarch, cocoa powder and salt.
In a large bowl, cream together butter and sugar. With the mixer on low speed, add in the milk and the extracts. Mixture will look curdled. Gradually, add in the flour mixture until fully incorporated.
Shape dough into two logs, about 1 1/2 inches (or about 4 cm) in diameter, wrap in plastic wrap and freeze for at least 1-2 hours, until dough is very firm.
Preheat oven to 375F before slicing your cookies.
Slice dough into rounds not more than 1/4 inch thick and place on a parchment lined baking sheet. Cookies will not spread very much.
Bake at 375F for 13-15 minutes. Cookies should be crisp when they cool.
Drizzle with melted chocolate, if desired.
Makes 3 1/2-4 dozen thin cookies.


Reminders and Announcements:
Blogging By Mail 3 has just been anounced! This round is hosted by Cathy, of my little kitchen. Her theme of "Home for the Holidays" will have us all tucking some holiday favorites and the food sections from our local papers into our packages. The deadline for signups is October 23rd, so don't wait! Keep an eye out for the roundup of some of the goodies that were shipped out this round at the samantha files. If you haven't send Samantha a link to your post, please head over and do so!


And how could we forget SHF and IMBB this month?

If you're worried about getting your egg whites just right, why don't you check out my Cooking School: How to Beat Egg Whites for a little more infomation and tips. You can even do a trial run with the very easy Overripe Banana Souffles.

Sunday, October 09, 2005

Sunday Brunch: Diner Food

Diner food epitomises quick, greasy, satisfying cuisine. You can get scrambled eggs, meatloaf and black-and-white cookies all at the same meal at any time of day. The first thing I always go for is the black-and-white, personally, but I know that the thing people love most abvout diners is breakfast food. Eggs, hash browns, pancakes, bacon and toast, in some combination with a side of orange juice and bad coffee is something that just can't be improved upon. If it progresses beyond the adjectives simple and adequate, with some optional greasy-ness thrown in, it isn't diner food anymore.
Now, don't misunderstand me: I love diner food. I wouldn't stop going to diners just because they aren't the French Laundry. Cookies aside, there is one main reason for this: hash browns. I don't make them at home and I don't usually see them on menus anywhere else.
I decided to make these at home because there aren't too many diners out here on the west coast. I'd prefer to wait until I'm visiting relatives in New Jersey, the diner capital of the world, than visit a sub-par establishment. The hash browns are buttery and crispy and simple. You can make them smaller if you wish, but in a diner the portions will be big.


Diner Style Hash Browns
2 medium baking potatoes
1/2 onion, diced (optional)
4 tbsp butter
salt and pepper


Wash the potatoes and coarsely grate them. Toss onion in with potatoes, if using. Divide into 6 even piles.
Heat a skillet over medium-high heat. Add one tbsp butter, swirl to coat and drop in three mounds of potatoes. Press them down/spread them out until they are about 1/2 inch thick each. Cook for about 5 minutes. Potatoes will start to look a bit dry on top and will be golden brown on the bottom. Drop in 1 tbsp butter into the center of the pan. As it melts, carefully flip each pancake. Cook 4-5 minutes, until bottom is golden brown.
Repeat with remaining potatoes and butter.
Makes 6 large hash browns.

Saturday, October 08, 2005

Roasted Strawberry and Tomato Salsa


October is National Breast Cancer Awareness month and Emily decided to sponsor a mini event to raise awareness. You can find some facts about breast cancer in the US here and in Australia here. Breast cancer is one of the most common, but also most researched, cancers. Every day will hopefully bring us closer to a cure. Or a vaccine, like the one that is currently in testing around the world (and found to be 100% effective!) for the prevention of cervical cancer.

My contribution to the event is some excellent - and pink - salsa. It is sweet and smokey and terribly addictive. Bring it out to a barbeque and share it with your loved ones.


Roasted Strawberry and Tomato Salsa
8-oz strawberries
8 oz cherry tomatoes
Juice of ½ lime
¼ cup onion (1/2 smallish onion)
½ - 1 tsp chipotle in adobo sauce
½ tsp salt
pinch black pepper

Roast strawberries and tomatoes in a 350F oven for 45 minutes. They will be very soft. Allow to cool.
In a food processor, whiz onion and chipotle pepper. Add in lime juice, strawberries, tomatoes, salt and pepper. Pulse several times, until salsa is chopped/blended evenly, but do not let it puree completely.

Chill until ready to serve.

Makes about 1 1/2 cups

Thursday, October 06, 2005

Cooking School - Cream Filled Chocolate Cupcakes


Classic, now retro, lunchbox fair, cream-filled chocolate cupcakes are a treat that many of us are familiar with. I don't really think that there was anything wrong with the moist chocolate cake, but I was mostly concerned with the cream filling. I had had chocolate cake before - but where did one come across cream filling? It wasn't icing, it wasn't marshmallow. It was simply gooey and delicious. The company's advertising slogan is "Hey! Where's the cream filling?" for a reason.
To recreate this treat, I turned back to a favorite of mine: Retro Desserts by Wayne Harley Brachman. I have used Mr Brachman's recipes before and, with a very few exceptions, have enjoyed them immensely. I considered only making the cream filling recipe but I gave in and did actually make cupcakes to fill. I used a Martha recipe for the cake (Sorry, Wayne!). I also used a buttercream instead of ganache, as the majority of these cakes made their way into the hands of a few 9 year olds and I thought they'd like it sweet. The recipe calls for dipping the filled cakes in ganache to create a smooth surface.
I love these cupcakes because they are very chocolatey and could not be simpler. The cream filling really stands out in them. Creamy and very sweet without seeming very sugary, this is the way cupcakes were meant to be filled. Simply fill a piping bag with the cream, jab the tip about 1/2-1 inch into the cupcake and squeeze out a tablespoon or so of filling. It will ooze out the top a bit when it is full. Make the hole in the top of the cupcake, so the filling won't leak out the bottom and the hole will be covered with frosting.


One Bowl Chocolate Cupcakes
¾ cup unsweetened cocoa
1 ½ cups ap flour
1 ½ cups white sugar
1 ½ tsp baking soda
½ tsp baking powder
½ tsp salt
2 eggs
¾ cup water
¾ cup buttermilk
3 tbsp vegetable oil
1 tsp vanilla extract

Preheat oven to 350F. Place liners in 2-12 cup muffin tins.
In a large bowl, whisk together cocoa, flour, white sugar, baking soda, baking powder and salt until thoroughly mixed. Add in eggs, water, buttermilk, vegetable oil and vanilla extract. Whisk batter until all of the dry ingredients are mixed in.
Fill muffin cups with batter using a 1/4 cup measure.
Bake at 350F for 15-17 minutes, until a toothpick inserted into the center of a cupcake comes out clean, or with only a few crumbs.
Let cupcakes cool for 10 minutes and then remove from the muffin pan. Cool completely before frosting.
Makes 24 cupcakes.


Vanilla Cream Filling
3 tbsp vegetable shortening, room temperature
3 tbsp butter, room temperature
1 cup confectioners sugar
1 tsp vanilla extract
1 cup light corn syrup


With an electric mixer, cream shortening and butter together. Add in confectioners sugar. When combined, slowly pour in vanilla and corn syrup, beating until the mixther has thickened to a mayonnaise-like consistency, about 3 minutes.
Use a spatula to scrape the filling into a pastry bag fitted with a wide tip. It must have a tip - no cutting the corners off plastic bags. Poke the tip about 1/2 inch into each cupcake and fill with about 1-2 tbsp filling.
Makes enough for 24 cupcakes.


Chocolate Ganache
5 oz bittersweet chocolate, coarsely chopped
3/4 cup heavy cream


Place chocolate in a small bowl. In a small saucepan, bring cream just to a simmer. You should see tendrils of stream coming from the cream, but no bubbles. Pour hot cream over the chocolate and whisk until mixture is smooth. Dip the top of each filled cupcake in the ganache and transfer to a wire rack to cool (it's OK if some ganache drips down the side of the cupcake).

Wednesday, October 05, 2005

Quinoa Stuffed Squash


I actually saw a picture of this dish in a magazine ad sometime last year. It was so visually appealing that I remembered it all spring and summer, waiting for all the pumpkins and squash to turn up in fall. Could I have found the squash I wanted earlier in the year? Probably. But I wouldn't have wanted to for the same reasons I don't crave a dinner of salad and sorbet out in the yard in winter.
This was an easy, tasty dish. You can serve it as a side for a warm, hearty dinner, with roasted pork or chicken. It could serve as the main dish for somewhat lighter meal, with some warm, fresh bread, and save room for a rich dessert. Use dried cranberries in place of the cherries if you can't find them and add in a quarter-cup of chopped pecans, if you feel so inclined. I will sometimes drizzle a bit more maple syrup over it before serving, but salt and pepper are nice, too.


Quinoa Stuffed Squash
1 acorn or carnival squash
1/4 cup quinoa
1/2 cup water
1 tbsp maple syrup
1/4 tsp cinnamon
1/2 tsp salt
1/4 cup dried sour cherries


Preheat oven to 350F.
Cut squash in half and place face down in a over proof dish. Add a few tablespoons of water to the dish and cover tightly with foil. Bake for 30 minutes.
Meanwhile, combine quinoa and 1/2 cup water in a small sauce pan. Cover and bring to a boil. Reduce heat to a simmer and cook until water is absorbed, about 10-15 minutes. Stir in maple syrup, cinnamon, salt and dried cherries. Set aside until the squash is ready.
Remove squash from the oven and turn cut side up. Divide quinoa mixture evenly between the squash. Cover the squash tightly with foil and return to the oven and bake for 20 more minutes, until squash is quite tender.
Serves 2.

Tuesday, October 04, 2005

Pumpernickel


Pumpernickel is one of the more maligned breads. For good reason. It is a naturally leavened, or sourdough, rye bread. Traditionally, pumpernickel bread is made without wheat flour and is baked for 16-24 hours at a low temperature. This produces a dense, dark, coarse and flavorful loaf, though the flavor may not be the most appealing one. This fact is evidenced by its name.
The origin of the word Pumpernickel is sometimes attributed to Napoleon. It is said that he was presented with a loaf of the bread on a campaign in Eastern Europe and refused it, saying "Pain pour Nicole", meaning that the bread was only fit for a horse, not for human consumption. A cute story, but untrue. The bread originated before Napoleon's time and, if he had a horse called Nicole, it was not among his well-recorded mounts.
The actual name originated before Napoleon's time in Old German, from pumpern "to break wind" and Nickel "Demon". Devil-fart bread. Mmm, appetising. My suspicion is that the bread must have been reputed to have health benefits, because it defies logic that a barely digestible bread that incurred such an unfortunate name would continue to be popular.
Pumpernickel has, fortunately, been modernised. Loaves now feature wheat flour as well as rye and often have yeast, colorings - such as molasses or cocoa - and flavorings like caraway seeds added to them. This produces a softer, more appealing loaf. Pumpernickel is often featured in delis because it is a good sandwich bread. It is most often paired with roast beef and pastrami and it goes very well with cheeses. It also makes up the dark half of a marble rye.
My pumpernickel is chewy, hearty and dense, with a mix of rye, whole wheat and all purpose flours. I do break away - thankfully - from tradition: I used a bit of yeast, some cocoa to add color to my bread and added raisins. Leave out the raisins if you're not a raisin lover and feel free to add in 1-2 teaspoons of caraway seeds. The buttermilk gives the loaf a tight crumb. This bread makes a great sandwich and goes very well with soups or as part of a cheese tray.


Pumpernickel Bread
1 cup ap flour
1 tsp active dry yeast
1/2 cup sourdough starter
1 cup warm water
1/2 cup warm buttermilk
1 tbsp unsweetened cocoa powder
1 tbsp molasses (or brown sugar)
2 tsp salt
1 cup rye flour (light or dark)
1 cup whole wheat flour
2/3 cup raisins or sultanas (optional)
2 tsp caraway seeds (optional)
Additional all purpose flour for rolling


Combine the ap flour, yeast, sourdough starter, water and warm buttermilk in a large bowl. Mix well and leave to proof in a warm place for 1 - 1 1/2 hours.
Stir in cocoa powder, molasses, salt, caraway seeds (if using), rye and whole wheat flours. If the dough has not started to come away from the sides of the bowl yet, add a few tablespoons of all purpose flour.
Turn dough out onto a lightly floured surface and knead in raisins (if using). Knead for about 5 minutes, until dough is very smooth. It will not be as elastic as all wheat flour doughs. Place dough into a lightly oiled bowl, cover with plastic wrap and leave to rise for about 2 - 2 1/2 hours, until doubled.
Gently, without deflating the dough too much, shape into an oval roughly twice as long as it is wide and place on a lightly floured baking sheet. Rub loaf gently with some all purpose four. Cover with a dish towel and let rise for 30-45 minutes.
Preheat the oven to 425F. Make several shallow slashes in the top of the loaf.
Bake for 40 minutes at 425F.
Remove to a wire rack to cool completely before slicing.
Makes 1 loaf.

Monday, October 03, 2005

Pumpkin Spice Mocha

I love pumpkin. And by pumpkin I actually mean most types of winter squash. Butternut squash/pumpkin and sugar pumpkins happen to be my favorites. The butternuts are very versatile and have an beautiful, sweet flavor. The sugar pumpkins make excellent soups and pies.
Many markets seem to carry jars of prepackaged spice blends simply labled: Pumpkin Pie Spice. I like my spices to be a bit fresher, so I usually blend my own. These are simply the traditional spices that are found in pumpkin pie. They are so prevalent in these pies, that the combination, even in the absence of pumpkin, often conjures thoughts of the squash. They are warm spices that simply compliment each other well.
You may have noticed that some coffee shops have added a drink to their winter menu featuring a drink with just these spices. Now, I'm not going to say that this is better than your friendly, neighborhood coffee conglomerate, but it is quick, easy and wallet friendly. And I know that I am not leaving the house before I've had my coffee.


Pumpkin Spice Mocha
Makes one 6-8 oz cup. Adjust the spice to your tastes.
2/3 cup coffee
1/3 cup milk
1 1/2 tsp unsweetened cocoa powder
1 tbsp sugar
1/4 - 1/2 tsp pumpkin pie spice*


*Pumpkin Pie Spice
1/4 cup ground cinnamon
2 tbsp ground ginger
2 tsp ground cloves
2 tsp ground nutmeg

Combine all ingredients in a small jar and shake to combine thoroughly. Store covered.

Sunday, October 02, 2005

Blogging By Mail and WCB


I'm glad to see that lots of people are sending out and receiving their Blogging By Mail packages from this round. I got mine from Susann, a non-blogging (but we won't hold that against her) friend of Samantha's. Let me take this moment to mention that this round is almost over. We are waiting for the last of the packages to arrive, but there will be a roundup soon. You can take comfort from the fact that we will be announcing the next round - and accepting signups - in the near future. Keep your eyes out!
Susann put together a great package. In addition to a great mixed CD, she included some very addictive spiced pecans, two kinds of cookies and a whole cake! The peanut butter oatmeal cookies were soft and chewy and a nice balance between the two cookie types. I particularly liked that they had both raisins and chocolate chips in them - my favorite cookie additions. The other cookies were Earl Grey Tea cookies. Buttery and delicious. I think that the Spiced Wine Cake was my favorite thing, if I absolutely had to chose. Suprising, even to me, since I am normally a cookie kind of girl. It was moist, soft and fluffy with a wonderful wine flavor. It is no exaggeration to say that it was the perfect cake to have with my tea. And it shipped so well!
My favorite part may have been the cake, but Phoebe liked the kitty treats that Susann slipped into the package best. Thanks for thinking of her, Susann. And thanks for putting together such a great Blogging By Mail package.


And, of course, you can check out Phoebe's online cat buddies at Clare's Weekend Cat Blogging roundup.