Thursday, August 31, 2006

Cooking School: Whoopie Pies


A whoopie pie is a commonly found treat in New England, but is relatively unknown elsewhere, especially on the West Coast. The pies are not really pies at all, as you have probably discerned from the photo above, but are two chocolate cookie/cake discs with a vanilla cream filling sandwiched between them. They're not like sandwich cookies and not like cream filled cupcakes, but are an entity unto themselves. No one can say for certain where the name came from, though the most widely held belief is that they were named after the reaction that they were intended to elicit from people who ate one.
This recipe comes from Tish Boyle's The Good Cookie (and is also available on Leite's Culinaria) and I like it because it doesn't use shortening in the filling. Don't get me wrong here: I have had some excellent cookie and cake fillings that use shortening and have no objection to using it in general, but the filling here is simply wonderful. It is very fresh tasting, and not at all greasy or heavy, as vegetable shortening-based fillings can occasionally be.
The cookies are moist and soft, with a rich and chocolaty flavor. They are not overly rich to the point where they overwhelm the flavor of the filling. You might feel compelled to eat them with a bit glass of milk, since they have a very nostalgic quality to them. They are a huge hit at parties, with adults and kids alike. The only change I would recommend making is to double the filling if you like a lot of cream in your whoopie pies.
The cookies are soft and keep very well when stored in an airtight container for several days - assuming that they last that long, of course. The two-bite sized cookies are awfully hard to resist.


Whoopie Pies
(recipe from The Good Cookie)
Cookies:
2 cups all purpose flour
1 cup cocoa powder
3/8 teaspoon salt
1/2 cup butter, very soft
1 cup sugar
1 large egg yolk
1 tsp vanilla extract
1 tsp baking soda
1/2 cup hot water
1/2 cup buttermilk

Preheat oven to 400F and line baking sheets with parchment paper.
In a medium bowl, whisk together the flour, cocoa powder, and salt.
In a large bowl, cream together the butter and sugar until light, then beat in the egg yolk and vanilla extract.
Add the baking soda to the hot water.
Adding 1/3 of each ingredient at a time, stir in hot water, buttermilk and flour mixture to the butter/sugar mixture, making sure to end with an addition of dry ingredients and to mix only until just combined.
Shape dough into 1-inch balls and place on cookie sheets, flattening slightly.
Bake cookies for 5-7 minutes, until the tops of the cookies are cracked and cookies look set.
Cool completely on a wire rack before filling.


Filling:
2 cups confectioners' sugar
4 tbsp butter, very soft
3 tbsp heavy cream
1 tsp vanilla extract
small pinch of salt


With the mixer on a low speed, beat together the sugar and butter until combined. Mixture will be somewhat crumbly. Add in cream, vanilla and salt and beat at high speed until smooth.

Spread the cooled cookies with the filling. Double filling recipe if you want more, but the book recommends using one heaping teaspoon per sandwich.

Makes 24-28 whoopie pies.

Tuesday, August 29, 2006

How to make a great hamburger


When I've written about making hamburger buns (and hot dog buns)in the past, I generally left out any sort of instructions for making the filling. Basic hamburgers are made with ground beef, which is seasoned and grilled over a relatively high heat, leaving a juicy inside and a patty with very slightly crisp edges.
The timing for grilling hamburgers varies so widely that I won't even offer suggestions as to how long you should cook you meat, but I will share a few tips on how to ensure that your burger is flavorful and juicy.


I have heard people say that they add everything from oatmeal and breadcrumbs to shredded vegetables to their hamburgers. While the vegetables are actually a pretty good idea, especially if you're trying to sneak a few more into a child's diet, oatmeal and breadcrumbs are for meatloaf - not hamburgers.
I saw this technique on Paula Deen's show well over a year ago and it works beautifully. Simply add a bit of water to your (lean) ground beef, just a tablespoon or two per pound, and some salt and pepper before mixing it up. Once it is well blended, shape the meat into balls, making twice as many balls as the patties you want (4 patties = 8 balls).
Place all the balls on a plate and season them with a bit more salt and pepper. Place one ball on top of another and squish them into a flat patty. Because the meat will shrink and get a bit thicker as it cooks, it is wise to make them larger and thinner than you want them to be. I estimate the size using one of my buns to make sure that they'll fit.
Once all the patties are shaped, you can put them on the grill, or even freeze them for later use. It really does seem to keep the burgers moist, and the extra seasoning (feel free to use spices other than salt and pepper) in the center improves the flavor of the burger.

Monday, August 28, 2006

French Toast Waffles


Pancakes, french toast, waffles... sometimes it seems that breakfast options are so limited. This is, of course, a ridiculous notion that only exists because I tend to make the same basic recipes repeatedly. After all, it's hard to go wrong with buttermilk pancakes.
One way to spice up breakfast is by adding new spice combinations and fruits, but another way is to think a little bit outside the box. Here, I used my waffle iron to make french toast.
I took a loaf of brioche, soaked each slice in a milk and egg mixture, then put them into the waffle iron to cook, which took same amount of time as a regular waffle. After cooking, the toast turned out to be slightly crispy and waffle-like on one side, and a bit softer on the other, due to the fact that there was slightly more upward pressure on the toast than downward (I didn't press the lid of the waffle iron down). Not surprisingly, it tasted like a waffle and french toast fused together.
You can't use just any waffle iron for these. A Belgian waffle iron is likely to tear the bread unless you are making a very, very thick slice of french toast. I recommend sticking to a standard (shallower) iron for these. You can also simply cook the french toast on a griddle on top of the stove if you don't care to use a waffle iron.


French Toast Waffles
1 cup milk (any kind)
3 eggs
1 tsp vanilla
1/2 tsp cinnamon
pinch salt
6 slices of brioche (about 1/4" thick) or plain bread


Whisk all ingredients together in a large bowl and pour into a shallow pan or baking dish. Lay slices of brioche (or regular bread) in the mixture and soak them until just saturated with the mixture, turning to coat.
Preheat waffle iron and grease lightly.
Place slice of toast on center of waffle iron and cook as a waffle.
Serve immediately.

Makes 6 slices.

Saturday, August 26, 2006

SHF#22: Plum Jam


When I heard that the theme of this month's Sugar High Friday event, hosted by Delicious Days, was to make jam, jelly or some other type of preserves with fresh summer fruits, I was momentarily disappointed. I love jam, but I don't love the huge amount of work that goes into making it, and I certainly had no intention of standing around and sterilizing jars in 100F+ weather when I can buy perfectly good jams.
Then I saw the blackberry jam post on Meathenge and realized that I didn't have to go through that whole procedure. I could make a single batch of jam, about enough for a jar full, and would not have to think twice about whether my jars were the right type.
This got me excited again, and I started to mull over my fruit options. My mind was made up when I saw some lovely plums at the market.
My jam is very simple. Plums have quite a bit of natural pectin - the stuff that makes jam and other preserves gel - so I did not have to add any. The fruit was sweet to begin with, so I added only a minimal amount of sugar and a touch of vanilla. The one thing that you do need is a candy thermometer because you must cook the jam until it gets up to just about 220 degrees - any higher than that and it will scorch, but if you don't cook it enough it won't thicken properly. The jam tastes great and - really - is very easy. I like the single batch size so I can use it up and switch to another flavor when I run out, rather than having a dozen jars of the same kind in my cabinet.


Plum Jam
About 1 1/2 lbs plums, ripe
1/2 cup sugar
1/4 cup water
1 tsp vanilla extract


Bring about 3-4 inches of water to a simmer in a saucepan on the stove. Cut a shallow X in the bottom of each plum, submerge in the simmering water for about 30 seconds to loosen the peel, then remove it while running the plum under cool water (so you don't burn your fingers). You may have to work a few plums at a time.
Cut plums into small chunks and remove pits.
Put sugar and water into a large saucepan and cook until dissolved. Add in plums, vanilla and a candy thermometer and bring the mixture to a boil. Cook until it reaches 220F.
Pour into a clean glass container and store, covered, in the fridge to be eaten on toast, etc.


Note: I like my jam with a few bits of fruit, but you can finely dice the plums if you prefer.

Thursday, August 24, 2006

Cooking School: Molten Center Chocolate Cakes


One way to make a molten center chocolate cake is to undercook your batter, preferably at a high temperature that will cause the outside of you cake to appear to be cooked. I don't honestly think that this is the best way to make a dessert because while cake batter is tasty, I don't want it for my dessert. I mentioned once before that I was taught to make molten center chocolate cakes by putting a ball of ganache into the center of the cake (or of a souffle) before baking. Once the individual cake is done, the ganache is melted and makes a lovely, warm center when the cake is served.
The trick of using a ball of ganache can really be done with most cupcakes or souffles, and is not specific to this recipe, so don't be afraid to try it out with your favorite chocolate cupcakes sometime.
This recipe, from Williams-Sonoma, has a fairly light cake that is somewhere between a sponge cake and a souffle, though it is much more chocolaty than those two types of cake usually are. The base is formed and a ganache ball is inserted. It's very simple.
Once of the best things about this technique is that it is easy to add different flavorings. You can use mint truffles, for example, or even store-bought truffles, provided that they do not have a hard chocolate coating. A chocolate coating should not affect the outcome, but it's rather like adding ganache and chocolate chips, instead of just ganache.
Whipped cream is the best serving option because the light cream contrasts with the richness of the cake beautifully, though you can't go wrong with vanilla ice cream, either.


Molten Center Chocolate Cakes
(recipe from Williams-Sonoma)
6 oz. bittersweet chocolate, chopped and divided
1 tbsp heavy cream
3 tbsp unsalted butter, very soft
2 large eggs, room temperature
1/4 cup sugar
1 tsp vanilla extract
1/8 tsp salt
1 tbsp all-purpose flour


Preheat oven to 400F. Butter a 6-cup muffin tin and dust each well with cocoa powder.
In a small bowl, melt together 2-oz. chocolate and 1 tbsp cream, either in the microwave in very small intervals or over a small double boiler. Chill for about 20 minutes once it is smooth. (This step can be done in advance and the ganache softened before using.)
In another small bowl, melt together the remaining 4-oz chocolate and the butter. Set aside to cool for about 10 minutes at room temperature.
In a large bowl, combine the eggs, sugar, vanilla and salt. Beat with an electric mixer until the mixture triples in volume and is very thick (about 5-7 minutes). Sift flour over egg micture and fold in. Add cooled chocolate/butter mixture and fold in until batter is uniform. Pour into prepared muffin tins.
Form ganache into 6 teaspoon-sized balls and place one in each cake, pressing gently to cover with batter. (If there is a little left over, that's ok.)
Bake at 400F for 9-11 minutes, until the tops are set. Let cakes cool in pan for 5 minutes before turning out onto a wire rack and serving on individual plates. Cakes can be served right side up or still inverted (personal preference for the look).
Serve immediately, with lightly sweetened whipped cream or vanilla ice cream.
Serves 6.

Wednesday, August 23, 2006

Cornbread Griddle Cakes


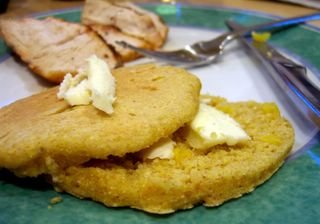
A griddle cake is another word for a pancake, but it seems to be used more often to indicate something more rustic and less breakfast-y than the word "pancake." This makes it the perfect descriptor for these cornbread cakes.
Essentially, these griddle cakes are cornbread that is cooked in rounds on the stovetop, like pancakes, rather than being baked in the oven. The result is something that takes less time than baking, heats up the kitchen less and already comes in neat, individual servings. The cakes have a nice wholesome taste and a good texture, which is a bit "rustic" from the cornmeal, with a lovely little bit of crunch. They are not dense or heavy, but they are very satisfying.
I personally like them best with jam, but one of the best things about them is that they are incredibly versatile. The cakes can be topped with everything from butter to salsa, used to mop up barbecue sauce or gravy or even served with maple syrup.
I used some fresh corn in the griddle cakes, but you can also add other things to them, such as cayenne pepper and lime zest for a spicier variation, or some chopped up pre-cooked bacon, for something really savory.

Cornbread Griddle Cakes
1/2 cup all purpose flour
1/2 cup whole wheat flour
1 cup cornmeal
1 tsp sugar
1/2 tsp baking powder
1/2 tsp baking soda
1/2 tsp salt
2 large eggs
1 cup buttermilk
2 tbsp vegetable oil
1/2 cup sweet corn kernels


Combine all dry ingredients (flour through salt) in a large bowl and whisk to combine.
Combine eggs, buttermilk and oil in a small bowl and whisk until smooth. Pour into dry ingredients and stir until the batter is just combined, adding in the corn kernels at the last minute.
Cook as you would cook pancakes, in a nonstick or lightly greased pan until lightly browned on either side. The cakes will be fairly thick and I like to make them about 3-inches in diameter. They will take a bit longer to cook than "real" pancakes, so be patient.
The griddle cakes can be served warm, at room temperature or popped in the toaster and heated up.

Serves 6-8, as a side.

Monday, August 21, 2006

Mint Chocolate Truffles


Everyone should try making truffles at least once in their lives. They are delicious and dead easy to make.
Essentially, all you have to do is combine chocolate and heavy cream in a heat-proof dish (I tend to use glass bowls) and melt them together. Once the mixture - called ganache - is smooth, it is chilled slightly until it is firm and easy to handle.
One thing that I do to make the process easier is that I melt the chocolate and the cream in the microwave, rather than on top of a double boiler. You have to take your time - working in intervals of a few seconds - but the whole process only takes a minute or so.
When everything is mixed together, I refrigerate the ganache. It can be made a few days in advance and kept cold in the refrigerator, then warmed slightly to room temperature to make shaping the balls easier. Speaking of the balls, I find it very difficult to shape them by hand, so I scoop the ganache into a ball with a teaspoon and use a small knife to turn it out into a ball. The shape can be adjusted slightly once it is covered in cocoa and is less sticky.
Adding peppermint makes these taste a lot like the York peppermint patty candies, but any flavor of extract (or none at all, if you like things very chocolaty) can be substituted. Vanilla is a nice option, as is cinnamon, but feel free to get creative with any flavors you like.
The truffles can be stored in the refrigerator, but should be eaten at room temperature for the best flavor and texture.


Mint Chocolate Truffles
8-oz bittersweet chocolate, chopped
1/4 cup heavy cream
1 tsp peppermint extract*
cocoa powder


In a medium glass bowl, combine the chocolate and the heavy cream. Melt the two together, whisking frequently, until just smooth. This can be done by placing the bowl over a small saucepan of gently simmering water, or by putting the bowl into the microwave on high in 10 second intervals, whisking between each.
Whisk in peppermint extract.
Chill at least 30 minutes.
Remove from refrigerator and let the ganache soften until it is easy to work with. Form teaspoon-sized balls (using a teaspoon and a small knife to shape them) and roll in cocoa powder.
Makes about 24-28 truffles, depending on size and whether you sample any ganache.


*Note: You could use more, if you want a mintier flavor, and you can substitute just about any other kind of flavoring, too.

Saturday, August 19, 2006

Apple Morning Muffins


I'm always looking for healthy baked goods, especially muffins and other breakfast pastries. I love breakfast and muffins, but I really prefer to get my days off to a relatively healthy start. This is especially true on weekdays, when I - and most people - are likely to be sitting around a bit more than a weekend. Flipping though the new issue of the Vegetarian Times that arrived this week, a recipe for Morning Muffins caught my eye.
The muffins had no added fat (meaning that there is no butter or oil added to them) and plenty of fruit. They also used low fat yogurt as the part of the wet ingredients in the recipe. Sounds like a nice way to get going in the morning, right?
I wanted to try them right away, so I made a few quick substitutions and ended up with a recipe that was similar in principle to the original. I'll say that my recipe was "inspired by" the original VT recipe.
The original recipe for the muffins called for using 1 1/2 cup whole wheat pastry flour and 1/2 cup all purpose flour, so I lost some of the whole grain-ness by using all all purpose flour. I made up for this, in my opinion, by using diced apples instead of all dried fruit. As much as I enjoy dried fruit, fresh fruit is much lower in calories and makes the low-fat muffin a bit moister.
They're quite good when they have just cooled, and the apples are a nice touch. They are best the first day they are made, but since they're so low in calories and fat, you don't have to feel guilty about eating a couple of them.
If they're too healthy for you, cut your muffin in half and spread with butter before eating. Or, simply skip this recipe and go straight to the delicious (but decidedly less healthy) Apple Streusel Muffins.


Apple Morning Muffins
2 cups all-purpose flour
3/4 cup raw sugar (regular sugar will work fine)
1 1/2 tsp baking powder
1/4 tsp baking soda
1/4 tsp salt
3/4 tsp cinnamon
1/4 tsp allspice
1/8 tsp nutmeg
1 cup buttermilk
2 large eggs
1 tsp vanilla extract
3/4 cup diced apple (1 large apple)
1/4 cup raisins

Preheat oven to 350F and line a 12-cup muffin tin with paper liners.
In a large bowl, combine the flour, sugar, baking powder, baking soda, salt, cinnamon, allspice and nutmeg.
In a small bowl, whisk together the buttermilk, eggs and vanilla. Pour into dry ingredients and stir until just combined and no streaks of flour remain, adding in the apples and raisins at the last minute. Do not overmix.
Divide evenly into muffin tins and sprinkle with 1 tbsp additional sugar, if desired.
Bake at 350F for 16-20 minutes, until a toothpick inserted into the center comes out clean and the muffin springs back when lightly pressed.
Cool on a wire rack. Muffins are best when just cooled.

Makes 12 muffins.

Thursday, August 17, 2006

Cooking School: A Blue Ribbon Recipe


I watched a special on the Food Network a few weeks ago that was about a pie competition. At the competition, there were a number of categories for amateur bakers: apple pie, fruit pie, cream pie, etc. Just about every pie looked delicious, but the one that ended up winning the best in show award was a fluffy pie that used Cool Whip as one of its main filling ingredients. My first thought, which I am sure was shared by others, was one of wonder - how could that have been picked over the perfectly made from-scratch pies? The answer is simple: it tasted better.
My point here is that food snobbery, however you choose to define it, is prevalent in the food-loving community and everyone has it to some small degree. When it leads to using only organic ingredients and from-scratch pies and cakes fresh from the oven, it can be a good thing. But it does not mean that the dishes that don't live up to those standards are sub-par, or unworthy of notice. I'm not going to say that they will always be as good as something that is entirely homemade - I do bake my own bread, after all - but it certainly can be delicious.
Case in point is this award winning recipe for Peaches and Cream Pie, which has apparently won the recipe writer 5 blue ribbons and a "Best in Show" award, not to mention a five star rating from more than 450 reviewers on AllRecipes. With that kind of pedigree, I knew that I had to try the pie as soon as I had seen it. It is not a traditional pie, though. It has a cake base, rather than a pastry one, and uses pudding mix in the batter. It also called for canned peaches.
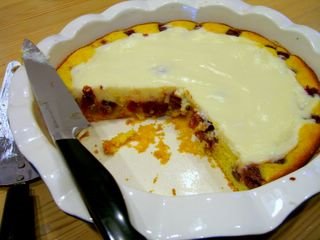
I'm glad that I put aside any snobbery I might have felt and made it. I used cherries instead of peaches, but the pie was declared to be one of the best things my tasters have ever tasted.
And they have tasted a lot.
The reason that the recipe calls for canned peaches is twofold: they take less time to soften in the oven and are very consistent. Everyone has jarred or canned peaches, so the pie can be made at a moment's notice. I used jarred Morello cherries (not cherry pie filling, but cherries in juice) from Trader Joe's. Other berries, fresh or frozen and defrosted, would work here, too. The vanilla pudding added a ton of vanilla flavor to the base of the "pie" and made a wonderful match for the cream cheese topping. In fact, it was almost like a very unusual cheesecake, or a cake with a cheesecake frosting. It was moist, surprisingly light and very good.
I'm not saying that all recipes that aren't entirely homemade, etc. will be fantastic, but sometimes it is worth trying them just to find out. You might be surprised.


Cherries and Cream Pie
3/4 cup all purpose flour
1/2 tsp salt
1 tsp baking powder
1 3-oz package vanilla pudding mix (not instant)
3 tbsp butter, very soft
1 large egg, room temperature
1/2 cup milk, room temperature
25-30 ounce can/jar of cherries in juice (not pie filling), see note for substitutions
1 8-oz package cream cheese, very soft
1/2 cup sugar
3 tbsp milk

Preheat oven to 350F. Grease a 10 inch deep-dish pie pan or round baking dish.
In a large bowl, stir together flour, salt, baking powder and pudding mix. Using an electric mixer, beat in butter and egg, adding milk gradually, until mixture is smooth. Pour into pie pan.
Arrange fruit on top of cake mixture.
In a small bowl, beat cream cheese until smooth, then add sugar and 3 tbsp milk and beat until sugar is dissolved and mixture is fluffy, about 2 minutes. Spoon cream cheese mix over fruit, gently spreading it to within 1 inch of pan edge.
Bake at 350F for 30-35 minutes, until golden brown at the edge.
Cool on a wire rack
Serve slightly warm or chilled.
Serves 10.


Note: If using frozen cherries, let them defrost before using. The same thing goes for other frozen berries. You will probably need about 1 1/2 cups fruit. Otherwise, use canned peaches, as in the original recipe.

Wednesday, August 16, 2006

Elise's Gazpacho


When Alanna and Kalyn told me that they were going to make gazpacho today, I couldn't resist joining in with my blogging buddies. As far as I'm concerned, gazpacho is one of the best soups that you can have during the summer. Not only is it easy to make, since it requires no cooking, but it uses up lots of fresh vegetables at the peak of their season. I don't know about you, but I feel pretty good about a satisfying dish that is comprised entirely of tasty, healthy vegetables.
I have made many gazpacho recipes and tend to vary the ingredients according to the vegetable quantities that I either already have, using more peppers or more cucumber, or according to what I want to use up. The dish is very much a "toss everything in" sort of thing. But if I am going to stick to a recipe, I think that Elise's version is one of the best. It's a little bit spicy, a little bit sweet and very satisfying on a warm day.
I admit that, even though the recipe is lovely as-is, I do make a few very minor changes because I can't fight my anti-recipe gazpacho instincts. For example, I am too lazy to peel the tomatoes. I use them whole. I also use cilantro insted of the chives called for in the original. And sometimes, I use balsamic vinegar instead of red wine vinegar.
Now that confession time is over - and I think that Elise will forgive my occasional alterations - what are you waiting for? Make some gazpacho!


Elise's Gazpacho
(from Simply Recipes)
6 ripe tomatoes, peeled and chopped
1 red onion
1 large cucumber, peeled and seeded
1 red bell pepper, seeded
2 stalks celery
1-2 tbsp fresh parsley
2 tbsp chopped fresh chives (or cilantro)
1 clove garlic
1/4 cup red wine vinegar
1/4 cup olive oil*
2 tbsp fresh lemon juice
2 teaspoons sugar
Salt and fresh ground pepper, to taste
1 tsp (more or less) Tabasco sauce, to taste
1 teaspoon Worcestershire sauce (optional)
4 cups tomato juice (or V8)

Combine the vegetables, tomatoes through garlic, in the food processor and pulse to chop. Add all remaining ingredients and blend to desired consistency (either smooth or slightly chunky). Place in a non-reactive storage container, cover tightly and refrigerate for several hours (overnight is best), allowing flavors to blend and the soup to chill.

Serves 8.


*Note: I always reduce the amount of oil when I make this, if I use it at all. The oil adds a smoothness to the soup, but I rather like a slightly more "rustic" texture. If I add it, I just drizzle a bit in. I estimate that the amount is 1 tbsp, or 2 at the most.

Monday, August 14, 2006

Brown Sugar Chocolate Chip Cookies


Some home bakers will tell you that the secret to a good cookie is using brown sugar instead of white. I don't think that this is actually any kind of secret at all, but I will agree that brown sugar can add a unique flavor to a cookie.
Brown sugar is basically white sugar that has had some molasses added back to it. This gives it a deeper flavor, and consequently produces more flavorful cookies. Molasses also helps to keep the cookies moist, so a cookie made with brown sugar will be slightly chewier than one made with white sugar.
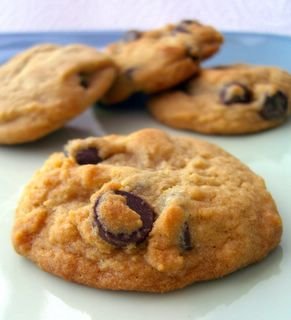
I would not say that these cookies are particularly chewy, though they do remaining soft in the center even after a couple of days in the (airtight) cookie jar. I would describe them as being an excellent example of what homemade cookies should taste like. They are simple, flavorful, slightly crisp on the edges and soft in the center. They are about 1 1/2 - 2 inches across and packed with chocolate chips.
I initially thought that I would put milk chocolate chips in these cookies, but while the cookies are not overly sweet at all, even the batter tasted too sweet with milk chocolate. Try using semi-sweet or bittersweet chocolate chips in them for a good contrast.
These won't spread out as much as you might expect, so you can fit quite a few on a sheet if you leave about an inch between each cookie.

Brown Sugar Chocolate Chip Cookies
2 1/4 cup all purpose flour
1 tsp baking soda
3/4 tsp salt
3/4 cup butter, room temperature
1 1/4 cups brown sugar
1 tsp vanilla extract
1 large egg
1 1/4 cups semi-sweet chocolate chips


Preheat oven to 350F. Line a baking sheet with parchment paper.
In a medium bowl, stir together flour, baking soda and salt.
In a large bowl, cream butter and brown sugar until light, about 2 minutes. Beat in vanilla extract and egg until smooth. With the mixer on low speed, gradually add in all the flour mixture, stopping when the dough has just come together and no streaks of flour remain.
Stir in chocolate chips.
Place slightly rounded tablespoons of dough on baking sheet.
Bake for 9-11 minutes, until just golden around the edges.
Transfer to a wire rack to cool completely.

Makes 3 dozen.

Saturday, August 12, 2006

Caramelized Banana Buttermilk Ice Cream


Just when you probably thought that I wasn't going to do any more ice cream posts, here is one more. After I posted the basic recipe for banana buttermilk ice cream, Fanny left a comment about making something similar: roasted banana ice cream. I was intrigued. How would the caramel-like flavor translate to the tangy ice cream?
I opted to caramelize my bananas on the stovetop instead of roasting them, though I think that grilled bananas would be a fantastic alternative. I thinnly sliced the bananas and dropped them into a hot pan. I don't think that they needed any butter or sugar, but you could certainly add a tablespoon (or two, of sugar) if you prefer. The bananas cooked until they were golden on both sides before I transfered them to a large bowl and mashed them somewhat. Some chunks remained, but all were small.
I combined the bananas with the ice cream base and let it chill until quite cold before pouring it into my ice cream maker.
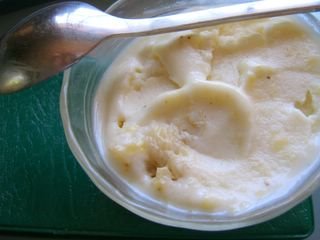
The result was a slightly tangy ice cream that was both caramel-y and banana-y. (Like those -y endings?) The overarching flavor was the buttermilk, with the banana flavors rounding it out very nicely. This would be fantastic with either chocolate or caramel sauce. Maybe both.
If bananas aren't your favorite thing in ice cream, try the Black Cherry variation that I posted at Slashfood. Depending on your tastes, it might be even better.


Caramelized Banana Buttermilk Ice Cream
2 large or 3 medium bananas
1/2 cup sugar
2 1/2 cups buttermilk
2 tsp vanilla extract
1/2 cup chopped, toasted walnuts (optional)

Thinnly slice the bananas and put them into a medium skillet over medium heat to cook until golden brown all over. Transfer to a large bowl.
Whisk together sugar, buttermilk and vanilla in a medium bowl, dissolving most of the sugar, then stir it into the bananas. Refrigerate until cold (at least 30-60 minutes).
Pour mixture into your ice cream maker and freeze as directed. Add in walnuts, if using. Mine took about 15-20 minutes.
Transfer to a freezer-friendly container with a lid and freeze until firm (at least 30 minutes) before serving.

Serves 6.

Thursday, August 10, 2006

Cooking School: Herbed Breadsticks


I have made breadsticks before, and though they were tasty and easy to make, I have wanted to pin down a good recipe for yeasted breadsticks. I wanted to get that nice texture that you just can't seem to get with a quickbread (non-yeast) type of recipe. Many recipes for homemade breadsticks are really just elongated dinner rolls, tending towards softness. Truthfully, I like those types of breadsticks, but I really wanted something crunchy, but not too hard, and flavorful. These seem to fit the bill. The recipe starts with a yeast dough that has dried herbs added to it, adding a relatively mild flavor that would complement many dishes. The dough is smooth and easy to handle. To shape it into those lovely twists, I just rolled the dough into long snakes, folded in half, and twined the loose ends together.
The trick to getting them crispy is in the baking. It seems that you need a high temperature and a relatively long baking time, compared to the size of the breadstick. I ended up baking them at 425F until they were a dark, golden brown all over. This produced sticks that were wonderfully crunchy on the outside and still a bit soft at the center. The long baking time did dry the center of the breadstick slightly, but this is a breadstick that is meant to be dipped in soups and sauces, soaking them up and adding a texture contrast. In short - it doesn't matter.
If you are a die-hard soft breadstick person, only bake them for 15-20 minutes, until they are light golden, firm to the touch and sound hollow when lightly tapped. Also, if you know your oven has hot spots in it, I recommend rotating the pan once during baking to avoid over-browning (a.k.a. burning) any of the breadsticks.


Herbed Breasticks
2 1/2 tsp active dry yeast (1 packet)1 cup warm (110F) water
1 tbsp vegetable oil
1 tbsp sugar
1 1/2 tsp salt
1 tsp dried dill
1 tsp dried parsley
1/2 tsp carraway seeds (optional)
2 1/4-2 1/2 cups all purpose flour
salt, for topping

In a large bowl, combine the yeast and the water. Let stand for 5 minutes, until slightly foamy. Add in vegetable oil, sugar, sald, dill, parsley, carraway seeds (if using) and 2 1/4 cups of flour and mix well. Add remaining flour a tablespoon at a time, stirring until the dough comes away from the sides of the bowl, adding a little more if necessary. Turn out onto a lightly floured surface and knead for 3-5 minutes, until smooth and elastic. Place dough into a lightly greased bowl, turn to coat, and cover with plastic wrap. Let rise for about 1h15min, or until doubled in size.

Once the dough has risen, divide it in half. Working with one half at a time, roll out into a large rectangle that is about 1/4 inch thick. Cut it into four strips (a pizza cutter will work well), then take each strip, roll it into a "snake" about 18-inches long, fold in half and twist together. Place twist on a lined baking sheet. Repeat with the second half of the dough to make 8 breadsticks. Cover the baking sheet with a clean dish towel and let rise for about 30 minutes.

Meanwhile, preheat the oven to 425F. When the breadsticks have risen, very lightly brush them with water and sprinkle with a bit of coarse salt. Bake for 20-25 minutes, or until dark golden all over.
Let cool to room temperature (or slightly warm) before serving.
Makes 8 large breadsticks.

Note: To refresh them, since they will loose their crunch overnight, just pop into a 350F oven for a few minutes – but there’s no shame in having none left over, either.

Wednesday, August 09, 2006

Cherry Blueberry Clafoutis


I had it in mind to make a blueberry clafoutis, but much to my chagrin, I found that the berries at the bottom of my small basket were beyond saving, much like the fresh raspberries I have had such bad luck with this year. I ended up adding some frozen black cherries to dish and the combination of fruits was delicious.
The recipe is only a slight variation on my favorite Pear Clafoutis, and while I love that one, it is a simple fact that ripe pears are harder to obtain and have a shorter season than cherries and blueberries - especially since the berries can be frozen with little detriment to their texture. An additional benefit is that the berries do not take any of the prep work that pears do. The finished product might not look quite as elegant as the sliced pear dish, but it makes up for any visual shortcomings in color - and in taste, of course.
The clafoutis is incredibly easy to make, with everything coming together in mere seconds in the food processor. A one step, one bowl recipe is incredibly forgiving, so even a complete beginner should be able to make this work.
Once baked, the finished dish is slightly eggy, like custard, but has a completely unique texture, somewhere between a custard and a cake. It is more dense on the bottom than the top and develops a slight "crust" where it comes in contact with the baking dish, but the whole thing is quite tender. The berries really shine in with the plain background flavors, but you could experiment with different extracts or spices if you wish. Cherries with cinnamon and vanilla would be delicious, and blueberries with lemon extract for part of the vanilla would be lovely, as well.


Cherry Blueberry Clafoutis
1/4 cup sugar
1/2 cup flour
1/2 tsp baking powder
1/4 tsp salt
1 cup milk ( I used skim)
1 1/2 tsp vanilla extract
3 large eggs
2 cups black cherries and blueberries, mixed, fresh or frozen*


Preheat oven to 425F.
Lightly grease a a 9-10 inch round baking dish (the pie dish I used was 9.5-in).
In a food processor, blend all remaining ingredients, except berries, until smooth, about 10-15 seconds (This can be whisked by hand, as well).
Place fruit on the bottom of the baking dish and pour egg mixture on top of it.
Bake for 15 minutes at 425F, then turn oven down to 350F and bake an additional 20-25 minutes, until clafoutis is light golden brown and a tester comes out clean. Holding the oven door open for a 30-40 seconds will help to reduce the oven temperature when you lower it.
Let it cool for at least 20-30 mintues before serving. The clafoutis will sink slightly as it cools.
Serve warm, at room temperature, or chilled.
Serves 6.


*Note: If using frozen, quickly rinse and pat them dry before using, since sometimes frozen berries have a lot of extra juice frozen to the outsides of the fruit.

Monday, August 07, 2006

Raspberry Lime Bread


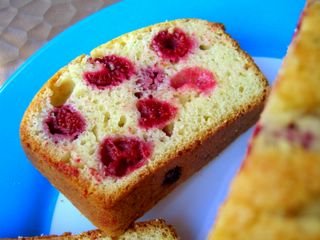
This is a very beautiful loaf. It has a golden top, an almost white interior and, of course, bright raspberries scattered throughout, making the contrast between white and red all the more obvious.
The idea to do a lime-raspberry flavor combination had been floating around in my head for some time, but I kept forgetting to buy raspberries. Or when I would get them, they would often spoil before I had a chance to use them. In all probability, the weather this summer has not been very produce-friendly, which probably contributed to the exceptionally short shelf-life of my berries. In the end, I ended up using frozen raspberries despite the fact that I could have used fresh. Frozen will hold their shape as the bread bakes and will not get smashed when mixed into the batter. You can use either kind, but I think that frozen might actually be a bit better when it comes to appearances.
The quickbread itself is sweet and tender, though it is not too light - marking it as more of a bread than a cake. This means that it stands up to toasting very well, if you prefer to eat yours with a bit of butter rather than having it plain. The lime zest gives it a bright flavor without coming across as too acidic or citrusy and serves to highlight the sweet berries.
I should also mention that this bread smells fantastic when it's baking. You might want to have a snack on hand so you'll be able to resist slicing into the loaf before it's cool.


Raspberry Lime Bread
2 cups all purpose flour
1 1/2 tsp baking powder
1/2 tsp salt
3/4 cup sugar
1 large egg
1 1/2 tsp vanilla extract
3 tbsp vegetable oil
1 tbsp lime zest
3/4 cup milk (any kind)
1 1/2 cups raspberries, fresh or frozen


Preheat oven to 350F. Lightly grease an 8x4-inch loaf pan.
In a medium bowl, whisk together flour, baking powder and salt.
In a large bowl, whisk together sugar, egg, vanilla, vegetable oil and lime zest until smooth. Stir in 1/2 of flour mixture and all of the milk. Stir in the rest of the flour mixture until just combined. Quickly stir in the raspberries and pour batter into prepared loaf pan.
Bake for 1 hour at 350F, or until a tester comes out clean when inserted into the center of the loaf.
Turn loaf out onto a wire rack and cool completely before slicing.
Store wrapped in plastic wrap and it will keep for several days.
Makes 1 loaf.


Sunday, August 06, 2006

Blogging by mail returns!


For all of you who have e-mailed me over the past few months, asking when we were going to have another round of Blogging By Mail, your time has come. The global, non-digital event has returned!
When I started Blogging By Mail, back before any of the other postal-blogging events did, I might add, I didn't know it would be as popular as it was. The first round had 26 people. Subsequent rounds had more than 100. It takes time and a vast amount of organization to coordinate packages going from Manila to New York and Auckland to Indiana. But I'm sure you don't want to hear about the boring details. We're leaving all that to the host of this round, Stephanie from Dispensing Happiness.
Stephanie has posted all the guidelines for packages and how to sign up, so read them carefully! You must e-mail her (and not me) to participate. Sign-ups will last from now until August 25th, and all packages must be shipped by September 15th, at the latest.

This event is a chance to swap a few of your favorite goodies, either local or homemade, with someone somewhere else in the world. I do ask, however, that you all profusely thank Stephanie for organizing this round. I know she's going to do a brilliant job, so we might as well thank her ahead of time - what else will we have to do while waiting to find out who we'll be sending our packages to?

Sunday Brunch: Pepper, Onion and Cheese Omelet


The trick to making an omelet is to practice. The more often you make them, the easier they'll be to do. An omelet is sort of like a large egg pancake, if you've never had one before. The egg mixture has eggs (of course), a little milk or water and seasonings, then it is poured into a pan and cooked until just firm, before being wrapped around a filling of some kind. The most important thing is that the eggs should stay together in one round, not break apart like scrambled eggs. If they do break apart, a scramble is always an option.
Without coming over and using my pans and my stove, I can't tell you the exact settings to make the perfect omelet, if there is such a thing. I like to cook my eggs over a medium or medium-high heat until the top is still jiggly, but just set. Then, I add my filling and fold up the sides of the omelet. I always use a silicone spatula when working with eggs because it handles them more delicately than a hard or stiff tool.
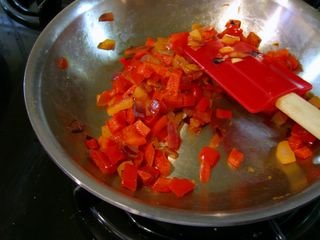
I used a blend of sweet onions and red bell peppers for this omelet, mixed a little bit of dill into the eggs, and topped it off with some muenster cheese just before folding up the sides.
For the vegetables, use about 1/4 of a veggie per person. So, if you are only making an omelet for one, you don't need to cut up a whole onion. You can, of course, use more veggies, but keep in mind that it will be difficult to fold the sides of the omelet up if your filling is too thick.


Omelet with Pepper, Onion and Cheese
(for one person, can multiply as needed)
2 large eggs
2-3 tbsp milk or water
1/2 tsp dried dill
salt and pepper
red bell pepper, diced
sweet onions, diced
salt and pepper
1-2 tsp butter
cheese of choice (I recommend muenster or provolone)


In a small skillet, sautee diced pepper and onions (see above note for the amounts) with a small amount of butter and some salt and pepper until very tender. Working over medium heat, this could take about 15 minutes. Turn heat to low while you prepare the eggs.
Preheat a medium skillet over medium-high heat. Grease lightly if using a non-nonstick pan.
In a medium bowl, beat the eggs, milk (or water), dill and salt and pepper together until very smooth. Pour into prepared skillet and reduce heat slightly. Cook until the top of the eggs are just set, but still jiggly, and the edge separates easily from the bottom of the pan when you slide a spatula under it. Distribute veggies in the center of the eggs, top with cheese, then use the spatula to fold up the sides of the omelet.
Continue cooking until the omelet is as done as you like it (some prefer theirs slightly runny and some like them well-done).
Serve immediately, preferably with toast.


*Note: if you want to reduce the fat, omit the cheese and use one whole egg and two egg whites. The veggies can be sauteed in a nonstick pan, too, but a small amount of butter (only about4g fat per tsp) really makes them wonderful when they are cooked to an almost melting consistency.

Friday, August 04, 2006

Ice Cream Cookie Sandwiches


I had a good time with the two-tone milkshakes that I made last week and decided to use the same effect to make these ice cream sandwiches. And by this, I mean that I made them with half vanilla filling and half chocolate.
Ice cream sandwiches are really simple to make because you don't have to actually make anything in order to make them. You can buy all the ingredients you need. Of course, there are some things that you should keep in mind if you're doing this. Here are a couple of tips:
First, choose with a soft or chewy cookie so that it doesn't crack and crumble all over the place while you're eating it. Second, get the best and most strongly flavored ice cream you can find, since you're only using a small amount and want the flavor to come through. Third, chocolate chip cookies pair very well with vanilla ice cream, the standard filling for a sandwich.
The technique involved in putting the sandwiches together is quite simple. You need to take the ice cream out of the freezer and let it soften until it is easy to handle with a spoon. Once it is sandwiched between two cookies, wrap the whole thing in a small piece of plastic wrap and freeze until solid. With individually wrapped cookies, you'll never have a problem grabbing one for a snack, and doing them one at a time allows you to get each sandwich into the freezer without worrying about the filling melting too much.


Ice Cream Cookie Sandwiches


The amount of each ingredient you'll need depends on how many cookie sandwiches you're going to make.
Simply soften the ice creams on the countertop, spread each half of one cookie generously with ice cream until it's about 1-inch thick, and top with another cookie.
Wrap in plastic wrap and freeze until firm, about 1 hour.
To serve, simply unwrap and plate. The sandwiches will soften in just a few minutes, though you can certainly consume while they're straight from the freezer if your teeth can handle the cold.


*Note: Ok, you can use other cookies if you want to. Oatmeal raisin would be good, as would the very chocolaty amazing chocolate cake cookies, salty oat cookies or white chocolate cookies.

Thursday, August 03, 2006

Cooking School: Oatmeal Chocolate Chip Cookies


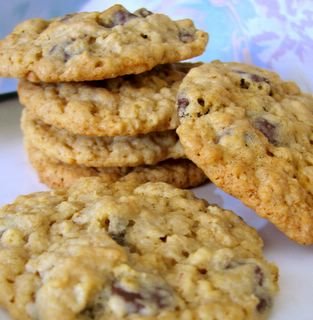
These are, hands down, the best oatmeal chocolate chip cookies I have ever made and probably the best I have ever eaten. Granted, I actually make things that I like more than these (sometimes you feel like a muffin, not a cookie), but I have never seen someone not reach for a second cookies straight away. They are fantastic - slightly crispy on the edges with a nice and chewy center. They are buttery, without being greasy at all, and perfectly balanced. The cookies have just the right amount of chocolate chips to appease any chocolate lover, but not so much that the flavors of the oats and vanilla are drowned out.
I could go on about the taste, but I'll refrain.
The cookies are from The Frog Commissary Cookbook, a book of the recipes from a very popular local restaurant called "Frog" in Philadelphia in the 1970s. As I have family out in that area, I suspect that more than one relative of mine frequented the restaurant, which is probably how my mother ended up with a copy of the cookbook. She started making the cookies and, after a time, so did I.
The book says that the restaurant would "sell this cookie the way that McDonald's sells burgers: they fly out the door." They also note that they were "irresistible," even to employees who were around them every day.
Oatmeal cookies hardy make a good "cooking school" entry in terms of method because almost everyone knows how to make a simple drop-cookie already. They fit in, however, because this is a cookie that everyone needs to have in their repertoire.
Trust me.


Oatmeal Chocolate Chip Cookies
(from The Frog Commissary Cookbook)
1 cup butter, room temperature
1 cup sugar
1 cup brown sugar
2 large eggs
2 tbsp milk
2 tsp vanilla extract
2 cups all-purpose flour
1 tsp baking soda
1 tsp baking powder
1 tsp salt
2 1/2 cups oats (rolled or "quick," but not "instant")
2 cups chocolate chips (about 12-oz.)

Preheat the oven to 350F. Line a baking sheet with parchment paper.
In a large bowl, cream together the butter and the sugars until mixture is light in color. Beat in the eggs one at a time, followed by the milk and the vanilla extract.
In a medium bowl, stir together the flour, baking soda, baking powder and salt. Either by hand or with the mixer on low speed, gradually beat the flour in to the sugar mixture until just incorporated.
Stir in the oats and chocolate chips by hand.
Drop 1-inch balls of dough onto the cookie sheet, placing about 1 1/2 inches apart so they have room to spread.
Bake at 350F for 10-13 minutes, until golden brown at the edges and light golden at the center.
Cool on baking sheet for at least 1-2 minutes before transfering to a wire rack to cool completely.

Makes 4 dozen.


Notes:
- If you chill the dough for about 30 minutes before baking, you will have a slightly puffier cookie.
- You can substitute raisins for the chocolate chips.
- You can add up to 1 1/2 cups chopped nuts in addition to raisins or chocolate chips. You might want to make the cookies slightly larger if this is the case.

Tuesday, August 01, 2006

Lemon and Candied Ginger Muffins


While we were at BlogHer, Elise told me a story of some semi-disastrous lemon muffins that she had recently tried to make from a recipe given to her by a friend. What precisely caused the muffins to fail was a mystery, since the friend who supplied the recipe later had the same difficulty, despite the fact that she had succeeded with the muffins in the past.
It was with those muffins in mind that I put together this recipe for Lemon and Candied Ginger Muffins, though you can rest-assured that my recipe is completely unlike the unsuccessful one I just mentioned.
These muffins, instead of being made with lemon juice, are only kissed with lemon through the use of lemon zest in the batter. The lemon flavor is boosted by adding an easy lemon glaze after baking. The glaze is added when the muffins are still slightly warm so that it almost melts into the top of the muffin.
The muffins themselves are very light and tender, in large part because I creamed the butter and sugar together, as I might do for a cupcake. These aren't sweet enough to be mistaken for cake, but at the same time, they don't fall into that trap of not having enough sugar in them, as some muffins do. They have an excellent balance overall and can be eaten plain, with a cup or tea or coffee, as well as with a bit of butter at breakfast.
The candied ginger boosts the sweetness of the muffins and provides a little crunch every time you encounter an unusually sugary piece. I actually use the crystallised ginger chips (pre-cut candied ginger) from the Ginger People, which have a higher sugar-to-ginger ration than most, but still carry across a lot of ginger taste, especially if you eat them more than a few at a time.


Lemon and Candied Ginger Muffins
1 3/4 cups all purpose flour
2 tsp baking powder
1/2 tsp salt
1/4 cup butter, soft
1/2 cup sugar
2 large eggs
1 tsp vanilla extract
Zest of 1 lemon (about 1 tbsp zest)
3/4 cup milk (low fat is ok)
1/2 cup candied ginger, in small pieces

Preheat oven to 400F. Line a 12-cup muffin tin with paper liners.
In a medium bowl, whisk together flour, baking powder and salt.
In a large bowl, cream together the butter and sugar until light. Beat in the eggs, one at a time, followed by the lemon zest and vanilla extract.
Alternate adding the flour mixture and the milk to the butter/sugar mix, working in two or three additions and beating at a low speed (or by hand) only until just combined. Stir in candied ginger.
Divide batter evenly into prepared muffin cups and bake for about 15 minutes, until a tester comes out clean and the top of the muffin springs back when lightly pressed.
Cool on a wire rack, drizzling with lemon glaze (below) while muffins are still slightly warm.


Lemon Glaze
2-3 tbsp lemon juice
1 cup confectioners sugar

In a small bowl, combine confectioners' sugar with enough lemon juice to make a glaze that will drizzle easily from the tines of a fork. You don't have to be exact, and can always add either a bit more juice or a bit more sugar to achieve a good consistency.
Drizzle a little glaze over each muffin and let dry for at least a few minutes before serving.