Monday, November 27, 2006

Pumpkin Streusel Muffins


The holidays have a way of making time go by both very slowly and very quickly, which is why it has taken me so long to get this post up even though I intended to do it days ago. Fortunately for me, despite the fact that Thanksgiving is now over, pumpkins are considered to be winter fare, as well as fall. Of course, canned pumpkin means that you have have pumpkin all year long, though.... I digress. The point is that these are delicious muffins - delicious enough to make up for my delay in posting them.
Pumpkin muffins can often be rather heavy and dense due to the fact that there is so much moisture in the pumpkin. These muffins are neither. They have a very tender crumb that is fluffy and light, but very moist. Because they use both butter and sour cream, they can be quite rich, but you can cut back on the amount of fat slightly by using yogurt, either low fat or fat free. The taste will probably make up for any guilt you might feel from eating these, though. They have a good pumpkin flavor, but not overwhelming enough to put off even people who aren't particular fans of pumpkin. The spices, and the hint of cinnamon in the streusel, really round out the overall flavor of fall.
I should also note that the instructions for the streusel below will make a bit more than enough to cover the muffins. You can either try to stack the extra on top of the muffins or store it in the fridge for a couple of days to use on a second batch. You can also half the recipe but isn't it better to have too much stresel than too little?
I really love pumpkin in any form that it comes in and I have to say that, in my opinion, these are realy excellent muffins. They can also be dangerously addictive, so you might want to have some people in mind to share them with.


Pumpkin Streusel Muffins
1/2 cup butter, melted and slightly cooled
3/4 cup canned solid-pack pumpkin
1/2 cup yogurt or sour cream
2 large eggs
1 tsp vanilla
2 cups all purpose flour
2 tsp baking powder
1 tsp cinnamon
1/2 tsp ground ginger
1/4 tsp allspice
1/4 tsp cloves
pinch freshly grated nutmeg
1/2 tsp salt
1/2 cup brown sugar
1/2 cup white sugar

Streusel Topping
1/2 cup butter, softened
1/2 cup sugar
3/4 cup flour
pinch salt
1/2 tsp cinnamon

Preheat oven to 400° F. Line twelve muffin cups with paper liners or lightly grease the tin.
Make the streusel:
In a medium bowl, combine all ingredients and rub the butter in until the mixture is crumbly. This will be a bit of a sticky operation because the butter is soft, but take your time. Once it is crumbly, gently squeeze bits of the mixture together to form larger pieces of crumble/streusel. Set aside.
Make the muffins:
In a large bowl, combine melted butter, pumpkin, yogurt/sour cream, eggs, and vanilla and whisk until smooth.
In another large bowl, sift together the flour, baking powder, spices and salt, then stir in the sugar. Add pumpkin mixture to flour mixture and sir until just combined. Divide batter evenly between the prepared muffin cups and top with streusel.
Bake for 16-19 minutes at 400F, until a tester inserted into the center of the muffins comes out clean.
Cool muffins in the pan for about 5 minutes to allow the topping to set up, then turn out onto a wire rack to cool completely.
Makes 12 muffins.

Tuesday, November 21, 2006

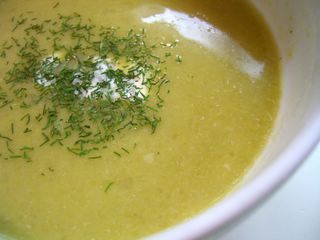
Cream of Artichoke Soup

Before Thanksgiving, I usually think about savory foods. This is because I already know what I'm going to do in terms of dessert (pie, of course!), so I need to spend more time working out the other things on the menu, like soups and side dishes.
Last year, the soup course was some kind of potato soup that was uninspiring and perhaps a bit too heavy with the other potato dishes at dinner. I wanted to do something lighter and a little bit different, so I thought back to a very good artichoke soup I had at an Italian restaurant a few months ago and decided to aim for that flavor. I recall the waiter explaining that there was no cream and no potato, which is often used as a filler, in the soup, so I started out with a lot of artichokes. I used frozen because they're just as good as fresh for soups and other cooked dishes and they take very little prep time. I added in a little bit of rice to help thicken the soup and ended up adding in some milk to smooth it out. You can use any type of milk in the soup, from skim milk to cream, based on how rich you want it to be. I used a combination of skim milk and light cream (half and half), which is pretty much like low fat milk.
Is it the same as the soup I enjoyed this past spring? No, but it does taste delicious. The flavor of artichoke really comes through and you'll know exactly what it is you are eating. I highly recommend serving the soup with a sprinkle of dill - fresh or dried - and a dollop of sour cream or yogurt, as the dill really blends well with the artichoke flavor.
This soup can be served as a first course in smal bowls or as a main dish with bread or half a panini sandwich.


Cream of Artichoke Soup
24-oz frozen artichoke hearts, thawed
1 large onion, diced
30-oz vegetable broth
1/4 cup rice, uncooked (I used basmati)
1 tsp tarragon
pinch red pepper flakes
salt, to taste
1 cup milk or cream

dill and yogurt/sour cream, for serving


In large saucepan or pot, combine all ingredients except for the milk and bring to a boil. Reduce heat to a simmer and cook for 45 minutes, until everything is very tender.
Using a hand blender (or working in small batches in a regular blender) puree the soup until very smooth. Slowly stir in the milk and, if necessary, blend again.
Season with more salt and pepper to your tastes, and serve with a small dollop of sour cream and a generous sprinkle of dill.

Serves 6-8.

Sunday, November 19, 2006

Vegetarian Stuffing

Whether you call it stuffing or dressing, this dish and its many variations are a classic holiday dinner side dish. Personally, I always called it stuffing, regardless of the fact that it may or may not have actually be stuffed in a bird. I don't really care for the mushy texture of the in-bird stuffings, so I tend to opt for the "on the side" variety with a crunchy, browned top.
I was working on a couple batches of stuffing for Slashfood this week and I really like the recipe that I ended up with, so I figured I'd share it here as well as there. This version uses cranberries instead of raisins and eliminates the small amunt of oil, which I found made little difference in the crispness of the final stuffing.
It's very easy to make and completely vegetarian. It is flavorful with sage and a fair amount of sweetness from the fruit. You can, of course, adjust the seasonings to suit your tastes and the type of bread you are using. I don't usually measure things as I'm adding them (and will sometimes toss in a bit of paprika or garlic just to make things different), so these are ballpark figures anyway. I like to use fresh bread, not stale, since the flavor is better and it gets just as crispy on top in the oven. I also like to use a good-qualiy store bought bread (usually from TJs or something) rather than homemade, since I tend to want to eat homemade breads and not chop them up into stuffing.
The only "odd" thing about the recipe is that I noted you should use "strong" vegetable stock/broth for the best flavor. I use a vegetarian bullion to make my veg stock, so it is easy to increase the amount for a stronger batch. Add a tbsp of soy sauce to boost the flavor if yours isn't particularly flavorful.


Vegetarian Stuffing
3/4 cup onion, diced
1/2 cup celery, diced
1/2 cup apple, peeled and diced
2 tsp dried or 3 tbsp. minced fresh parsley
1/2 tsp dried sage
1/4 tsp salt
pinch cayenne pepper
4 cups bread cubes (white or whole grain)
1/2 cup dried cranberries
1/4 cup chopped pecans (optional)
10-12 tbsp strong vegetable broth* (up to 3/4 cup)

Preheat the oven to 350F and lightly grease a 1.5-quart baking dish.
In a small frying pan, sautee the onion, celery and apple until tender with the parsley, sage, salt, cayenne (or regular pepper, if you prefer). This should take about 5 minutes. Remove from heat.
In a large bowl, combine the bread cubes with onion mixture, cranberries, pecans, vegetable broth, adding slightly more if the bread is very absorbant (some need more liquids), and mix well. Taste one of the cubes and, if necessary, add additional salt or pepper.
Pour into prepared casserole dish and cover with aluminum foil. Bake for 20 minutes. Remove foil and bake for an additional 20 minutes, until top is crisp and golden.
Serve immediately.

Serves 4.

Thursday, November 16, 2006

Dried Cranberry Dinner Rolls


Thanksgiving is only a week away and I don't know about you, but I'm already starting to think about what I'm going to serve. I don't usually do "test recipes," making up a batch of something before I intend to serve it, and this isn't one. Instead, these rolls came about as al the ideas that I had for different courses and ingredients were floating around in my head. Dinner rolls and cranberries were the two that spoke loudest to me, and combining them produced these Dried Cranberry Dinner Rolls.
The rolls are delicious, soft with a great texture and a bit of sweetness from the cranberries. They're not actually sweet at all, although there is a bit of honey in the recipe, and they can certainly be used to sop up gravy with dinner. The good thing about any roll like this one is that, even though they work with savory foods, they can still be breakfast-friendly if you have leftovers
I used bread flour, not all purpose, in this recipe and that is what gives the rolls such a nice texture. They sell bread flour at most supermarkets these days, so keep an eye out for it.


Dried Cranberry Dinner Rolls
2 1/2 tsp active dry yeast
1 cup milk, warm (105F-110F)
1 tbsp honey
1 tbsp butter, melted and cooled
2-2 1/2 cups bread flour
3/4 tsp salt
1/2 cup dried cranberries
1 egg yolk


In a large bowl, combine milk and yeast and let stand for about 5 minutes, stirring slightly to dissolve yeast.
Stir in honey, butter, salt and 2 cups of bread flour. Add remaining flour in a tablespoonful at a time, stirring until the dough begins to pull away from the sides of the bowl.
Turn dough out onto a lightly floured surface and knead until smooth and elastic (3-5 minutes). Place dough in a lightly greast bowl, cover with plastic wrap and let stand for 1 hour, or until doubled in size.
Turn dough out onto a very lightly floured surface and flatten slightly. Knead in cranberries and let dough rest, covered, for 10 minutes.
Divide dough into eight equal portions and shape each into a ball. Place on parchment lined baking sheet, cover with a clean dish towel, and let rise for 30 minutes.
Meanwhile, preheat the oven to 375F.
With a fork, beat the egg yolk with 2-3 tbsp water and brush the mixture over the rolls.
Bake for about 18-20 minutes, until rich golden brown.
Cool on a wire rack before enjoying.

Makes 8 rolls.

Monday, November 13, 2006

Chewy, Chunky Blondies


I know that I just recently made something from Dorie Greenspan's new cookbook, Baking: From My Home to Yours, but as I flipped through the book I bookmarked over a dozen recipes that I wanted to try, so here is another one.
This recipe appealed to me both because I like blondies and because there is so much good stuff packed into these. A blondie is supposed to be a slightly fudgy/chewy, non-chocolate version of a brownie. In most cases, the blondies turn out to just be slightly chewy cookie bars, which is exactly how these turned out. Not that there is anything wrong with that, but if you're looking for a more brownie-like bar, this might not be the ideal recipe.
The batter is thick and doughlike - in part because of the fairly generous amount of flour and in part because there are chocolate chips, butterscotch chips, pecans (the original recipe called for walnuts) and shredded cocnut - and the only problem I had with the recipe was getting it into an even layer in the pan. I solved this little issue by lightly greasing my spatula and using it to flatten down the dough. I recommend keeping an eye on your oven temperature, or else the bars might turn out to be a touch crispy on the edges and dry in the center. Otherwise, however, they had a great flavor and a nice, chewy texture. These aren't refined cookies to be eaten with tea, but ones to be dunked in a glass of milk when no one is watching.


Chewy, Chunky Blondies
(from Baking: From My Home to Yours)
2 cups all purpose flour
3/4 tsp baking powder
1/2 tsp baking soda
1/2 tsp salt
1 cup butter, room temperature
1 1/2 cups (light) brown sugar
1/2 cup sugar
2 large eggs
1 tsp vanilla extract
1 cup bittersweet/semi sweet chocolate chips
1 cup butterscotch chips or toffee bits
1 cup chopped pecans
1 cup sweetened shredded coconut


Preheat oven to 325F. Grease a 9x13-inch baking pan.
In a medium bowl, whisk together the flour, baking powder, baking soda and salt.
In a large bowl (or the bowl of a stand mixer), cream together the butter and sugars until light and fluffy, about 3 minutes. Beat in the eggs one at a time, waiting until each is fully incorporated to add the next, then beat in the vanilla. With the mixer on low, gradually add in the flour mixture, stirring only until no streaks of flour remain. Stir in the chips, nuts and coconut by hand.
Spread batter into prepared pan, using a lightly greased spatula to even it out.
Bake for 35-40 minutes, or until a tester comes out with only a few crumbs.
Cool blondies in the pan, but turn them out (and then reinvert them so the top is facing up) before slicing into 32 bars.

Wednesday, November 08, 2006

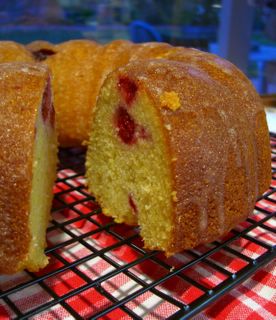
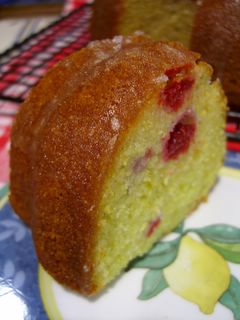
Lemon Cornmeal Bundt Cake with Raspberries


If you think that the title I gave this cake is long, let me assure you that it could have been longer. It almost makes me wish I was the sort of person who could come up with short, cutesy names for my creations, like "Mary Sunshine Cake" or something. Alas, I am not and so we are all stuck with a long name.
Names aside, this is a really good cake. I've been thinking about incorporating cornmeal into a cake for some time now but I really wanted to avoid the dense texture that so many cornmeal-heavy cakes have. I wanted to keep a hint of the crumbly, rustic texture that cornmeal offers, though.
This recipe seems to have come out just as I imagined. It has a noticeably different texture from an entirely flour-based cake, but is still very cake-like. The best way I could describe it is to say that there is the tiniest hint of crunch in the crumb. It is moist and very tender, yet isn't heavy at all. The only thing more that you could want is flavor, and this cake has plenty of that, too.
I used buttermilk to add a bit of richness and a generous amount of lemon zest to get the lemon flavor into the cake. I happened to have some Meyer lemons, but ordinary lemon zest will work perfectly well, too. The only thing is that you really must let it sit, well-wrapped, overnight. If you don't, the cake will be good, but it will be a bit cornbread-like because the texture will be slightly more coarse on the first day. After sitting overnight, however, it is perfect.
I highly recommend this cake. Try it with blueberries instead of raspberries if you prefer, or for something with a bit more fall flavor (or if you like slightly tart desserts), try using chopped up cranberries.


Lemon Cornmeal Bundt Cake with Raspberries
2 cups all purpose flour
1 cup yellow cornmeal
1 tsp baking soda
1/2 tsp baking powder
1/2 tsp salt
zest of 2 lemons (about 1 tbsp, or a bit more)
1/2 cup butter, room temperature
1 1/2 cups sugar
2 large eggs
1 1/4 cup buttermilk
1 tsp vanilla extract
1 1/2 cups raspberries (if frozen, do not defrost)


Preheat the oven to 350F. Grease a 10-inch bundt pan with butter or nonstick cooking spray.
In a medium bowl, whisk together flour, cornmeal, baking soda, baking powder, salt and lemon zest.
In a large bowl, cream together the butter and sugar until light, then beat in the eggs one at a time. Combine the vanilla extract and the buttermilk and, working in 3 or 4 additions, alternately add the flour and buttermilk to the butter mixture. Keep the mixer on low speed and make sure to end with an addition of flour (i.e. F, B, F, B, F). Stir in raspberries and pour batter into prepared pan.
Bake at 350F for 50-55 minutes, until a tester comes out clean and the cake springs back when pressed.
Let the cake cool in the pan for 15 minutes, then turn out onto a wire rack. Add lemon glaze at this point (see note below), while the cake is still hot. Allow the cake to cool completely, then wrap it up well and let it set overnight.
Serve the next day.

Makes 12 servings.
Note: For the glaze, I combined about 1/4 cup lemon juice with enough regualr sugar to make a thick, but somewhat runny, slurry. I drizzled this over the still-hot cake, which added a boost of lemon flavor and a slight crunch from the sugar. You can also mix lemon juice with powdered sugar to create a more traditional glaze to add after the cake has cooled.

Sunday, November 05, 2006

Sunday Brunch: The Best Buttermilk Pancakes

One of the first recipes I made on this site was for buttermilk pancakes. The recipe was one I used frequently, probably for years, with only tiny variations as I never really looked at a written recipe when I went to make them. Those pancakes are slightly thicker a puffier, although still tender and not too heavy.
This new recipe is why it sometimes pays to experiment a bit and no just stick with the same old thing, no matter how good the original was.
When I started on this recipe I thought that I wanted to make pancakes that would be slightly thinner and lighter than my standard, without going all the way to the crepe end of the spectrum. I used more liquid and omitted the baking powder, which gave the first cakes an extre lift during cooking. These turned out to be a bit thinner, but it was the texture that was the real difference. They are lighter and more tender than the original and where you can eat only a few of those cakes, you can have a whole pile of these (if you're so inclined). They have a lot of buttermilk flavor, so there is no need to add a lot of butter to the batter, though a bit on to of the cakes as you're eating them wouldn't hurt.

The Best Buttermilk Pancakes
1 1/4 cups all purpose flour
1 tsp baking soda
1/4 tsp salt
1 tbsp sugar
1 1/2 cups butermilk
1 large egg
2 tsp vegetable oil


In a medium bowl, whisk together flour, baking soda, salt and sugar. In a small bowl, whisk together the remaining ingredients and pour into the dry ingredients, stirring until just combined.
Heat a skillet or griddle over high heat until a drop of wate placed on it skitters around the surface. Drop by large spoonfuls (to make desired size) into the preheated pan and cook until golden on both sides, turning once.
Serve with maple syrup.

Makes enough for 3 hungry breakfasters.

Thursday, November 02, 2006

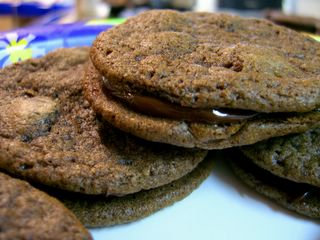
Ultimate Chocolate Sandwich Cookies


If you have ever even considered applying the word "chocoholic" to yourself, you simply must make these cookies. They are the ultimate in chocolate sandwich cookie-ness.
They start with fairly thin chocolate cookies that come out of the oven slightly crisp at the edges, due to their thickness (or lack thereof), and have a chewy, chocolaty center. The cookies are rather like thin brownies and have an intense taste that doesn't get overwhelming because they are thin. And they are loaded up with chocolate chunks of varying sizes, too.
The filling is basically the topping I used the other day to finish off a cinnamon cake. I added a bit of vanilla to it to round the flavor out ever so slightly. As it cools and solidifies, it melds with the outside cookies, producing an incredibly chocolaty treat that just cries out for a big glass of milk.

The cookies themselves are very easy to make and the only thing to keep in mind is that they will spread a lot. Use a teaspoon or a rounded teaspoon (yes, the actual measuring utensil) to divide up the dough. Try to chop the chocolate chunks relatively finely or use mini chocolate chips to get an even distribution of them.
Again, I can't really overstate the necessity of having a glass of milk nearby when you try one. You'll need it.


Ultimate Chocolate Sandwich Cookies
(cookies adapted from Epicurious)
1 cup all purpose flour
3 tbsp cocoa powder
1 tsp baking soda
1/2 tsp salt
1/2 cup butter, room temperature
2/3 cup brown sugar
1/4 cup sugar
1 large egg
2 tsp water
1 tsp vanilla extract
1 tsp instant coffee (or espresso) granules
1 1/2 cups mini chocolate chips or finely chunked bittersweet chocolate


Preheat oven to 325F. Line a baking sheet with parchment paper.
In a medium bowl, sift together the flour, cocoa, baking soda, and salt.
In a large bowl, cream together butter and both sugars until light. Beat in egg, water, vanilla and instant coffee powder. Gradually add in the flour mixture, using the mixer on low speed. Stir in chocolate chunks/mini chips. Drop dough by rounded teaspoonfuls the baking sheet, spacing about 2 inches apart.
Bake for about 12 minutes, until the cookies are slighly firm at the edges and no longer shiny in the center (baking time may be slightly shorter or longer depending on the exact size you scoop).
Cool on baking sheet for 5-10 minutes and then transfer to wire rack to cool.


Filling
6-oz bittersweet chocolate, finely chopped
2 1/2 tbsp butter, room temperature
1/2 tsp vanilla extract


Melt together the chocolate and the butter in a small glass bowl on low power in the microwave, checking and stirring every 20-30 seconds until it is smooth. Stir in vanilla extract. If the chocolate is runny, let it stand for a few minutes until it thickens and is spreadable.
Sandwich about 1 tsp (or as desired - I didn't measure and had two cookies left unfilled) between cookies.

Makes about 24 sandwich cookies.