Friday, April 29, 2005
Lamingtons
Bakingsheet is now Baking Bites!!!
Head on over to check out the new site!
If you have never been to Australia, you have probably never had a lamington. If you are an Australian (or are from New Zealand), you have probably had quite a lot of them.
Lamingtons are an Australian snack cake consisting of squares of sponge cake dipped in a chocolate icing and rolled in desiccated coconut. Sometimes they have a layer of jam in the middle of the sponge. They were originally created as a way to use up leftover or stale sponge cake, because the chocolate coating will add and lock in moisture. The coconut is added because coconut is great. You could, I suppose, use chocolate sprinkles if you really cannot abide coconut. I would not try and pass this off as a lamington, though.
The chocolate layer is not melted chocolate, but a mixture of milk, cocoa powder and confectioners sugar with a tiny bit of butter added for flavor. This glaze is easy to handle and firms up quickly. It is not greasy and makes the whole snack very easy to handle and transport.
Judging from some of the greasy, dry lamingtons I've had, it is clear that some bakers have taken the "stale cake" idea to extremes. This is particularly apparent because lamingtons seem to be getting larger and it is significantly more difficult to choke down multiple mouthfuls of overly dry cake. They also seem to have enbraced the belief that using real chocolate, regardless of how much oil or shortening it is mixed with, is superior to the traditional icing, rendering the entire lamington greasy and difficult to handle.
Sponge Cake
3 eggs, room temperature
4 oz sugar
4 oz flour
1 tsp baking powder
1/4 tsp salt
3 tbsp water
1 tsp vanilla extract
Preheat oven to 400F.
Grease and flour an 8"x8" or 9"x9" cake pan.
Beat eggs until frothy with the salt. Gradually add the sugar and beat until light and at least doubled in volume, probably 10 minutes at medium-high speed.
Sift together flour and baking powder. Gently fold flour mixture, followed by water and vanilla extract, into egg mixture until no streaks of flour remain. Pour into prepared pan.
Bake for 20-25 minutes, until cake springs back when touched.
Allow to cool for 10-15 minutes in the pan before turning it out to cool completely on a wire rack.
Chocolate Icing and Coconut Topping
2 cups desiccated coconut, chopped fine
3 cups confectioners sugar
1/3 cup cocoa powder
1/2 cup milk, warmed
1 tsp butter, melted into milk (optional)
1 tsp vanilla
Cut sponge cake into 16 squares, removing outer edges/crust, if desired.
Combine all ingredients, except coconut, in a bowl and mix until smooth with a fork. Add a bit more milk if mixture is too thick. Dip squares in icing to coat. Let excess drip off, roll in coconut and set on a sheet of wax paper. Icing will be hard in 1-2 hours, depending on your climate.
Lamingtons will keep for a week at room temperature.
Thursday, April 28, 2005
Cooking School: White Cake and Buttercream
Bakingsheet is now Baking Bites!!!
Head on over to check out the new site!
Most great cake bakers will have one great recipe for chocolate cake and one great recipe for white cake. Instead of continually modifying the flavoring of the cakes themselves, which could adversely affect the texture, they will create many different syrups, mousses and frostings to add flavor to their cakes. Sponge cakes and genoises, which are not typically used for wedding cakes, will often be dipped in or generously brushed with syrup, both for moisture and for flavor. They will often be filled with a flavored mousse or whipped cream, as these cakes can be stored in the refrigerator because they do not have any (or have very little) fat in them that will solidify at a low temperature. Butter cakes inherently have more flavor than sponge cakes due unsurprisingly to the presence of butter. Because of the added fat, butter cakes are more moist than sponge cakes and will not need syrups for flavor and moisture. They will typically be paired with things like fruit and frostings. If you are layering a butter cake, as we did today, you will probably want to brush it with a simple syrup - a 1 to 1 ratio of sugar and water - as a crumb coat. The syrup can be infused with a flavor, which will have a subtle presence in the finished cake.
We made white cakes and buttercream frosting today. Despite the name, there is no cream in a buttercream. I've never made a true buttercream before, where boiling sugar is added to whipped egg whites, beaten until fluffy and then beaten with butter until smooth. It wasn't terribly difficult, but it had to be beaten in the electric mixer for over 20 minutes, so it was quite noisy. The basic recipe makes a frosting that is not too sweet and very buttery.
Once we made the basic buttercream, we divided and flavored it. You can flavor it with any kind of extract, zest, liquor or puree. We mixed several tablespoons of raspberry puree in to 40 percent of the batch and 1/2 cup lemon curd into the remaining 60 percent. The raspberry buttercream was used in the interior and the lemon curd buttercream went all over the cake. In class, we also made vanilla, lime and coffee buttercreams. If you've only had storebought buttercream, make this one and you'll wonder how they can get away with calling their stabilised sugar mixture "buttercream".
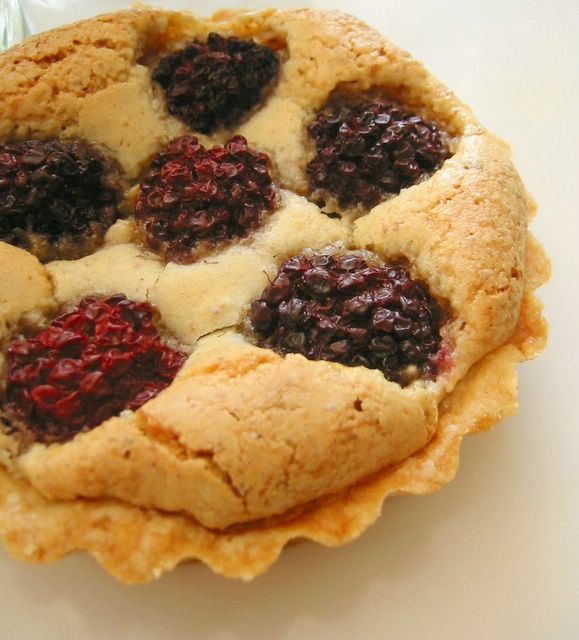
Of course the buttercream tasted fabulous - so fabulous, in fact, that one woman decided to start munching away on the demo cakes and cupcakes that our instructor made. This was odd because lunch had been prepared for us just moments before. Needless to say, the consumption of some of the cupcakes intended for her children prompted the instructor to hide the rest of the cupcakes away. I might also mention that the muncher is the reason that we all have to label our pans now. She was a late addition to the class and seems to feel that anything not labeled is fair game for the taking. We learned that the hard way when she attempted to claim a tart that looked better than hers.
The highlight of the class was the white cake. It was easy to make and just delightful. A white cake should taste like a cross between an angel food cake, with a light almond-vanilla flavor, and a pound cake, without the heaviness. Simply flavored, sweet, moist with a medium crumb. This is the quintessential white cake. It exceeded all the expectations for cake that I've been carrying around since I was a child, the memory of the way that a Betty Crocker cake should have tasted in a perfect world. Frost it with buttercream or serve with with whipped cream and fresh berries.
White Cake
Preheat oven to 350 F.
In the bowl of a stand mixer, place egg whites, with cream of tartar and 1/4 cup sugar nearby.
Tuesday, April 26, 2005
Perfect Ciabatta
Bakingsheet is now Baking Bites!!!
Head on over to check out the new site!
I used the recipe for the Very Lightest Ciabatta from King Arthur Flour but I made a few changes. The two minor changes were using active dry yeast instead of instant yeast and reducing the amount of olive oil to an amount that I would describe as a "splash". It was probably one to two teaspoons.
The major change I made was not using the starter. But wait! Contrary to what you might be inclined to think, I don't think this actually changed the recipe. I used about a cup of pizza dough instead. I made the dough last week and a chunk of it was still sitting in my fridge. The purpose of a starter is to simulate the incorporation of already leavened dough into a new loaf, a purpose that was accomplished successfully with the dough. Additionally, the pizza dough did not introduce any ingredients that were not already included in the bread. I let the dough sit out for about 4 or so hours to warm up and get a little bubbly. I then mixed it into the water/yeast mixture for the dough, added the flour... and the rest is according to the recipe. Since I used a baking sheet and not a stone (as I don't own one), I set the loaves directly on the oven rack for the last 5 minutes of baking time to make sure the bottoms of the loaves were crisp.
Next time you have pizza dough in the fridge, remember that you can use it in place of the starter in this recipe. It's worth it.
It tasted so good that I had eaten almost the entire first loaf before my soup was ready. Thanks, Anne, for the recipe!
Monday, April 25, 2005
Homemade Whole Wheat Crackers
Bakingsheet is now Baking Bites!!!
Head on over to check out the new site!
These were simple to throw together, and had a good feel and texture. They weren't quite as nice and flakey as store bought crackers, but that is probably because my butter wasn't really chilled. They tasted good, though. The only real problem was that not all of my crackers were crisp all the way through. Most of them were cut in roughly one inch squares, but the slightly larger ones seemed to retain some softness in the center. Even the large ones firmed up as they cooled, but I think that I will be more careful about cutting them equally in the future.
I'll definately make this recipe again. I like the seasonings I used (I have used them to make crackers in the past), but I think they would do very well with variations, like sesame seeds, black pepper, even brushed with vinegar and salt.
Sunday, April 24, 2005
IMBB #14: Orange Julius
Bakingsheet is now Baking Bites!!!
Head on over to check out the new site!
How lovely for Foodgoat to announce this month's Is-My-Blog-Burning theme as orange. I, rather appropriately, chose to use both the color and the fruit in my entry.
I also chose to relive a childhood treat by making an Orange Julius at home.
An Orange Julius is a cold, frothy orange drink. It is thinner than a smoothy, but thicker and creamier than plain orange juice. It was invented in 1926 in California at an orange juice stand and, over the next 80 years, spread to malls across America. The secret to the original recipe was the addition of egg white, which made the drink very frothy. Nowadays, what with salmonella and all, Orange Julius is made with a secret, dairy-derrivative that makes it foamy. I'm guessing that it is some sort of powdered creamer.
The recipe I used is based on the original formula. It called for pasturised egg whites/egg substitute, but I chose to tempt fate and use an ordinary egg white. The results were wonderful, and I'm not saying that simply because I suffered no ill effects. Quite the contrary. I juiced some fresh oranges and the drink turned out to be frothy, creamy and very refreshing. It was also quite addictive. I would bump up the amount of ice next time to make it a bit slushier, but the taste was fabulous and just how I remembered it.
The recipe is from Top Secret Recipes. I believe that it is in one of his books, but it is also posted here on his website. I won't reprint it here, but I recommend it!
Thanks to Foodgoat and Ladygoat for picking a great theme for this month's event and finally motivating me to try this recipe!
Friday, April 22, 2005
SHF #7: Graham Crackers
Bakingsheet is now Baking Bites!!!
Head on over to check out the new site!
So what is something nice and light? Hmm... how about marshmallows. And what goes with marshmallows? Graham crackers and chocolate to make s'mores.
Now we were talking.
I've been wanting to try homemade graham crackers for some time now. I even went out and bought a cookbook, Retro Desserts by Wayne Harley Brachman, that I knew would have a recipe for it. Grahams use both honey and molasses, so the flavor of molasses isn't overwhelming. The cookies turned out to be amazingly crumbly and delicious. I didn't have 1/2 cup of graham or rye flour, as the recipe called for, so I just substituted whole wheat flour. This led the final product to have a texture strikingly similar to store-bought grahams, meaning that they were flakey and not dense. In fact, I was thrilled since a similar texture means that probably I made them correctly!
I whipped them up in the food processor in no time. The dough was incredibly easy to roll out and I'm sure it could be rerolled once to use up any scraps, though I just ate some raw and tossed the excess. The only change I would make to the recipe is to roll the crackers out thinner than the 1/4 inch called for. I aimed for 1/8 inch and they puffed up a tiny bit in the oven.
I would not hesitate to use this instead of graham cracker crumbs the next time I was in need of a pie crust.
I would say that these had a lot more flavor than store bought graham crackers and a slightly more rustic texture. They were more substantial and much tastier overall. I would make them again in a heartbeat. I also discovered that they stay crispy when stored for several days in a airtight container, which is great because I can't imagine wanting to eat a mushy graham cracker!
The recipe was also used on an episode of Sweet Dreams. I've copied it below with my (minor) alterations, but the original can be found here.
In a food processor, mix together the flours, sugar, baking powder, baking soda, salt, and cinnamon. Add the cold butter and process until the mixture resembles coarse meal, about 30 seconds or so. Add the honey, molasses, water, and vanilla. Mix until the dough startes to come together in a ball, another 30 seconds. Scrape dough out of the mixer.
Between 2 sheets of waxed or parchment paper, roll the dough 1/8-inch thick. Chill for at least 1 hour, until firm (I chilled for several hours).
Yield: 48 crackers
Note: If you cut the dough through but leave the squares together, you can break them up after they're baked, just like a store-bought graham!
Thursday, April 21, 2005
Cooking School: Chocolate Cake
Bakingsheet is now Baking Bites!!!
Head on over to check out the new site!
But this post isn't about chocolates. It's about chocolate cake.
We made one, two layer chocolate cake today. It was a basic buttermilk chocolate cake, quite similar to one I made earlier this year. We split the batter between two 8-inch round cake pans. As the cakes baked, we made a chocolate ganache. One batch of ganache was used to glaze a chocolate cake that we ate in class. Once the rest of the ganache was cool, we poured it into the bowl of a stand mixer and whipped it until it was fluffy and light colored. Once the cakes were cool, we spread frosting on and stacked them up. Talk about chocolatey. The cake is nice a moist with a great, tender crumb. The frosting is not very sweet, but very rich. The whipped ganache chocolate frosting will set up nicely on the cake. Do not refrigerate the cake once it's frosted, or you'll have a hard time cutting another slice!
Evenly distribute batter into two 8" round cake pans. Bake for 30-35 minutes, or until a toothpick comes out clean. Cake will pull away from the sides of the pan.
To Assemble: Whip room temperature ganache until it is light colored and fluffy looking. Spread it on top of one cake layer. Place second layer on top of frosted layer. Spread frosting on sides, then on top, of the cake.
Store at room temperature.
Serves 12.
Wednesday, April 20, 2005
Artichokes
Bakingsheet is now Baking Bites!!!
Head on over to check out the new site!
As an alternative, I recommend lemon juice and sea salt.
Monday, April 18, 2005
Baked Honey Mustard Chicken
Bakingsheet is now Baking Bites!!!
Head on over to check out the new site!
Anyone who says that chicken is boring is missing out. I prefer to think of chicken as being versatile. I've made this recipe from AllRecipes a couple of times now and I really love it. It's just chicken breasts glazed with a honey and mustard mix. It's incredibly simple and very flavorful, with the sweetness of the honey countering the mustard nicely.
Tonight I mixed 1/4 each of honey and dijon mustard, added a teaspoon or so of balsamic vinegar and 1/2 teaspoon of paprika to make a glaze for two chicken breasts. 350 degrees and 40 minutes later and I had delicious, perfectly cooked chicken that I turned into salad. I also put in cherry tomatoes, red onion, avocado, cucumber and oranges. If you're going the salad route, do yourself a favor and reserve a bit of the glaze and drizzle it on as a dressing.
Sunday, April 17, 2005
Sunday Brunch: Bill Granger's Scrambled Eggs
Bakingsheet is now Baking Bites!!!
Head on over to check out the new site!
If you have ever visited or read a review of bills in Sydney, Aus., chances are you are aware that Bill Granger produces exceptional scrambled eggs. They are incredibly light, fluffy and creamy. They also contain 1/3 cup of cream for 2 eggs.
Now, I am so fortunate as to have had the eggs on a visit to bills and can assure you that it is worth it to use the cream. That said, I am not usually going to cook my breakfast with that much cream at home. Sometimes I'll substitute milk, and have even used fat free half and half with great results. Bill's method of cooking the eggs is what makes them so wonderfully light, so I employ it whenever I am scrambling eggs. Simply melt butter in a hot pan, pour in the eggs and gently push them from the sides to the center with a wooden spoon or spatula. This creates fluffly little curds of gently cooked eggs. I have a copy of Sydney Food, but Mr. Granger has kindly posted the recipe on his website. I have posted it below.
Those cute little muffins are cream cheese topped dried cherry muffins, along the lines of a black bottom cupcake. They tasted fine, but need some tweaking before I'd post the recipe. So make eggs for now. Maybe muffins next weekend.
bills Scrambled Eggs
2 eggs
1/3 cup cream
pinch salt
1/2 tbsp butter
Whisk together eggs, cream and salt.
Melt butter in a frying pan over medium-high heat. Pour in egg mixture and after about 20 seconds, using a spatula or wooden spoon, push the egg mixture on the outside of the pan to the center (Bill says to "fold" the eggs, not "scramble"). Let eggs set for an additional 20 seconds, then repeat. When all the eggs are just set in the center of the pan - they'll look soft and somewhat wet - turn them out onto a plate.
Serves 1
Note: Do not put more than two servings of eggs in one pan, or the eggs will get over cooked. If you're cooking for a crowd, double the recipe and make batches.
Friday, April 15, 2005
Blackberry Almond Tart
Bakingsheet is now Baking Bites!!!
Head on over to check out the new site!
By popular request, here is the recipe for the tart I made in class this week. You can use a tart pan with a removeable bottom or serve the tart directly from a ceramic pan. This makes enough for two 9" tarts, but I am giving directions to make one tart. We had leftover almond cream, so you may have to be inventive to use it up. If you want to maximise the amount of cream in your tart, fill the shell with pastry cream and leave out the berries. Garnish the tart with fresh fruil when you are serving it. Save the extra pastry crust for another tart. It can be frozen for up to one month.
For the pastry crust:
Thursday, April 14, 2005
Cooking School: Fruit Desserts, Pies and Tarts
Bakingsheet is now Baking Bites!!!
Head on over to check out the new site!
A crisp is a fruit base topped with a crumb topping that includes oats, but not nuts.
A crumble is a fruit base topped with a crumb topping that includes nuts, but not oats.
A cobbler is a fruit base topped with spoonfuls of sweet biscuit or scone dough.
The names and ingredients of fruit desserts vary regionally and widely. The types of fruit you might use in any of these desserts will vary with where you are from and what is in season. Your favorites will depend on your personal taste preferences. You might call your dish a crisp, crumble, cobbler, grunt, slump, betty or a pandowdy.
We made a pear crumble - with walnuts, vanilla and lots of butter. Use firm pears, they'll soften as they cook. We also made a mixed berry cobbler with blueberries and blackberries, both of which shot wonderful spurts of hot, red juice into our mouths as we at it piping hot from the oven. I'm not going to be picky about what you call the dessert - as long as it tastes good. And since fruit desserts are definately some of my favorites, so I had been looking forward to class today.
The main emphasis of class today was to practice making pie and tart crusts. I also learned that it is difficult to explain precisely how to make it. A concert pianist will not say, when asked how to play piano, "just sit down and move your fingers!" You have to practice.
The tart crust is more forgiving because it is meant to be more crumbley and less flakey than a pie crust. It has a much higher sugar-to-flour ratio and only uses butter. Because we were not looking to develop gluten in the tart crust, the dough used an egg as a binder, not water. We made a blackberry studded almond tart, which you can see above. The crust was blind baked for 10 minutes with weights, baked again for 10 minutes without weights and filled with almond cream and blackberries before going into the oven for a final 30 minutes. The recipe is here.
Pie crust is a much more sensitive beast, though once you've mastered it you'll wonder why you thought it was so difficult in the first place.
Here are some tips to make a great pie crust:
- Use a combination of butter (for flavor and leavening) and shortening/lard (for texture and flakiness).
- Chill butter and shortening and work them in quickly.
- Do not make a uniform mixture; you should have peanut sized bits as well as ones that resemble grains of sand.
- Only use enough water to just bind the dough. A little extra water will make it easier to roll out, but will diminish the flakiness of the final product.
- Refrigerate the dough before rolling.
- Only roll the dough once. If it tears, patch it later. If you have to reroll the dough, just throw it out and start again. It will have the texture of leather if you use it.
- Once the pie is together, bake at a high temperature for 10 minutes to set the crust then turn the oven down. Do not worry about over browning. Brown is a very attractive color in a baked item.
If you don't think apple pies are worth eating, you're wrong. Make this one and if you still don't like apple pies, we'll talk.
For the crust:
Combine dry ingredients in large bowl.
For the filling:
Mix apples, sugar, flour, spices and salt together in large mixing bowl. Set aside until dough is rolled out.
Wednesday, April 13, 2005
Quinoa Salad
Bakingsheet is now Baking Bites!!!
Head on over to check out the new site!
Quinoa, pronounced "keen-wa", is a south american grain. You can read more about it here. I had never cooked it before and bought it more or less on impulse. I didn't really know what to do with the small, hard grains that resembled a cross between steel cut oats and couscous. I decided that a warm salad would be the best option since it would allow me to taste the quinoa relatively plain.
Quinoa turns out to be very simple to prepare. Boil one cup of quinoa in 2 cups of water. Reduce heat to a simmer and cover until liquid is absorbed, about 15 minutes. I don't know if you can see in the photo above, but the grains sort of open an unwind as you cook them. I tossed it with cubed red onion, cucumber, papaya and salt and pepper to make a very simple warm salad. It turns out that quinoa tastes a lot like nutty brown rice, but with more of a creamy texture. Next time I'll do something more interesting with it, but I'm glad to say that there will be a next time.
Monday, April 11, 2005
Garibaldi Biscuits
Bakingsheet is now Baking Bites!!!
Head on over to check out the new site!
The recipe is somewhat problematic because it gives measurements in both grams and ounces, but the measurements are not equivalent. For example, 1 ounce of butter is not 25 grams. It's more like 50 grams - a difference of about a tablespoon! This actually caused problems for me since I started to measure out ingredients according to principles I am familiar with and ended up going back and measuring everything in grams. Not a big deal, but it was rather annoying. Fortunately, the garibaldis turned out very well and tasted like crunchy little scones. I added 1/2 teaspoon of vanilla to the milk and rubbed the butter into the dry ingredients with my fingers before adding the milk, rather like making pie crust.
The recipe can be found here. Measure your ingredients in grams if you can!
Saturday, April 09, 2005
Like butta
Bakingsheet is now Baking Bites!!!
Head on over to check out the new site!
What could be more enjoyable than creamy butter spread onto a nice piece of good bread? Homemade butter made from the best cream you can possibly find spread onto a nice piece of good bread.
This morning was devoted to butter making. And by "devoted to" I mean to say that I poured some heavy cream into my stand mixer, put on the whisk attachment and beat it on medium-high for about 20 minutes. I watched TV during this time. Then I squeezed the butter until dry in some cheesecloth. Then I ate some (on a cracker, if you're curious) and put the rest into the fridge. Delightfully creamy. Like butta - which isn't wholly surprising, since it was actually butter.
The best cream I could find happened to be organic raw cream from Organic Pastures Dairy. What is raw cream? It is cream that hasn't been pasturized, homogenized or had any other processing done to it. Pasturization involves heating milk to 161 degrees F, hot enough to denature the enzymes that cause spoilage and kill any harmful bacteria. While I certainly wouldn't use any old raw dairy products, Organic Pastures produces a very high quality product and has bacteria counts far lower than the California Department of Food and Agriculture benchmark, so I feel absloutely fine using their products. More than fine, since I know exactly what is in the milk and how it is produced. Another benefit of using raw cream is that the milk still contains the necessary enzymes to make buttermilk, which I am doing with the leftover liquid from my butter making. To make buttermilk with pasturized cream, you would have to add in enzymes (add buttermilk) to allow fermentation to occur.
If you make butter at home, it may actually turn out to be less expensive than buying butter. That was not the case with my raw cream butter, but it's something to keep in mind.
Butter
2 cups heavy cream
Pour cream into a stand mixer, put on the whisk attachment and beat it on medium-high for about 20 minutes. There will be yellow clumps sticking to the whisk and/or floating in liquid when beating is complete. Strain into a container over cheesecloth. Using the cheesecloth, squeeze the butter until dry. Discard remaining liquid.
Yield: Approx. 1 cup butter
Friday, April 08, 2005
Roasted Garlic
Bakingsheet is now Baking Bites!!!
Head on over to check out the new site!
Just rub a head of garlic with a little oil or butter, wrap it in foil and bake at 375F for 45 minutes. The cloves will be very soft and you can just squeeze them out of their skin. You can use it in the same ways you might use regular garlic, but it makes a really, really terrific spread. Crusty bread + roasted garlic = garlicky goodness!
Thursday, April 07, 2005
Cooking School: Choux Pastry
Bakingsheet is now Baking Bites!!!
Head on over to check out the new site!
I've done souffles before, both at a chooking class and at home, so they were nothing new to me. We made cheese souffles with gruyere, which were not very interesting. I also found them to be rather overdone since we didn't receive much instruction on the timing of the souffles. The instructor demoed a chocolate souffle, which I made with another student because I didn't want to make a whole batch myself. The chocolate flavor was not particularly strong and the whole thing was overbaked. Everyone's were overbaked. If I wanted a dryish chocolate cake, I would have made a genoise.
We also made choux pastry as well as pastry cream. I had never made choux pastry before and it was very easy. The pastry cream gave me some trouble because I had to make it in a aluminum pan. Aluminum pans are reactive and you cannot use metal implements in them, so I had to use a wooden spoon to temper my eggs and stir the cream over the heat. They looked scrambled - but the instructor said that I just needed to stir more. Hmm. There were lumps even after I strained the cream. It tasted fine, though.
I took the pastry cream home to fill all my leftover profiteroles. In class, we filled our choux creations with sweetened whippped cream. I recommend using the whipped cream. It's much easier and tastes great. I drizzled my profiteroles with some leftover chocolate syrup, but you can add any kind of chocolate topping or even simply dust the tops with powdered sugar.
This will make a small batch of choux pastry, enough batter for 3-4 large cream puffs or 8 profiteroles. You can drop the pastry onto a lined baking sheet or pipe it out if you want a specific shape. I find dropping to to be easier and have listed profiterole guidlines in the recipe.
1/4 cup milk
1/4 cup water
3 1/2 tbsp butter (1.75 ounces), melted
1 1/2 tsp sugar
1/2 tsp salt
3/4 cup flour
2 eggs
1 egg yolk + 1 tbsp water (for egg wash)
Preheat oven to 400F.
Combine milk, water, butter, sugar and salt in a small saucepan and bring to a boil over medium heat.
Add the flour all at once, stirring vigorously until dough comes together in a ball. Contiume to cook and stir for one additional minute.
Transfer dough to mixer or clean bowl and let mix at a low speed for 2 minutes until slightly cooled. Add eggs one at a time, waiting until each egg is fully incorporated to add the next one. Increase mixer speed to make batter smooth.
Using a spoon, drop 8 heaping tablespoonfuls onto a lined baking sheet. If there is batter leftover, even distribute it.
Lightly stir together egg yolk and water to creat an egg wash. Brush pastry with egg wash.
Bake for 40 minutes, until well browned and dry.
Set aside to cool completely.
Sweetened Whipped Cream
1 cup heavy/whipping cream
2 tbsp confectioners sugar
1 tsp vanilla extract
Using an electric mixer, begin to beat the cream at a medium/high speed. Once it is frothy, add sugar and vanilla. Beat to stiff peaks.
To fill, slice puffs in half and pipe or spoon whipped cream into the hole in the center. Once they are filled, your puffs must be kept in the fridge. It is best to fill immediately prior to serving to ensure a nice crisp and flakey exterior.
Wednesday, April 06, 2005
Coconut Oatmeal Cookies
Bakingsheet is now Baking Bites!!!
Head on over to check out the new site!
These are Coconut Oatmeal Cookies based on a recipe from Maida Heatter's New Book of Great Desserts. I bought the book a few months ago, soon after I discovered Cathy's Monday's with Maida plan, but enjoyed her posts so much that I never actually got around to making any of the recipes myself! I have now read the cookbook several times, adding new flags each time in preparation for the day I would use it.
This recipe would not ordinarily have been my first choice because, although I love coconut, not many of the people I know do. Oddly, they like things I have made which contain coconut, but remain firm in their insistance that they do not like the texture/flavor/color of the fruit. The description won me over, though:
They are quick and easy drop cookies that are especially good. The recipe was sent to me as a gift from a bakery in Jacksonville, Florida, there they are baked in huge quantities (700 cookies at a time) are are so popular that the bakery runs out of them every day.
700 cookies a day? Whoa. That must be some cookie.
They were very easy to mix up. I had to slightly alter the recipe to account for the fact that I only had one stick of butter when I started to make them, so the original recipe has slightly more flour, a whole cup of butter and no milk, which I added for a little extra moisture in the dough. Even so, these cookies turned out to be incredibly addictive. They are crisp on the edges, slightly chewy in the center, buttery and flavorful. They taste like a particularly good oatmeal cookie and the flavor of coconut is distinct, but subtle and not overly strong. I would even go so far as to say that if you didn't know there was coconut, you might not guess it was in there. Given their great taste (700 cookies a day!!!), I think everyone will like these. I know that I do.
Tuesday, April 05, 2005
Potato Toast
Bakingsheet is now Baking Bites!!!
Head on over to check out the new site!
When I was a kid, my father made me a sandwich every day to take to school in my lunch bag. He bought a loaf of bread over the weekend and I got the same bread for the whole week. Sometimes it was buttermilk, sometimes multi-grain or hawaiian. But I was always intrigued when he brought home potato bread. It certainly didn't taste like potatoes. It seemed to bear no resemblance to them. Puzzling though it was, it was good bread - quite soft, though it never got mushy, and with a mildly sweet flavor. When we had this bread around I always had toast for breakfast. Crispy on the outside and slightly soft on the inside, potato bread seemed to be the perfect toasting bread. I liked it with butter and cinnamon-sugar.
Wanting to reminisce, I looked up potato breads and was slightly surprised to discover that they involved nothing more than adding potato flour, instant potato flakes or a mashed up baking potato to my dough. It seems that potatoes keep the bread moist and tender. So. I baked up a loaf of toasting bread.
It lived up to my expectations with a fairly open but very even crumb and a moist interior. I baked a bit of the dough off as dinner rolls, which were excellent, and saved the loaf for recreating my childhood. Here's the recipe. Use it for toast.
Potato Bread
1/4 cup warm water (110F)
1 packet active dry yeast
1/2 cup water
1/2 cup milk
1/2 cup instant potato flakes
2 1/2 cups ap flour
2 tsp salt
Extra milk for brushing top of loaf (optional)
Combine yeast with 1/4 cup warm water until foamy, about 10 minutes.
Add yeast mixture to milk, water, potato, 1 cup flour, oil and salt in an electric mixer fitted with a dough hook. Mixing on a low speed, add remaining flour until dough comes away from the sides of the bowl. Add a bit more flour, if necessary.
Knead by hand on a floured surface until elastic and smooth, about 5 minutes.
Place dough in a lightly greased bowl to rise until doubled, 1 - 1 1/2 hours.
Gently deflate dough and shape into a rectangle. Place dough into a greased loaf pan (9X5) and let rise, covered with a dish towel, for 45 minutes.
Meanwhile, preheat oven to 375F.
Brush loaf with a bit of milk, if using. Bake loaf for 30 minutes. Remove from loaf pan and cover top of loaf with foil to prevent over-browning. Place directly on oven rack for 15 more minutes, or until bottom of the loaf sounds hollow when tapped.
Let cool before slicing. Store well wrapped.
Sunday, April 03, 2005
Alice Medrich's Cocoa Syrup
Bakingsheet is now Baking Bites!!!
Head on over to check out the new site!
What combination could be more classic than vanilla ice cream with chocolate sauce? Ok, I'm sure there are some, but this is one of the better ones.
Having recently acquired some Valrhona cocoa powder, I knew that it would be put to good use when I saw Alice Medrich's recipe for Cocoa Syrup in her book, Bittersweet. My immediate thoughts upon seeing recipe were of chocolate milk, hot chocolate and egg creams. I have so far done all of these things because I love this syrup. I also put it on marshmallows and bananas and into my coffee. I was about an inch from adding it to my oatmeal this morning. The syrup is not very thick, as are syrups made with cream or melted chocolate, but the chocolate flavor is intense. Rich and bittersweet - just the way I like it. And I like it so much I'm eating it by the spoonful.
And if you do want to use it as an ice cream topper, here's a preview of what you're in for:
¾ cup cocoa powder (I used Valrhona)
1 cup sugar
pinch salt (1/4 tsp)
1 cup boiling water
1 tsp vanilla (optional)
Whisk together cocoa, sugar and salt until well blended in medium saucepan. Add enough water to make a thick paste and incorporate all dry ingredients. Add remaining water and bring to a simmer over medium heat. Simmer for two minutes. Remove from heat. Stir in vanilla if using.
Let cool and store in a jar or squeeze bottle in the fridge.
Saturday, April 02, 2005
We all scream for ice cream
Bakingsheet is now Baking Bites!!!
Head on over to check out the new site!
This is the very same recipe from class this week. The trick to this recipe is to use the best quality cream you can find. Yes, price is indicative of quality in this case!
This is outrageously creamy, certainly wonderful if you like that sort of thing. Top with your favorite chocolate sauce and whipped cream if you're looking to take it even further over the top.
Vanilla Bean Ice Cream
And eat something healthy for dinner when you're having this for dessert.
Friday, April 01, 2005
Meyer Lemon and Blueberry Bread
Bakingsheet is now Baking Bites!!!
Head on over to check out the new site!
1 cup sugar
1/2 tsp baking soda
1/2 tsp baking powder
3/4 cup fresh squeezed meyer lemon juice
1 tablespoon grated meyer lemon zest
2 tablespoons canola oil
1 egg, well beaten
1 cup fresh or frozen blueberries
1/4 cup dried blueberries (optional)
Preheat oven to 350ºF.
Grease a 8x4 inch loaf pan.
Whisk together flour, sugar, baking powder, baking soda and salt in a large mixing bowl. Combine lemon juice, lemon zest, oil and egg in small mixing bowl. Whisk to combine.
Bake for 45 minutes or until a toothpick inserted in the center comes out clean. Cool on a rack for 15 minutes. Remove from pan; cool completely.


